 Beskor
Guides
244 guides188 with screenshots
Every guide the game ships, with the same screenshots and text you see in the in-game help: features and menus, Aniimo care, combat and events, traversal and puzzles, and a walkthrough entry for every Sanctum.
45
Features
17
Aniimo
71
Combat & Events
46
Exploration
65
Sanctums
Features 45
 ShortcutsFeatures · 1 stepTake advantage of shortcuts for a better gaming experience!
 SnapFeatures · 6 stepsThe camera is equipped with three modes: Creative Mode, Follow Mode, and Selfie Mode.
Switch between them to suit different photo needs.
SnapFeatures · 6 stepsThe camera is equipped with three modes: Creative Mode, Follow Mode, and Selfie Mode.
Switch between them to suit different photo needs. SnapFeatures · 6 stepsThe camera is equipped with three modes: Creative Mode, Follow Mode, and Selfie Mode.
Switch between them to suit different photo needs.
SnapFeatures · 6 stepsThe camera is equipped with three modes: Creative Mode, Follow Mode, and Selfie Mode.
Switch between them to suit different photo needs. BloomFeatures · 3 stepsBlooms are unusual flowers found across Idyll. Use Nurture to bring them to the budding stage. To use this feature, obtain the area’s Bronze Collection Badge.
 BranchFeatures · 2 stepsBranches are an important part of the map system. After you activate a Branch, you can reveal the Blooms across a large area and unlock a new map layer where Pathfinders can view area info.
 Change the WeatherFeatures · 1 stepUsing the Branch’s change-weather function, you can directly attract and spawn Prismana Form Aniimo.
 MapFeatures · 4 stepsThe map shows your current location. Different locations are shown with different icons, and you can also place custom markers on the map.
The options below let you choose which marker types to show or hide.
MapFeatures · 4 stepsThe map shows your current location. Different locations are shown with different icons, and you can also place custom markers on the map.
The options below let you choose which marker types to show or hide. Prismatic EnergyFeatures · 3 stepsMost regions of Idyll can accumulate Prismatic Energy. To do so, catch Aniimo during Wild Surges. As a region’s Prismatic Energy state rises, higher-tier Aniimo become more likely to appear!
 AniilogFeatures · 5 stepsAfter you catch an Aniimo for the first time, its Aniilog entry will be unlocked. You can use the Aniilog to learn more about its Field Notes.
press a Field Notes entry to view clues. Some entries can also track the target's location.
AniilogFeatures · 5 stepsAfter you catch an Aniimo for the first time, its Aniilog entry will be unlocked. You can use the Aniilog to learn more about its Field Notes.
press a Field Notes entry to view clues. Some entries can also track the target's location. TeleportFeatures · 3 stepsTeleporting is a quick way to move your character. To use it, select a transportable icon on the map.
Teleportable icons are usually blue, such as Outposts, Branches, Blooms, and Sanctums.
TeleportFeatures · 3 stepsTeleporting is a quick way to move your character. To use it, select a transportable icon on the map.
Teleportable icons are usually blue, such as Outposts, Branches, Blooms, and Sanctums. Research Points and Star-UpFeatures · 5 stepsComplete research goals in the Aniilog to earn Research Points and raise the Aniilog level.
 FriendsFeatures · 1 stepYou can add Friends here so you can explore together later.
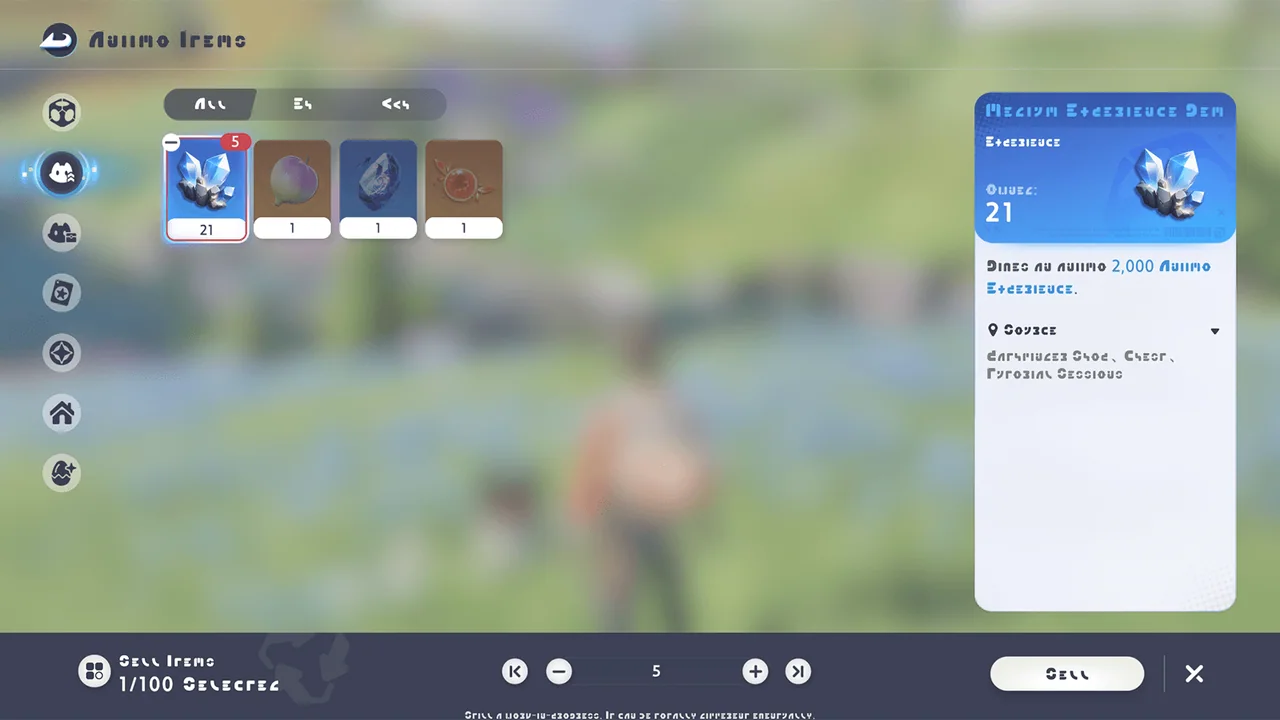 SellFeatures · 1 stepNot sure what to do with extra items? Sell them from your Inventory to earn Credits. Be careful! Sold items cannot be recovered.
 ReportFeatures · 2 stepsAfter catching Aniimo, head to an outpost to report your findings and claim rewards.
Reporting caught Aniimo earns you Credits.
ReportFeatures · 2 stepsAfter catching Aniimo, head to an outpost to report your findings and claim rewards.
Reporting caught Aniimo earns you Credits.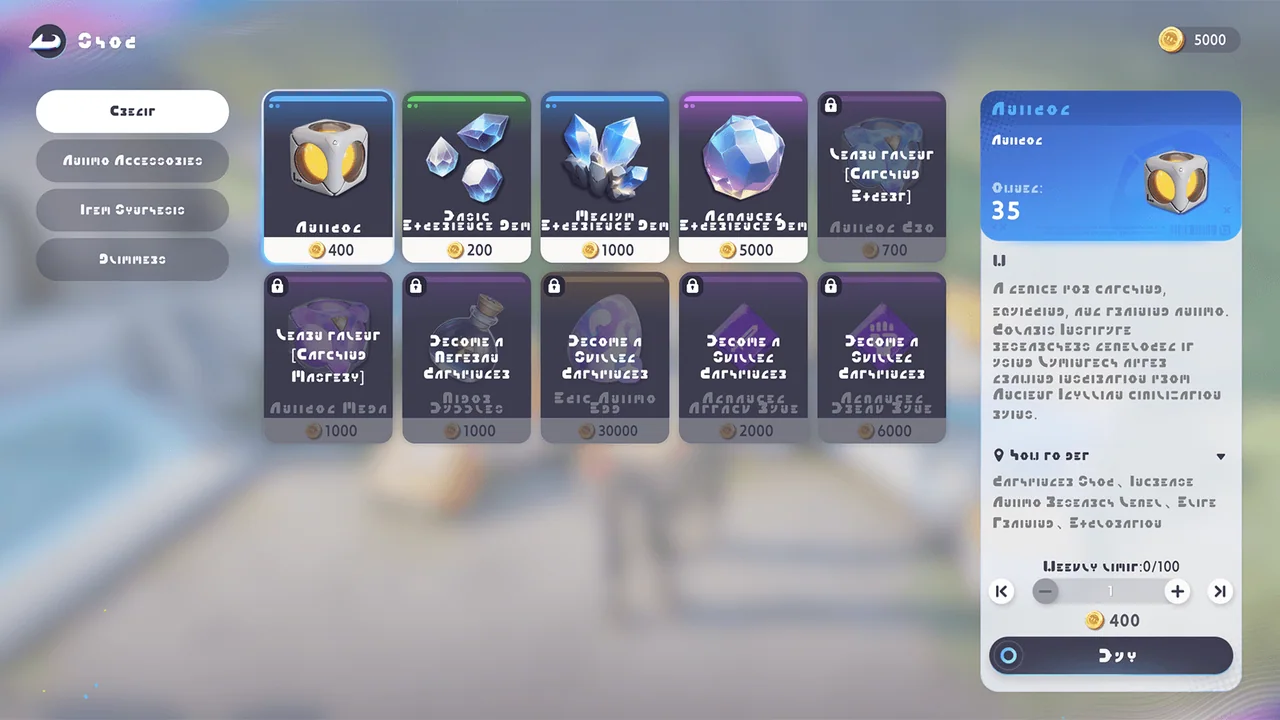 ShopFeatures · 2 stepsVisit Vendor Joff at the outpost or shops in Astra for essential adventuring supplies. Reach a certain title to unlock perks that let you buy higher-grade items.
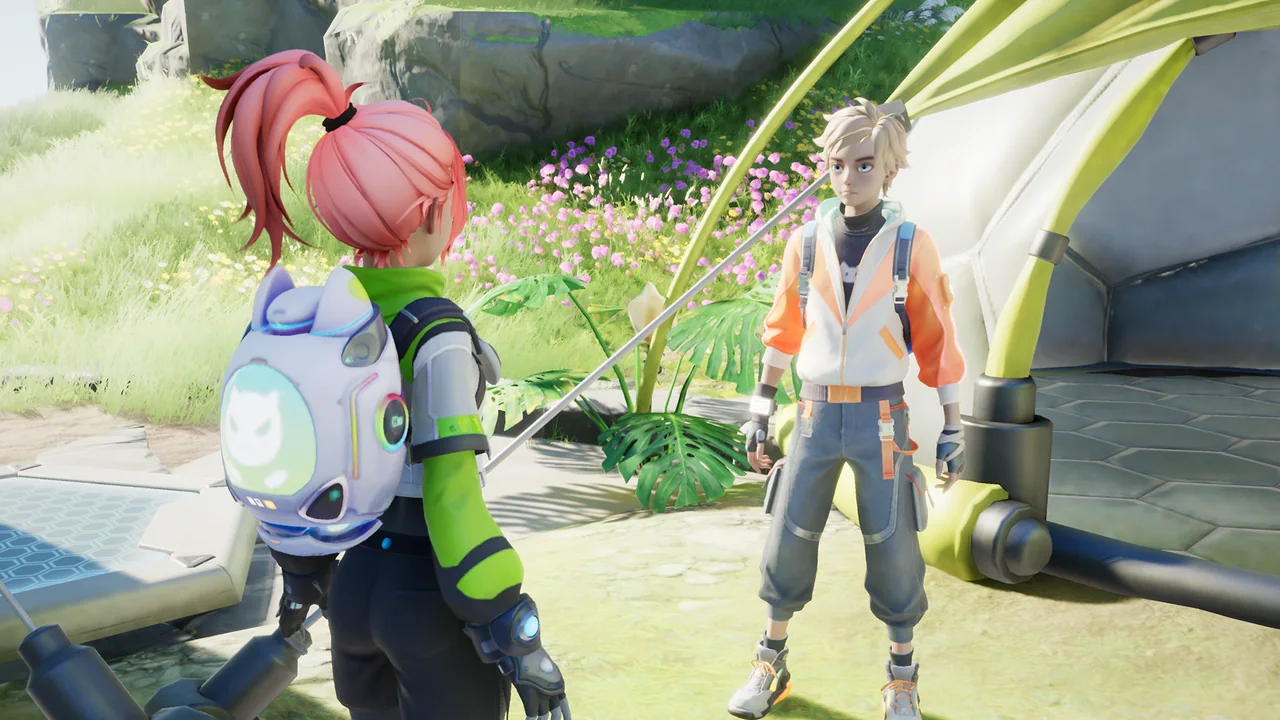 Heal AniimoFeatures · 1 stepWhen an Aniimo is injured, you can visit Healer Kim at the Outpost to heal it, or let it recover at a nearby Bonfire.
 LogFeatures · 3 stepsFollow quest guidance to explore Idyll more easily. Complete quests to earn various rewards.
 CoursesFeatures · 1 stepIn the Courses module, you can enter all kinds of tutorial stages. Complete each course to unlock rewards.
 Elite TrainingFeatures · 1 stepThe Elite Training program makes you stronger and is the best choice to help you explore the World.
 Mark SharingFeatures · 1 stepPathfinders can leave markers in the world and share content.
Other Pathfinders will be able to see what you leave behind.
Mark SharingFeatures · 1 stepPathfinders can leave markers in the world and share content.
Other Pathfinders will be able to see what you leave behind. Stamp RushFeatures · 4 stepsStamp Rush is an event co-held by the Polaris Institute and several other big corporations in Astra, meant to honor those who have made outstanding contributions to Idyll’s exploration.
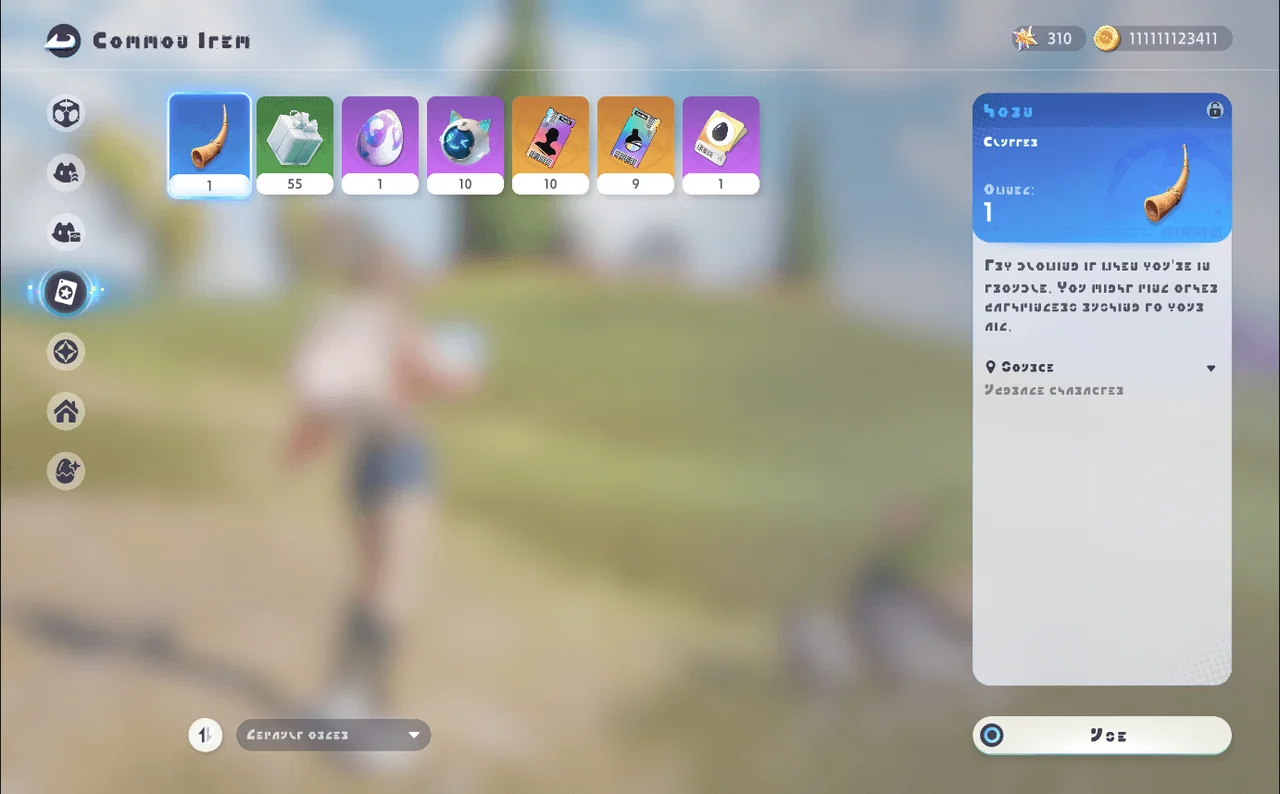 HornFeatures · 1 stepYou’ll receive the Horn upon reaching Level 10 as a Pathfinder. Use it from your inventory when in trouble—blowing it may summon fellow Pathfinders to assist you. While exploring, you might also hear another Pathfinder’s Horn call for help. After all, helping each other is what adventuring’s all about!
 ProfileFeatures · 1 stepWhen near another Pathfinder, you can press #kHud/Interact#z to view their Profile and interact with them.ProfileFeatures · 1 stepWhen near other Pathfinders, select a Pathfinder to view their Profile and interact with them.
 Aniimo ExchangeFeatures · 1 stepClick the Student ID to exchange Aniimos with friends and discover their diversity!
 GesturesFeatures · 1 stepDon’t forget to greet other Pathfinders you meet using Interaction Panel!
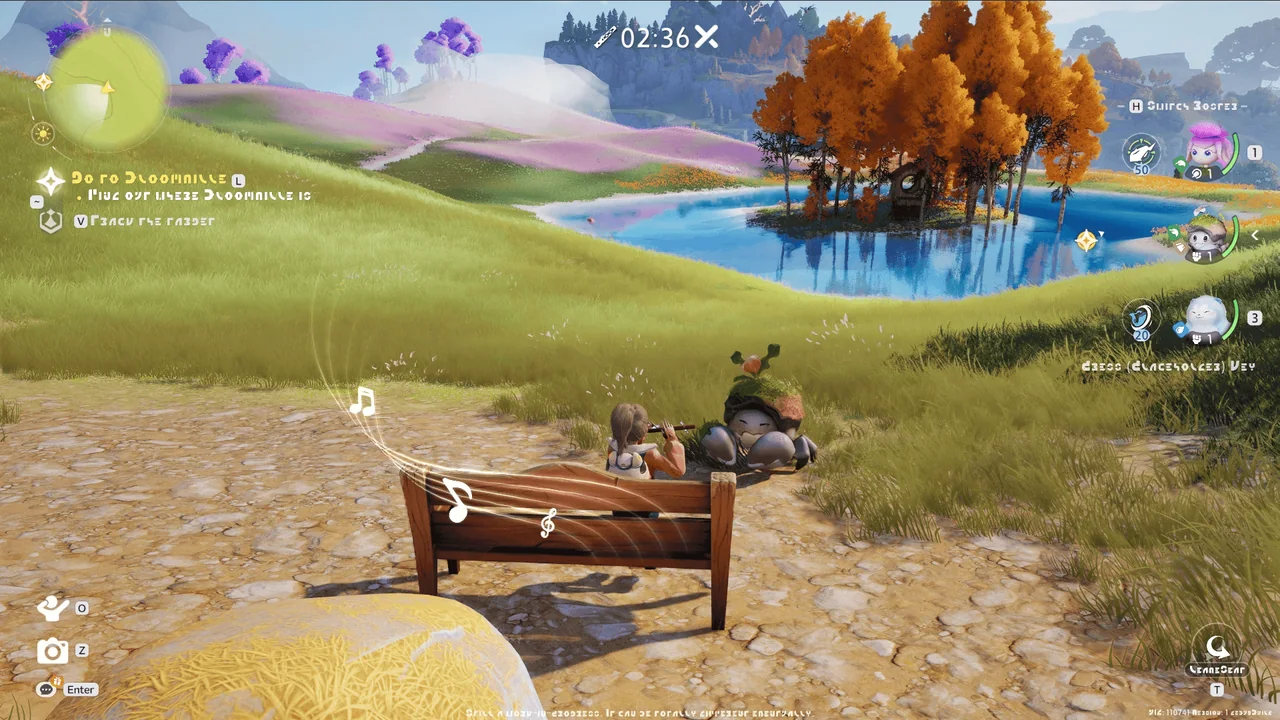 Seeking Friend with the FluteFeatures · 1 stepYou can play the flute via the Interaction Panel—perhaps a nearby Pathfinder will hear and respond to your melody!
 Who’s That Aniimo?Features · 2 stepsDuring the "Who’s That Aniimo?" event, the camera can recognize Aniimo forms. Enter Camera Mode through the event camera entrance. If today’s Mystery Aniimo appears in the frame, the camera will automatically identify it and give you a hint.
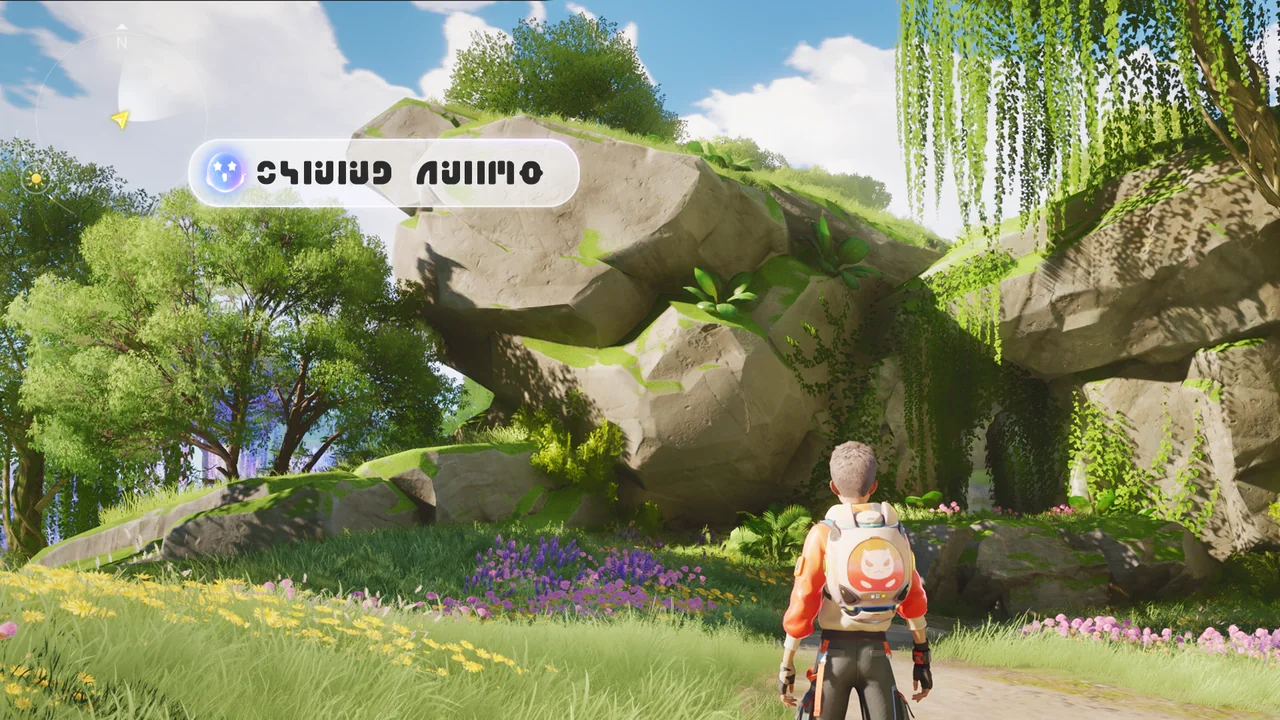 BINI #9: UpgradedFeatures · 1 stepThe upgraded BINI #9 has stronger detection features. When it senses something important nearby, it will alert you right away.
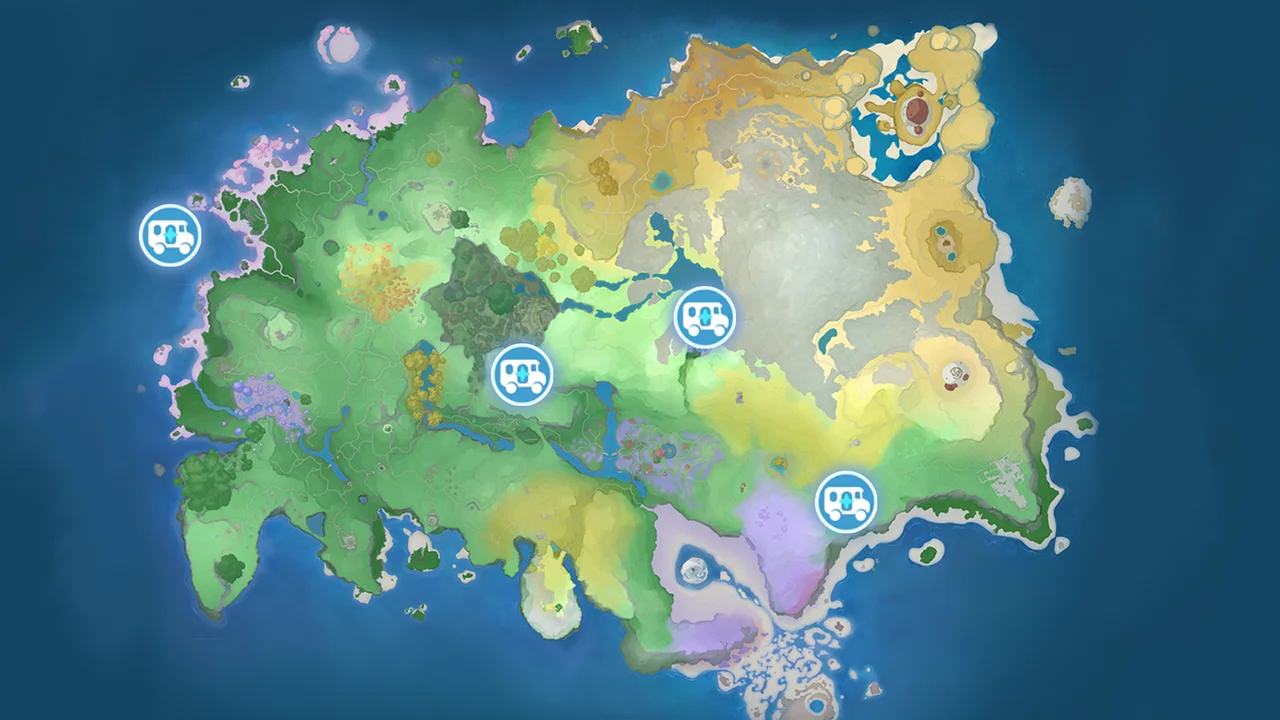 RV ParkFeatures · 1 stepThere are four RV Parks on the Breezy Plains. Find each park keeper to activate and join a different RV Park.
RV Parks continuously restore your Aniimo’s HP.
RV ParkFeatures · 1 stepThere are four RV Parks on the Breezy Plains. Find each park keeper to activate and join a different RV Park.
RV Parks continuously restore your Aniimo’s HP. How to Get Home CoinFeatures · 1 stepComplete Home orders, or sell Home products and Home materials gathered across Idyll at the Home Co-op Store to earn Home Coins.
 Home Power SystemFeatures · 3 stepsUpgrade your RV to Level 12 and unlock the RV Electric Module to switch certain Home facilities to E-Mode.
 Home Environment SystemFeatures · 3 stepsSome materials need the right temperature or lighting before they can be produced. You can check these requirements when setting up production.
 Home Aniimo CollaborationFeatures · 3 stepsAfter setting a production recipe, the facility will show the Home Ability needed for the current production stage. Aniimo that meet the recommended ability level will work more efficiently.Quick ConstructionFeatures · 3 stepsIn Build Mode, you can drag furniture straight from the furniture list into your Home and edit its placement.
 Home Building: Multi-SelectFeatures · 3 stepsIn Build Mode, tap the button at the top to enter Multi-Select Mode.Build SettingsFeatures · 1 stepIn Build Mode, tap Settings to access more advanced building options.Building Assist FeatureFeatures · 3 stepsIn Build Mode, you can adjust the camera height using the side buttons.Continuous Purchase in HomeFeatures · 1 stepIn Build mode, press Settings and enable Continuous Purchase to buy and place the next matching piece of furniture.Quick Placement in HomeFeatures · 1 stepIn Build mode, press Settings and enable Quick Placement. Then select the next piece of furniture to start editing it right away, without pressing Confirm again.
 Aniimo TransmogFeatures · 2 stepsTransmog parts include: Color, Wings, Body, Headwear, and Effects.
Use the items Radiant Dreamshadow and Glimmering Driftshadow to change your Aniimo’s appearance.
Aniimo TransmogFeatures · 2 stepsTransmog parts include: Color, Wings, Body, Headwear, and Effects.
Use the items Radiant Dreamshadow and Glimmering Driftshadow to change your Aniimo’s appearance. RV Park: EssenceFeatures · 1 stepRest for a while in a ride placed at an RV Park to gain the park owner’s Element Essence Buff effect.
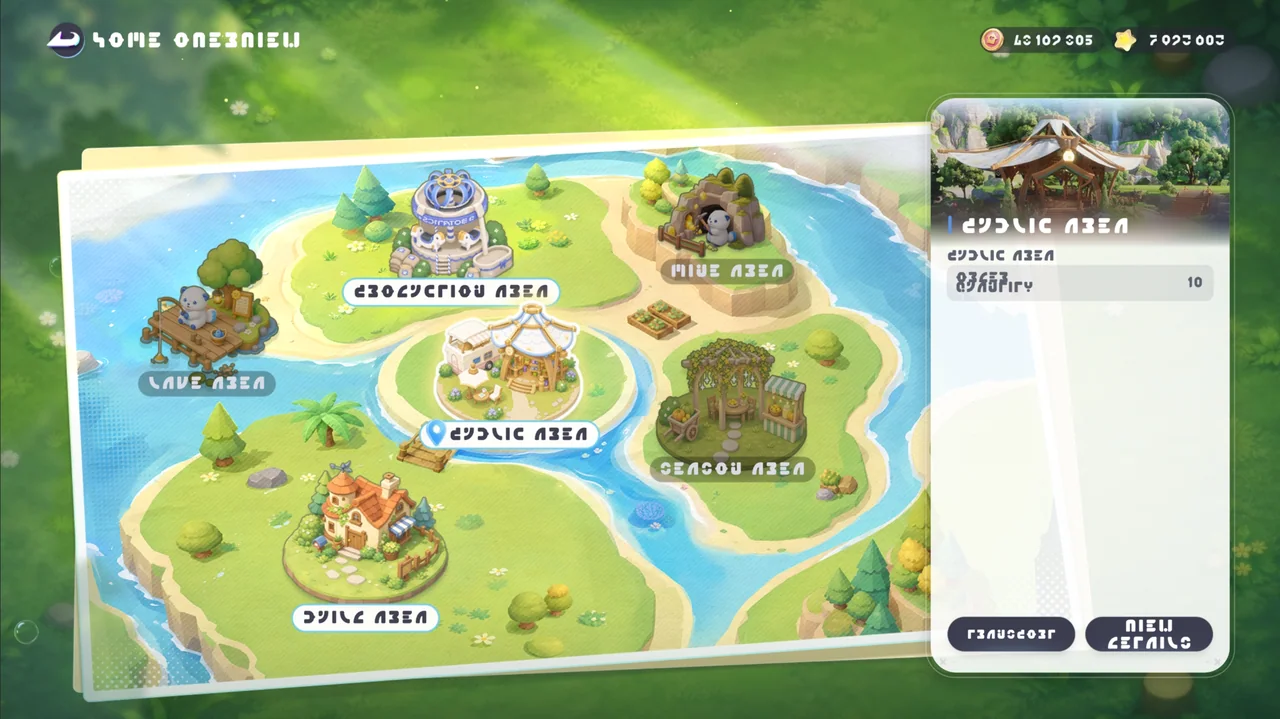 Home Management: Main PageFeatures · 1 stepOn the Home Management home screen, you can fast-travel between different areas of your Home and easily view the detailed info for each area.Home Management: ProductionFeatures · 1 stepIn the Production Zone, using Home Management lets you perform convenient batch operations such as batch recipe changes, batch facility upgrades, batch acceleration, and more.
 Home: Loosen SoilFeatures · 1 stepIn another player’s Home, you can help loosen the soil for their crops. As you help them, you’ll also get a nice little bonus reward!
Aniimo 17
 Aniimo Level UpAniimo · 2 stepsIn the Aniimo Management screen, select the Aniimo you want to level up. Then press Level Up on that Aniimo’s Attributes screen.
 Aniimo EvolutionAniimo · 2 stepsIn the Aniimo interface, press the Aniimo you wish to evolve, then open its Attributes screen and press Evolve to view its evolution path.
When an Aniimo is ready to evolve, a marker will appear directly on its avatar.
Aniimo EvolutionAniimo · 2 stepsIn the Aniimo interface, press the Aniimo you wish to evolve, then open its Attributes screen and press Evolve to view its evolution path.
When an Aniimo is ready to evolve, a marker will appear directly on its avatar. Aniimo ManagementAniimo · 3 stepsIn the Aniimo Management interface, you can view and manage all caught Aniimo. You can train Aniimo, and choose which Aniimo and skills to equip during battle or exploration.Release AniimoAniimo · 2 stepsThere is a limit to how many Aniimo a Pathfinder can keep, so it’s best to leave some space before heading out. When you need room, use the Release feature on the Aniimo Management screen to return unused Aniimo to Idyll.
 Aniimo Management - Base AttributesAniimo · 2 stepsEach Aniimo has its own innate potential. After you catch and report an Aniimo, it will be rated based on its total Innate Potential and recommended attributes. Ratings are divided into 4 tiers: Common, Good, Elite, and Perfect. A higher potential tier means stronger starting attributes, making that Aniimo a better choice to train.
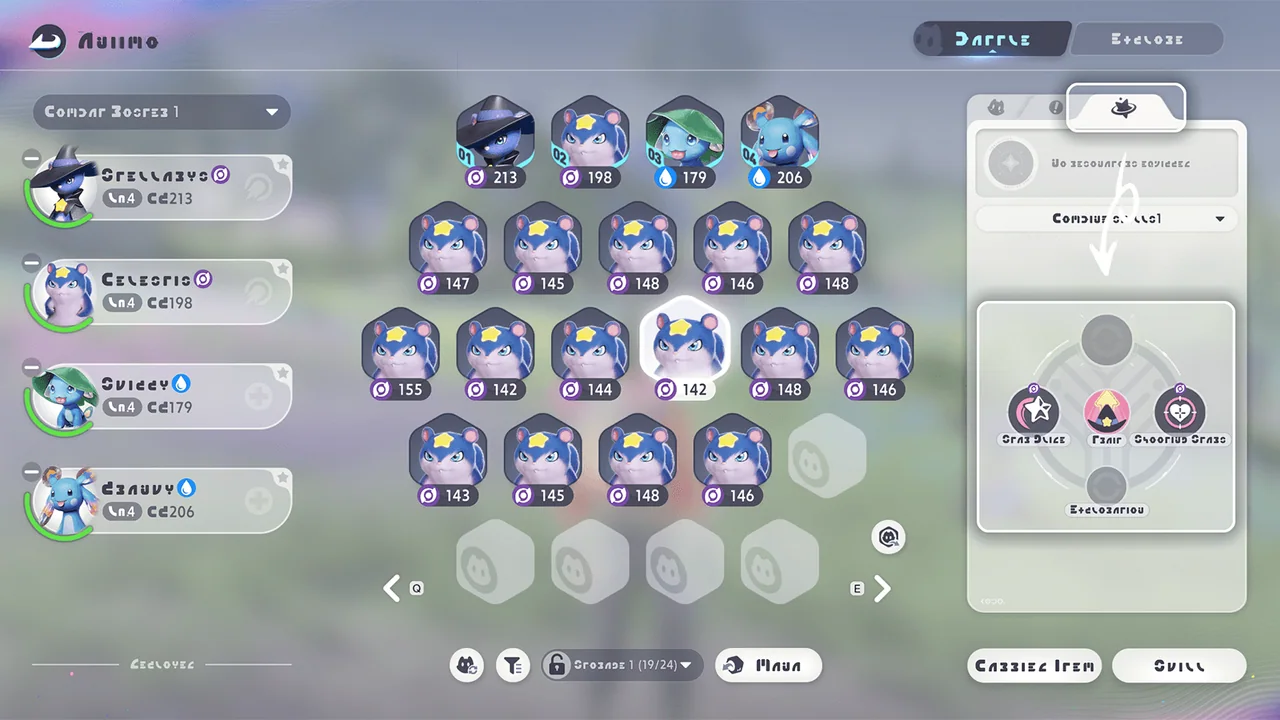 Aniimo Combat SkillsAniimo · 1 stepPress Skills on the right side of the Aniimo Management screen to view learned Aniimo combat skills. You can also learn new skills or adjust unlocked Aniimo combat skills.
 Aniimo TraitsAniimo · 1 stepEach Aniimo family has its own traits.
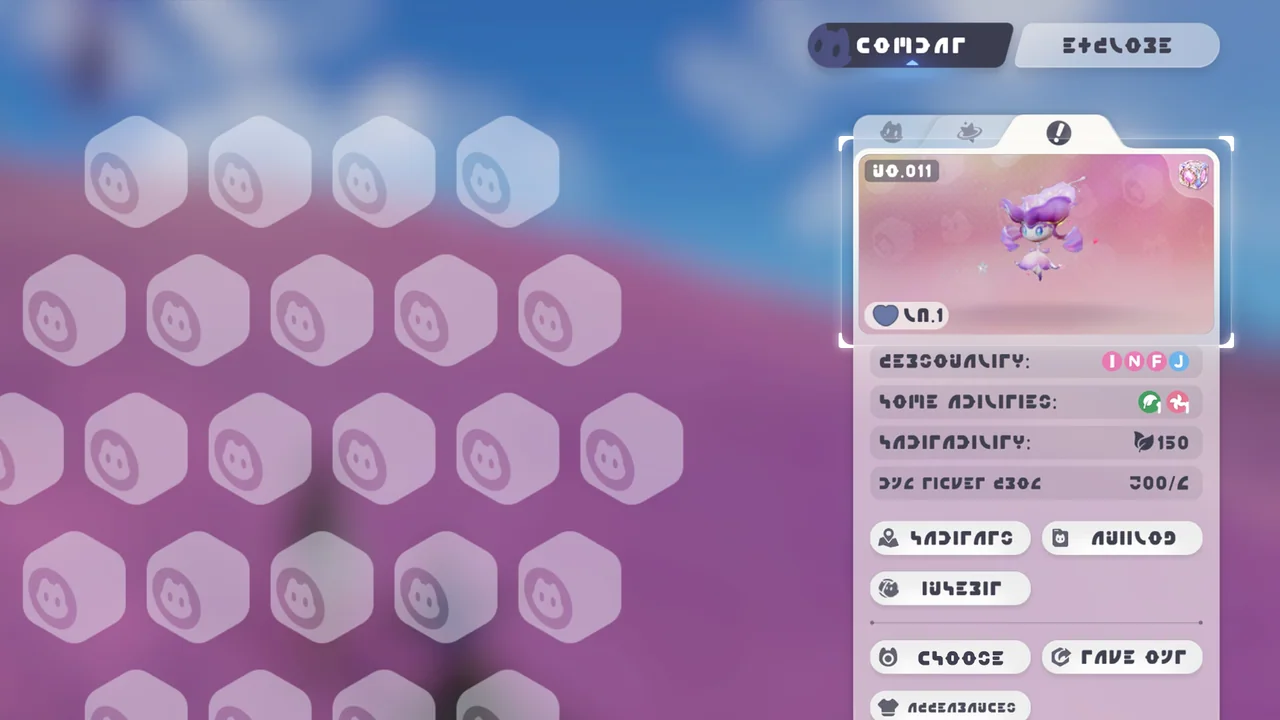 Legendary Aniipod: Departure with the WindAniimo · 2 stepsCatch Effect Part I: Exclusive Sparkling Effect
 Character Level UpAniimo · 4 stepsCollect enough Safaris to increase your character level. Reach certain character levels to claim rewards.
By increasing your character level, you can also raise the Aniimo level cap and unlock character abilities to help you better explore the world.
Character Level UpAniimo · 4 stepsCollect enough Safaris to increase your character level. Reach certain character levels to claim rewards.
By increasing your character level, you can also raise the Aniimo level cap and unlock character abilities to help you better explore the world. TitleAniimo · 2 stepsTitles come with many benefits. Most importantly, they raise your character level cap, allowing you to train higher-level Aniimo.
 CharacterAniimo · 1 stepHere, you can view combat, Mobility sets, and Active Twined Aniimo. Press Equip to make adjustments.
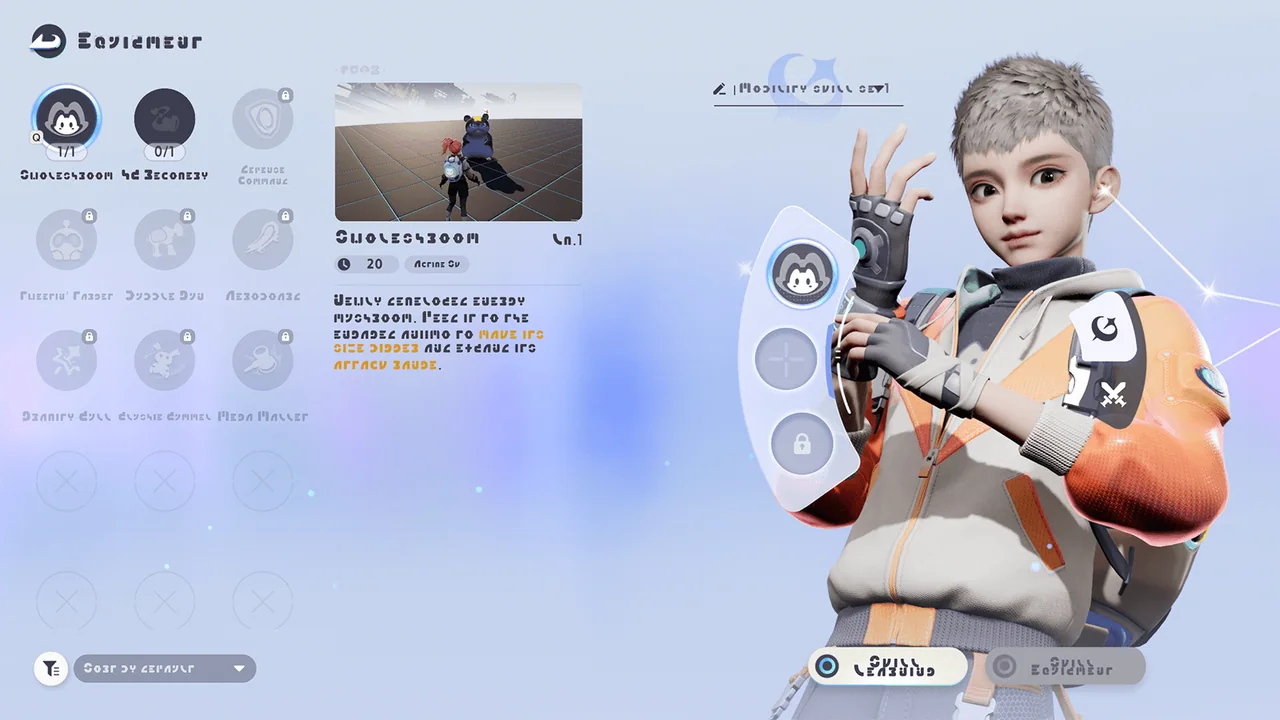 Equip SkillsAniimo · 1 stepHere, you can choose suitable skills for combat and exploration, then equip them as sets. You can also view videos and text descriptions to learn more about each skill.
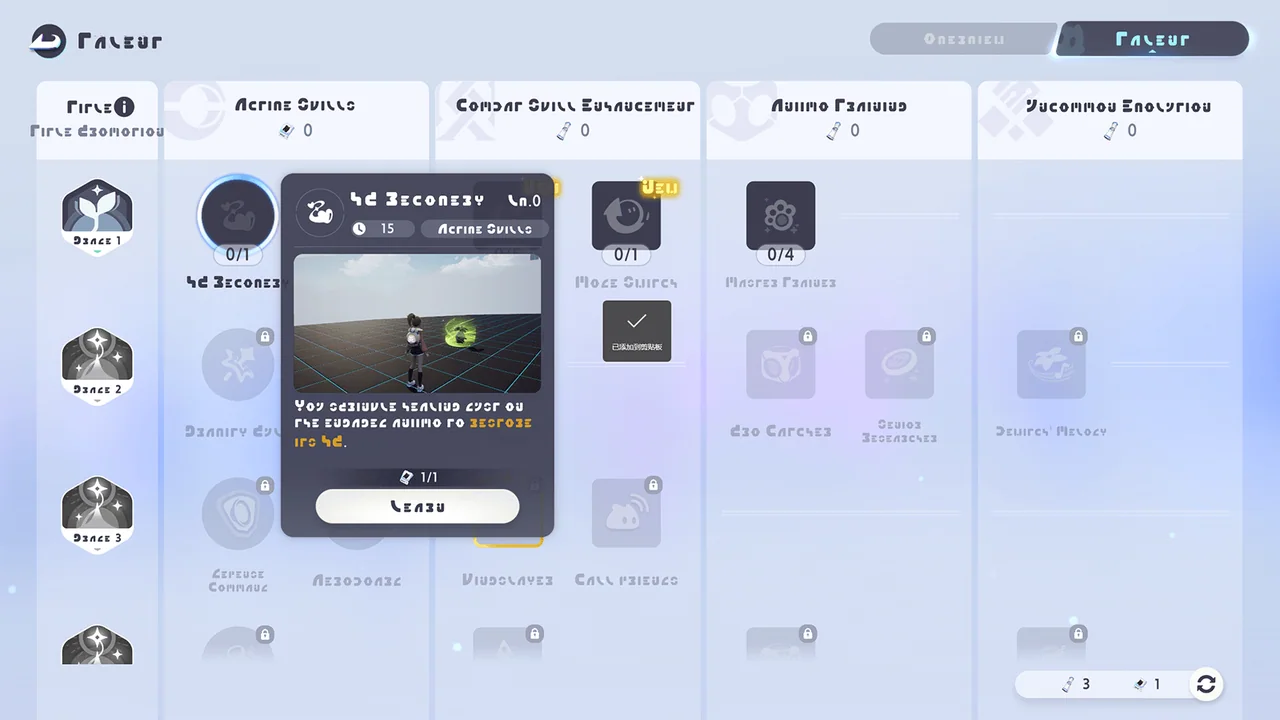 Learn SkillsAniimo · 1 stepAs your Pathfinder Title upgrades, you will unlock more Active Skills and Passive Talents. Use Demo Tapes to learn Active Skills, and Report Cards to learn and upgrade Passive Talents.
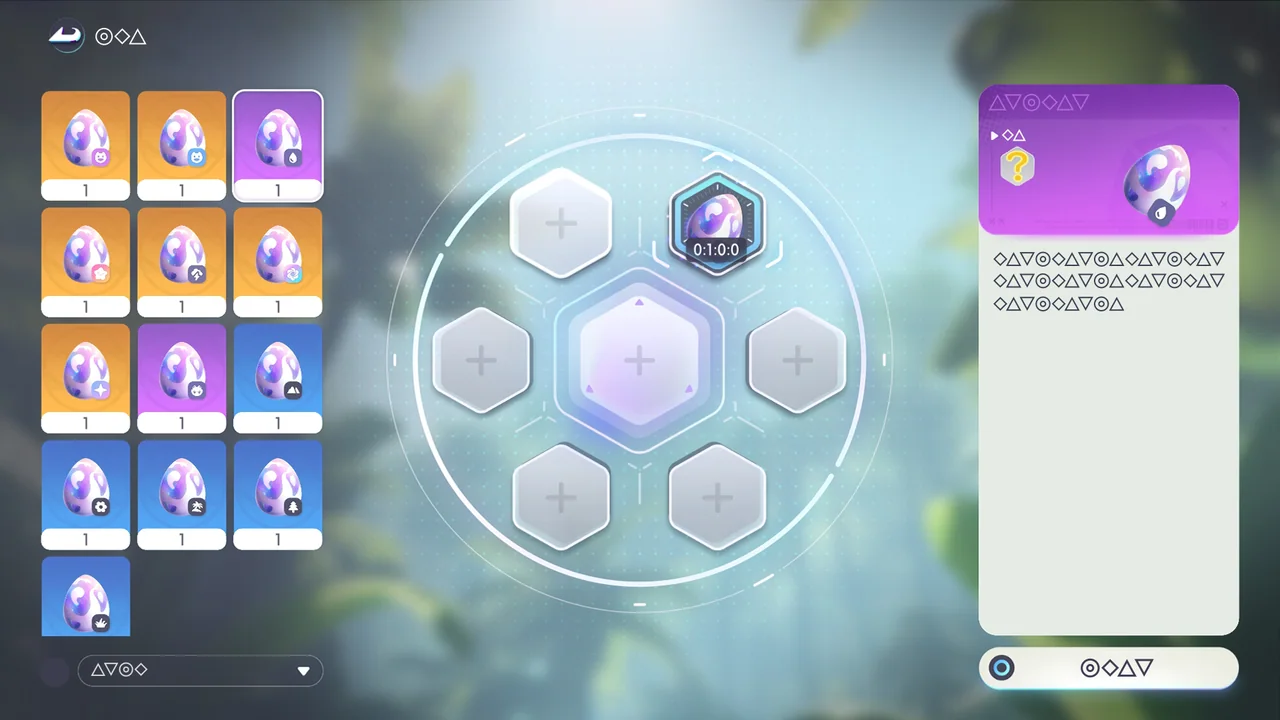 HatchAniimo · 1 stepWhile exploring the world, you can discover eggs left behind by Aniimos. Hatch them using the outpost’s Hatchinator—higher-quality eggs take longer to hatch. Once hatched, you’ll receive the corresponding Aniimo—and there’s even a tiny chance of obtaining a rare Sparkling Aniimo!
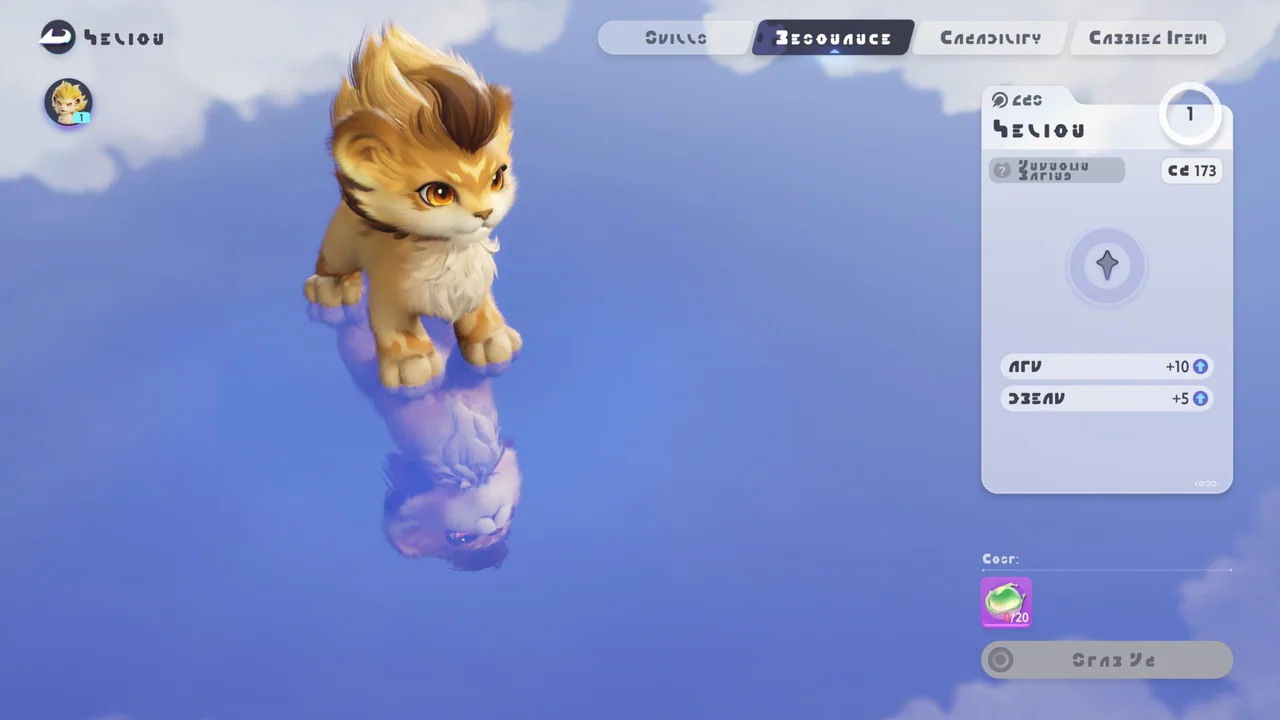 Star UpAniimo · 1 stepUse Dewdrop Crystals in the Resonance Star-Up system to strengthen Aniimo and gradually increase their base attributes such as ATK and HP.
After reaching max stars in the current stage, spend Elemental Stones and other items to ascend and unlock stronger attribute bonuses.
Star UpAniimo · 1 stepUse Dewdrop Crystals in the Resonance Star-Up system to strengthen Aniimo and gradually increase their base attributes such as ATK and HP.
After reaching max stars in the current stage, spend Elemental Stones and other items to ascend and unlock stronger attribute bonuses.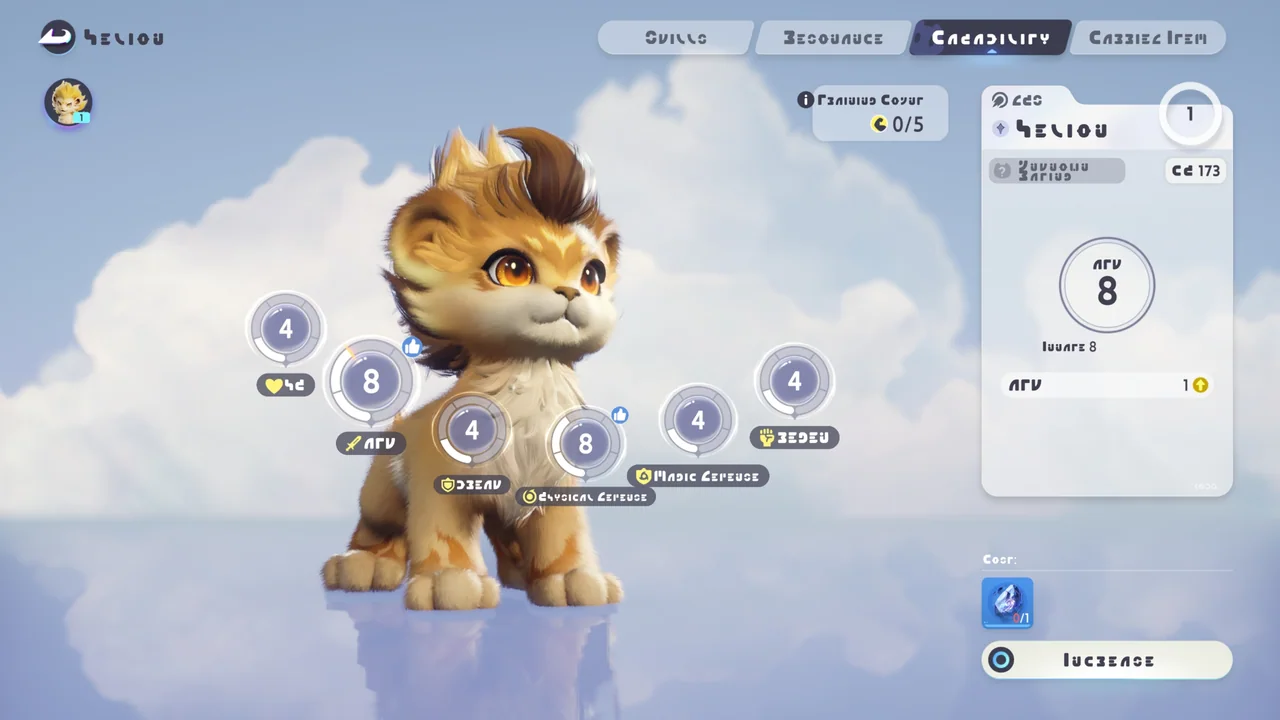 Capability AwakeningAniimo · 1 stepIn the Capability Awakening system, you can consume Star Dust and other items to increase the Aniimo’s Acquired Potential for the selected attribute.
1. Each of an Aniimo’s six attributes has [Innate Potential] and [Acquired Potential].
[Innate Potential] is fixed at birth and can only be increased through special methods, such as Capafruit.
[Acquired Potential] can be raised through Capability Awakening. Higher increases require more, rarer items.
The sum of Innate Potential and Acquired Potential cannot exceed 20. Higher Potential results in greater stat increases as the Aniimo levels up.
2. The number of Capability Awakenings available to an Aniimo depends on its Resonance Star Rank rating, growth stage, and level.
Capability AwakeningAniimo · 1 stepIn the Capability Awakening system, you can consume Star Dust and other items to increase the Aniimo’s Acquired Potential for the selected attribute.
1. Each of an Aniimo’s six attributes has [Innate Potential] and [Acquired Potential].
[Innate Potential] is fixed at birth and can only be increased through special methods, such as Capafruit.
[Acquired Potential] can be raised through Capability Awakening. Higher increases require more, rarer items.
The sum of Innate Potential and Acquired Potential cannot exceed 20. Higher Potential results in greater stat increases as the Aniimo levels up.
2. The number of Capability Awakenings available to an Aniimo depends on its Resonance Star Rank rating, growth stage, and level.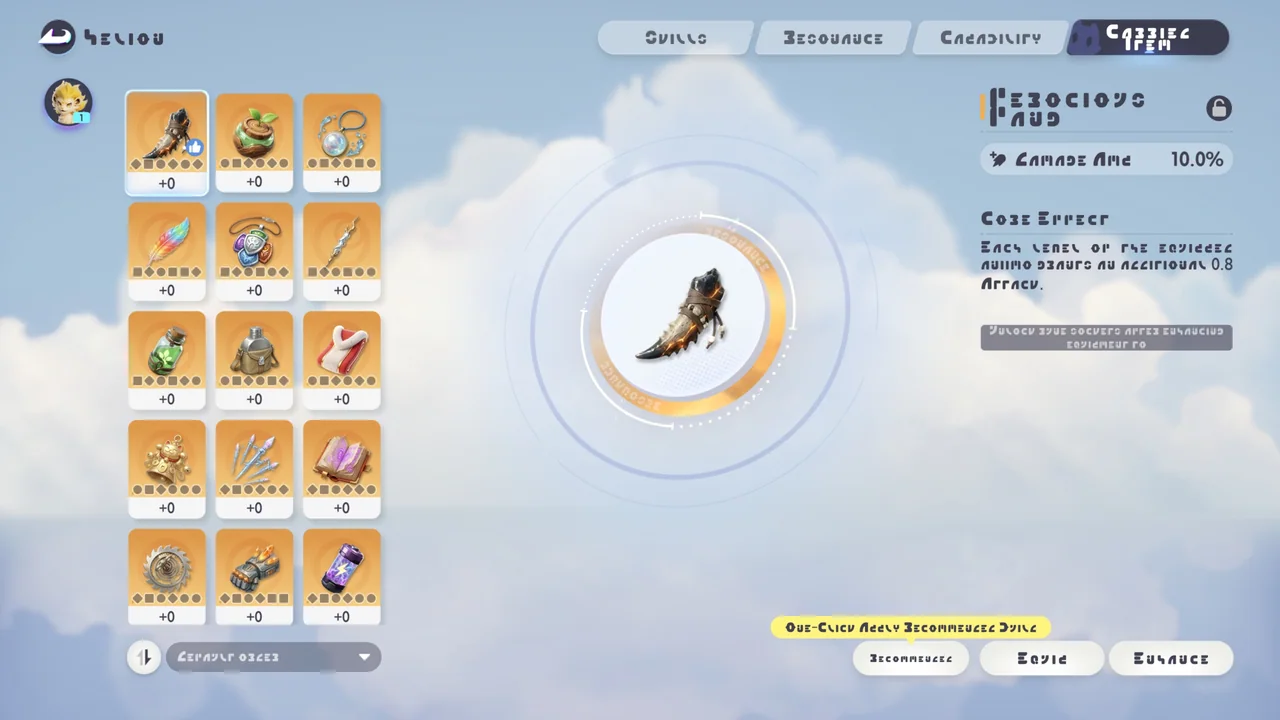 Held ItemAniimo · 1 stepEquipping an Aniimo with a Held Item grants attribute boosts or unique effect enhancements. Held Items can be upgraded using other Held Items as materials. Upgrades increase the item’s base attributes by a fixed percentage. The maximum upgrade level depends on the Held Item’s rarity: Blue-quality items can be upgraded up to Level 5, Purple-quality up to Level 10, and Gold-quality up to Level 15.
Combat & Events 71
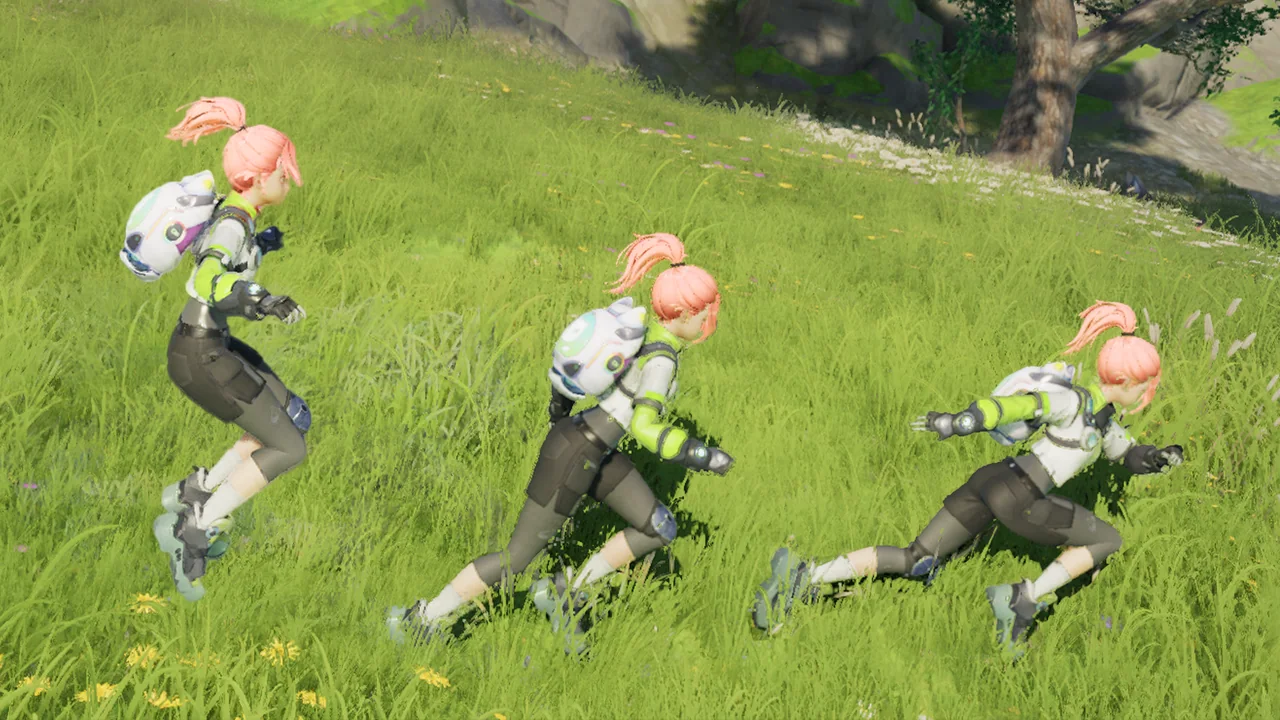 MoveCombat & Events · 1 stepUse #kPlayer/Move#z to move your character in any direction. Press #kPlayer/Jump#z to jump. Press #kPlayer/StartSprint#z to dash. Hold a direction and press #kPlayer/StartSprint#z to enter sprint state.MoveCombat & Events · 1 stepUse the joystick to move your character. Use the Jump and Dash buttons to perform actions.
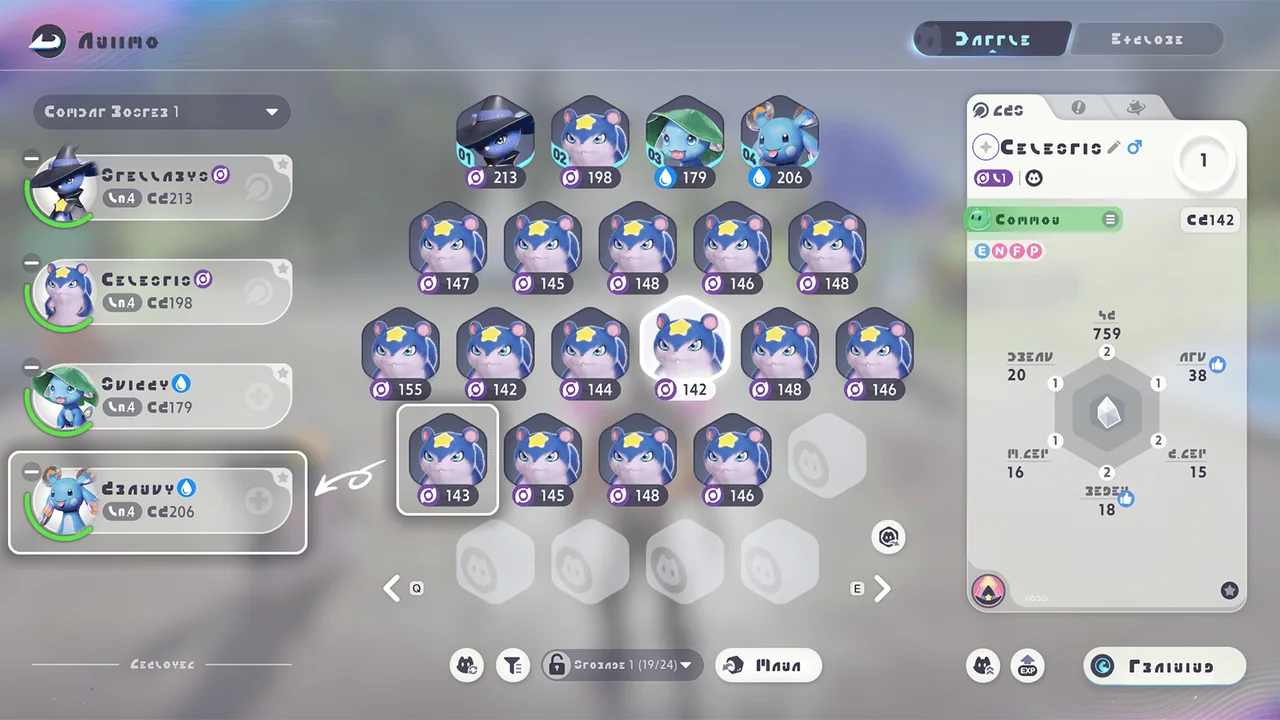 PartyCombat & Events · 2 stepsPress and hold an Aniimo avatar and drag it to the party panel on the left. Each party can include up to four Aniimo.PartyCombat & Events · 2 stepsPress and hold an Aniimo avatar and drag it to the party panel on the left. Each party can include up to four Aniimo.
 ATKCombat & Events · 1 stepIn Twine Mode, use #kHud/NormalAttack#z to command your Aniimo to attack and deal damage to enemies.
 AttackCombat & Events · 1 stepIn Twine Mode, you can control your Aniimo directly and attack enemies to deal damage.
 SkillsCombat & Events · 3 stepsEP appears under the Aniimo status bar as six blue energy orbs.
 SkillsCombat & Events · 3 stepsEP appears under the Aniimo status bar as six blue energy orbs.SkillsCombat & Events · 3 stepsEP appears under the Aniimo status bar as six blue energy orbs.
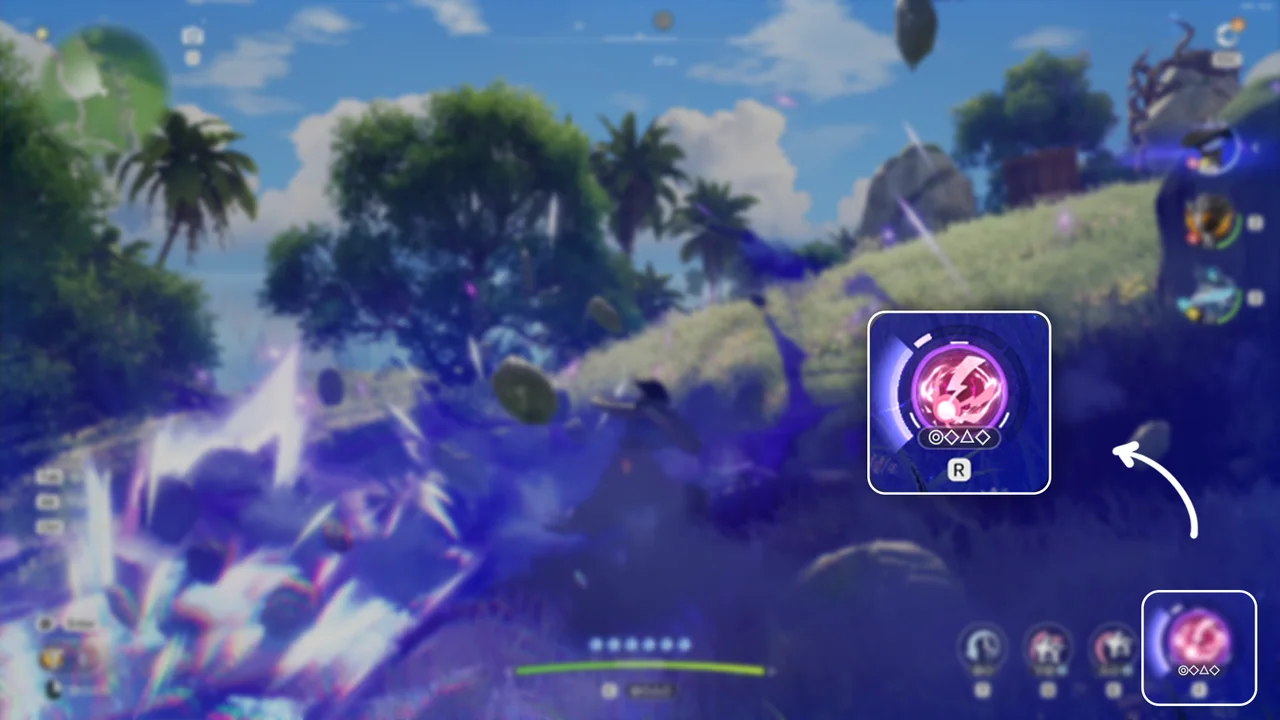 UltimateCombat & Events · 1 stepThe Ultimate Point gauge appears around the Ultimate icon. When the gauge is above one segment, press #kHud/SkillR#z to spend it and command your Aniimo to unleash a powerful Ultimate. Using Aniimo skills can restore Ultimate Points. You can store up to three segments.
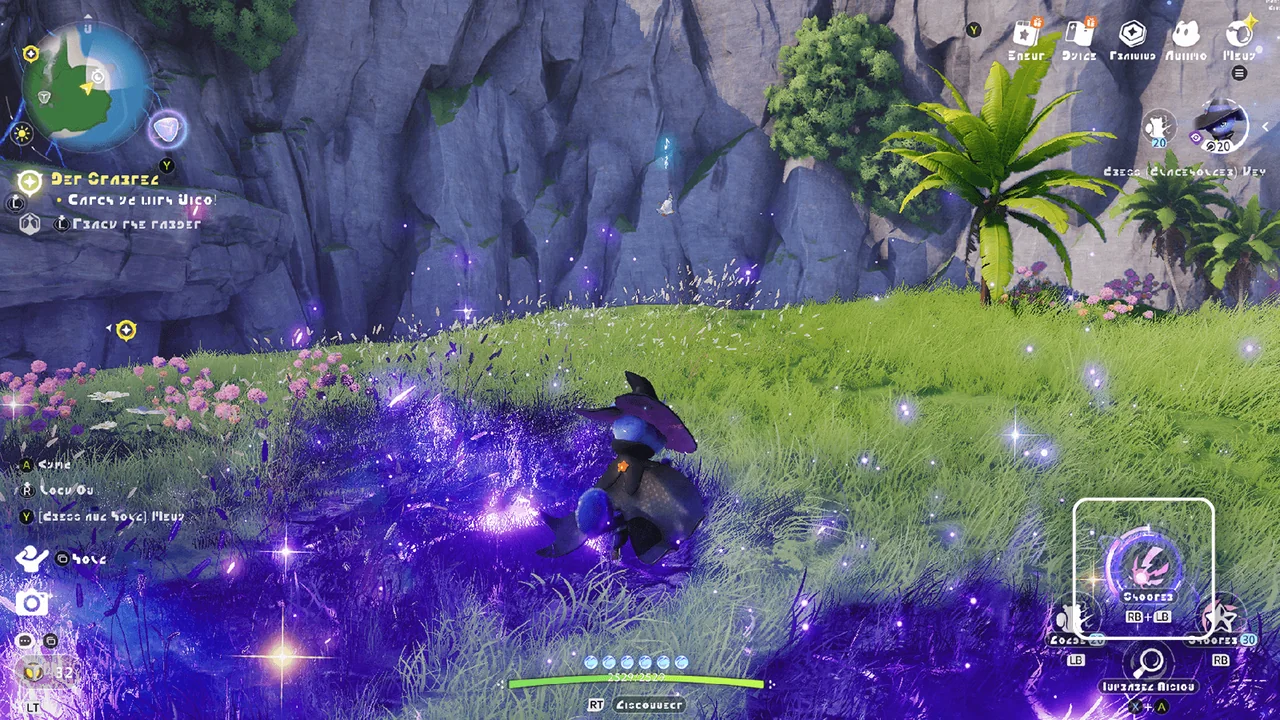 UltimateCombat & Events · 1 stepThe Ultimate Point gauge appears around the Ultimate icon. When the gauge is above one segment, press #kHud/SkillR#z to spend it and command your Aniimo to unleash a powerful Ultimate. Using Aniimo skills can restore Ultimate Points. You can store up to three segments.
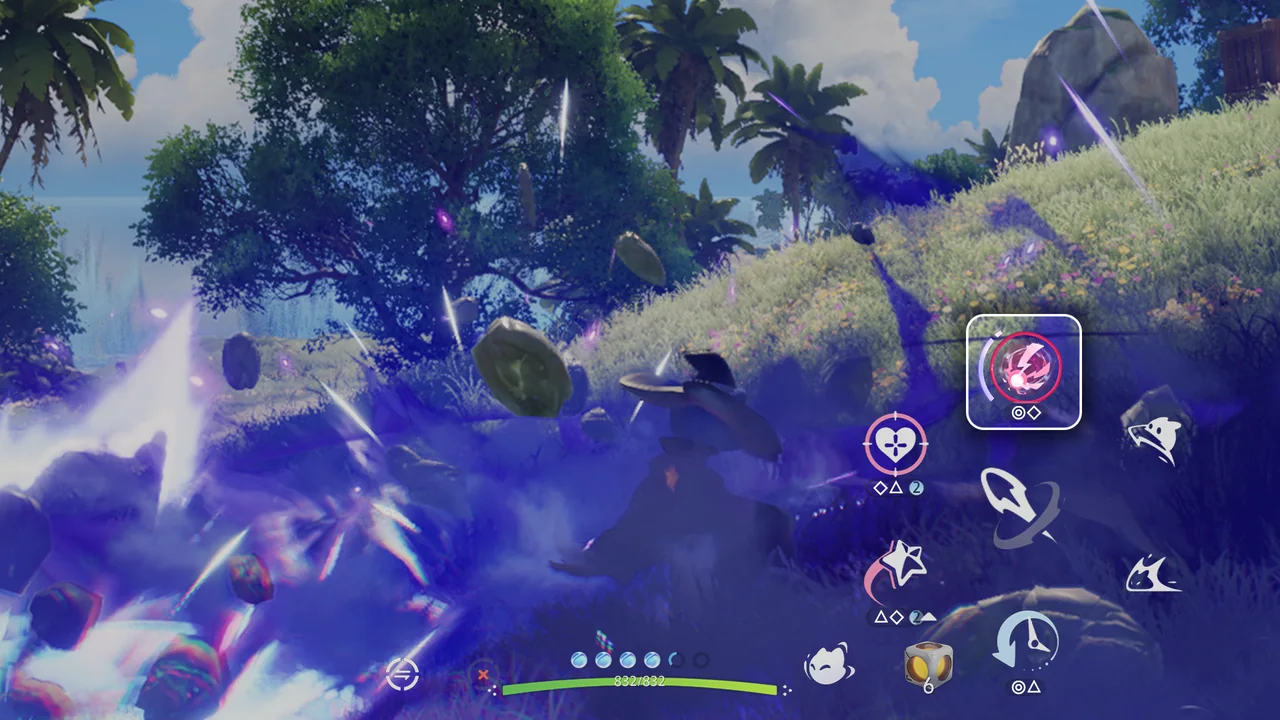 UltimateCombat & Events · 1 stepThe Ultimate Point gauge appears around the Ultimate icon. When the gauge is above one segment, press Ultimate to spend it and unleash a powerful Ultimate. Using Aniimo skills can restore Ultimate Points. You can store up to three segments.
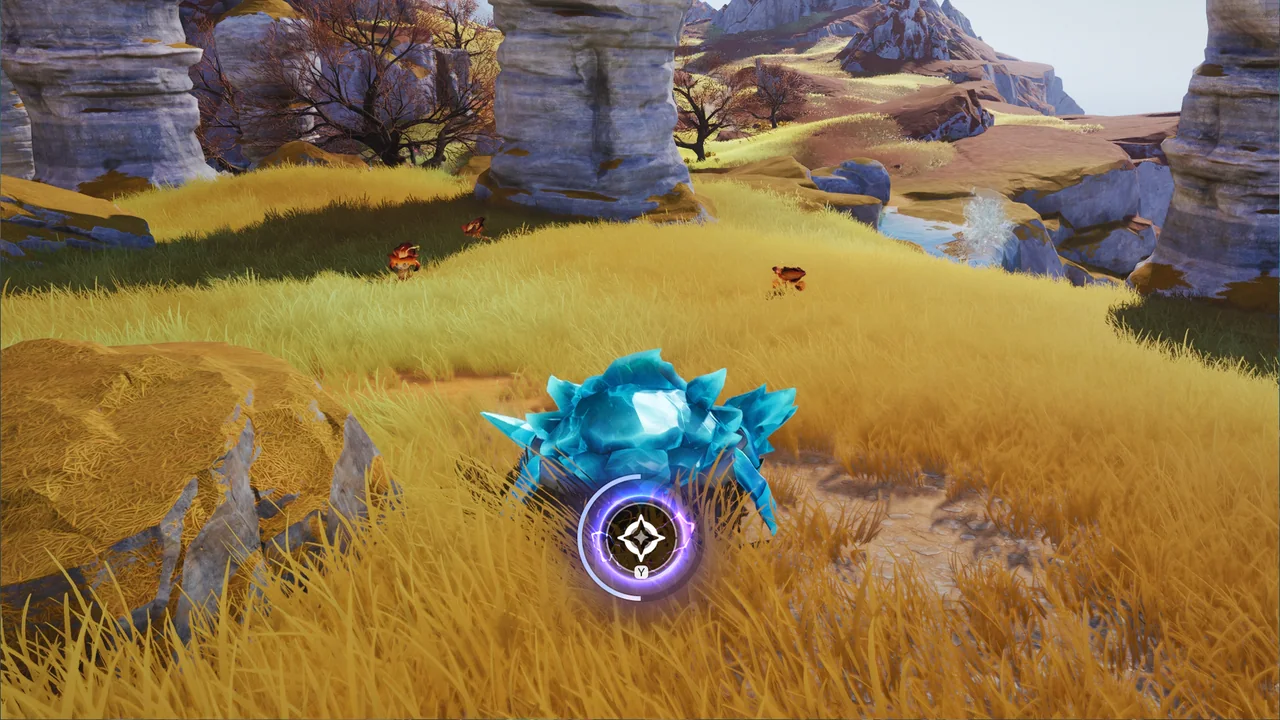 Chain UltimateCombat & Events · 1 stepWhen more than 2 Pathfinders are in a party, after one Pathfinder uses an Ultimate, Chain Timing will appear for the other Pathfinders. Using an Ultimate during Chain Timing counts as a successful chain. When more than 2 Pathfinders successfully chain, a powerful Chain Burst will be triggered after the chain ends, dealing massive damage.
Chain Ultimate will not trigger in Operation: Egg Heist.
Chain UltimateCombat & Events · 1 stepWhen more than 2 Pathfinders are in a party, after one Pathfinder uses an Ultimate, Chain Timing will appear for the other Pathfinders. Using an Ultimate during Chain Timing counts as a successful chain. When more than 2 Pathfinders successfully chain, a powerful Chain Burst will be triggered after the chain ends, dealing massive damage.
Chain Ultimate will not trigger in Operation: Egg Heist.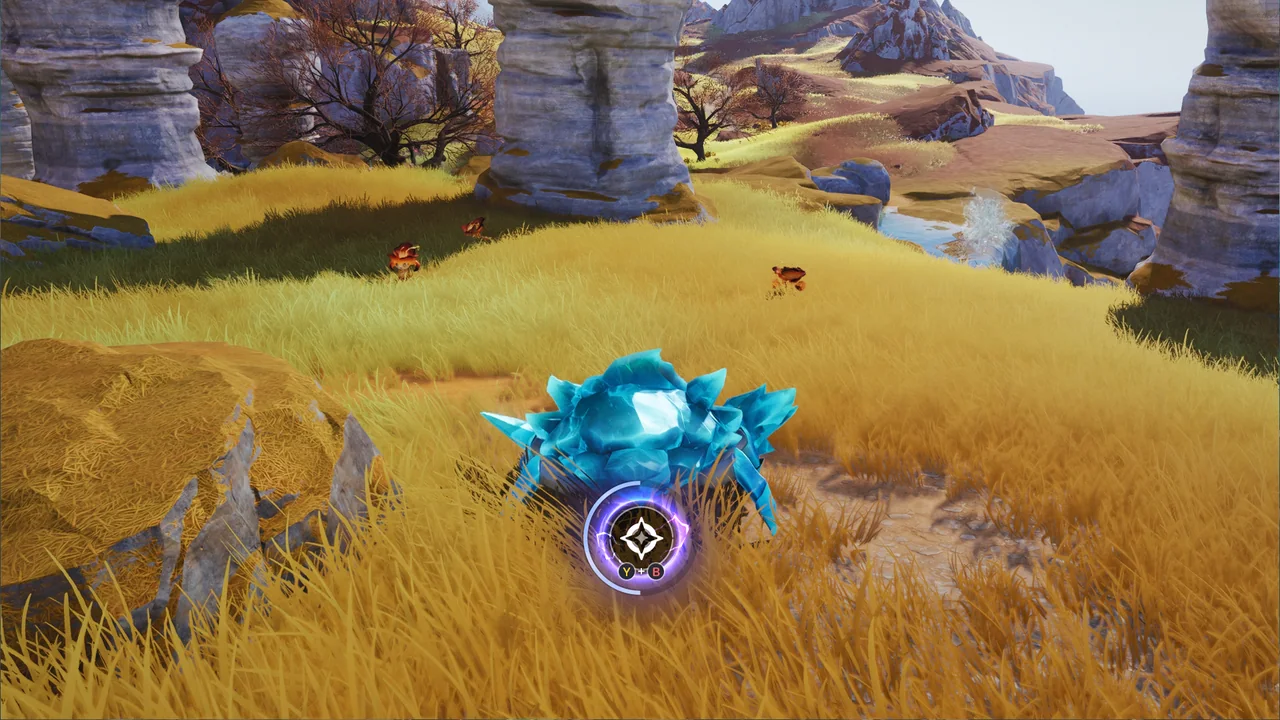 Chain UltimateCombat & Events · 1 stepWhen more than 2 Pathfinders are in a party, after one Pathfinder uses an Ultimate, Chain Timing will appear for the other Pathfinders. Using an Ultimate during Chain Timing counts as a successful chain. When more than 2 Pathfinders successfully chain, a powerful Chain Burst will be triggered after the chain ends, dealing massive damage.
Chain Ultimate will not trigger in Operation: Egg Heist.
Chain UltimateCombat & Events · 1 stepWhen more than 2 Pathfinders are in a party, after one Pathfinder uses an Ultimate, Chain Timing will appear for the other Pathfinders. Using an Ultimate during Chain Timing counts as a successful chain. When more than 2 Pathfinders successfully chain, a powerful Chain Burst will be triggered after the chain ends, dealing massive damage.
Chain Ultimate will not trigger in Operation: Egg Heist.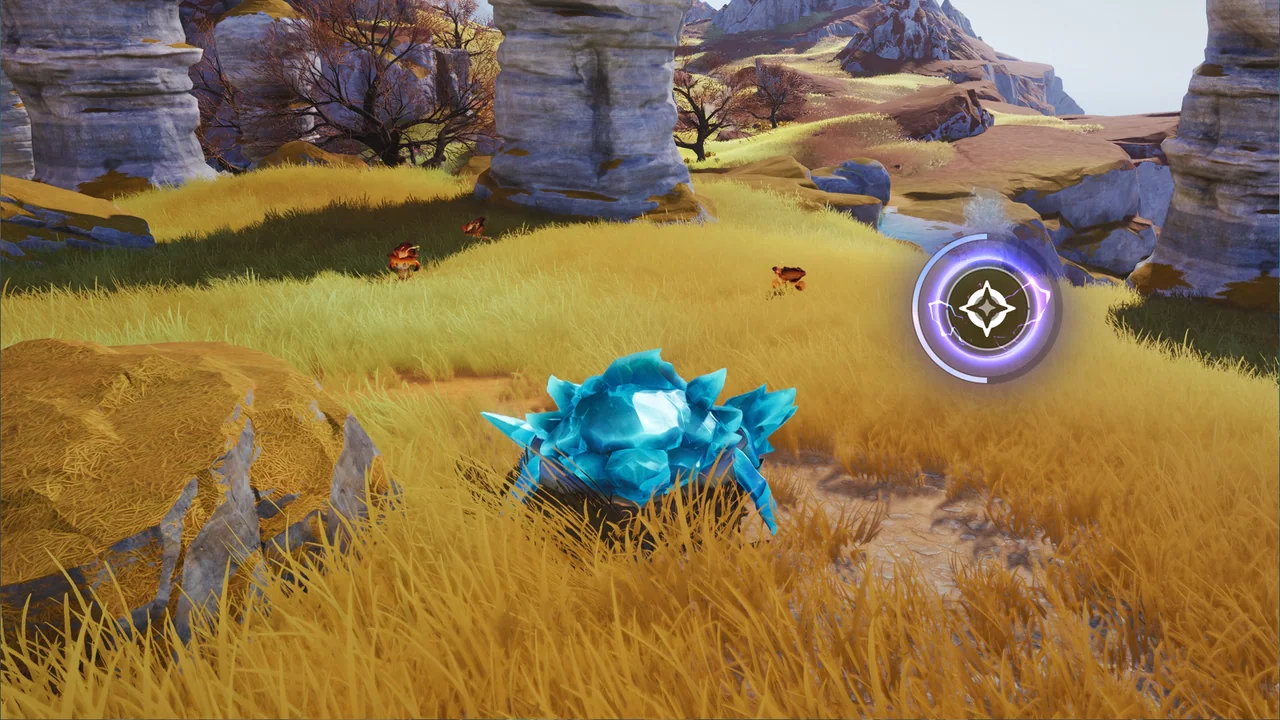 Chain UltimateCombat & Events · 1 stepWhen more than 2 Pathfinders are in a party, after one Pathfinder uses an Ultimate, Chain Timing will appear for the other Pathfinders. Using an Ultimate during Chain Window counts as a successful chain. When more than 2 Pathfinders successfully chain, a powerful Chain Burst will be triggered after the chain ends, dealing massive damage.
Chain Ultimate will not trigger in Operation: Egg Heist.
Chain UltimateCombat & Events · 1 stepWhen more than 2 Pathfinders are in a party, after one Pathfinder uses an Ultimate, Chain Timing will appear for the other Pathfinders. Using an Ultimate during Chain Window counts as a successful chain. When more than 2 Pathfinders successfully chain, a powerful Chain Burst will be triggered after the chain ends, dealing massive damage.
Chain Ultimate will not trigger in Operation: Egg Heist. Command ModeCombat & Events · 2 stepsIn Command Mode, if there is an attackable locked-on target ahead, use the #kHud/NormalAttack#z to give a command. Your active Aniimo will then fight automatically in the direction you command.
 Command ModeCombat & Events · 2 stepsIn Command Mode, if there is an attackable locked-on target ahead, press Attack to give a command. Your active Aniimo will then fight automatically in the direction you command.
 Pathfinder SkillsCombat & Events · 2 stepsIn Command Mode, press #kHud/SkillE#z, #kHud/SkillQ#z, or #kHud/ExploreSkill#z to use Pathfinder Skills.
 Pathfinder SkillsCombat & Events · 2 stepsIn Command Mode, press #kHud/SkillE#z, #kHud/SkillQ#z, or #kHud/ExploreSkill#z to use Pathfinder Skills.
 Pathfinder SkillsCombat & Events · 2 stepsIn Command Mode, press a skill button to use an Active Skill.
 Aniimo Behavior PatternCombat & Events · 3 stepsIn Command Mode, your Aniimo have three behavior modes, which can be switched with #kHud/SwitchPetMode#z.
Attack Mode: The Pathfinder’s Aniimo will actively attack wild Aniimo within range.
Aniimo Behavior PatternCombat & Events · 3 stepsIn Command Mode, your Aniimo have three behavior modes, which can be switched with #kHud/SwitchPetMode#z.
Attack Mode: The Pathfinder’s Aniimo will actively attack wild Aniimo within range. Aniimo Behavior PatternCombat & Events · 3 stepsIn Command Mode, your Aniimo have three behavior modes, which can be switched with #kHud/SwitchPetMode#z.
Attack Mode: The Pathfinder’s Aniimo will actively attack wild Aniimo within range.
Aniimo Behavior PatternCombat & Events · 3 stepsIn Command Mode, your Aniimo have three behavior modes, which can be switched with #kHud/SwitchPetMode#z.
Attack Mode: The Pathfinder’s Aniimo will actively attack wild Aniimo within range. Aniimo Behavior PatternCombat & Events · 3 stepsIn Command Mode, your Aniimo have three behavior modes. Press the Aniimo Combat Mode button to switch between them.
Attack Mode: The Pathfinder’s Aniimo will actively attack wild Aniimo within range.
Aniimo Behavior PatternCombat & Events · 3 stepsIn Command Mode, your Aniimo have three behavior modes. Press the Aniimo Combat Mode button to switch between them.
Attack Mode: The Pathfinder’s Aniimo will actively attack wild Aniimo within range. BREAKCombat & Events · 2 stepsWhen you attack an Aniimo, the yellow BREAK gauge under its status bar will keep decreasing. Once the gauge reaches zero, the Aniimo enters the BREAK state, becoming unable to act and ready to be caught. Press Quick Catch to catch it immediately.
 BREAKCombat & Events · 2 stepsWhen you attack an Aniimo, the yellow BREAK gauge under its status bar will keep decreasing. Once the gauge reaches zero, the Aniimo enters BREAK state, becoming unable to act and ready to be caught. Press #kHud/Interact#z to catch it immediately.
 BREAKCombat & Events · 2 stepsWhen you attack an Aniimo, the yellow BREAK gauge under its status bar will keep decreasing. Once the gauge reaches zero, the Aniimo enters BREAK state, becoming unable to act and ready to be caught. Press #kHud/Interact#z to catch it immediately.
 Lock OnCombat & Events · 4 stepsWhen you are not in lock-on status, moving near a target will show an auto-aim marker on the nearest target. Attacks will automatically aim at the marked target.Lock OnCombat & Events · 4 stepsWhen you are not in lock-on status, moving near a target will show an auto-aim marker on the nearest target. Attacks will automatically aim at the marked target.
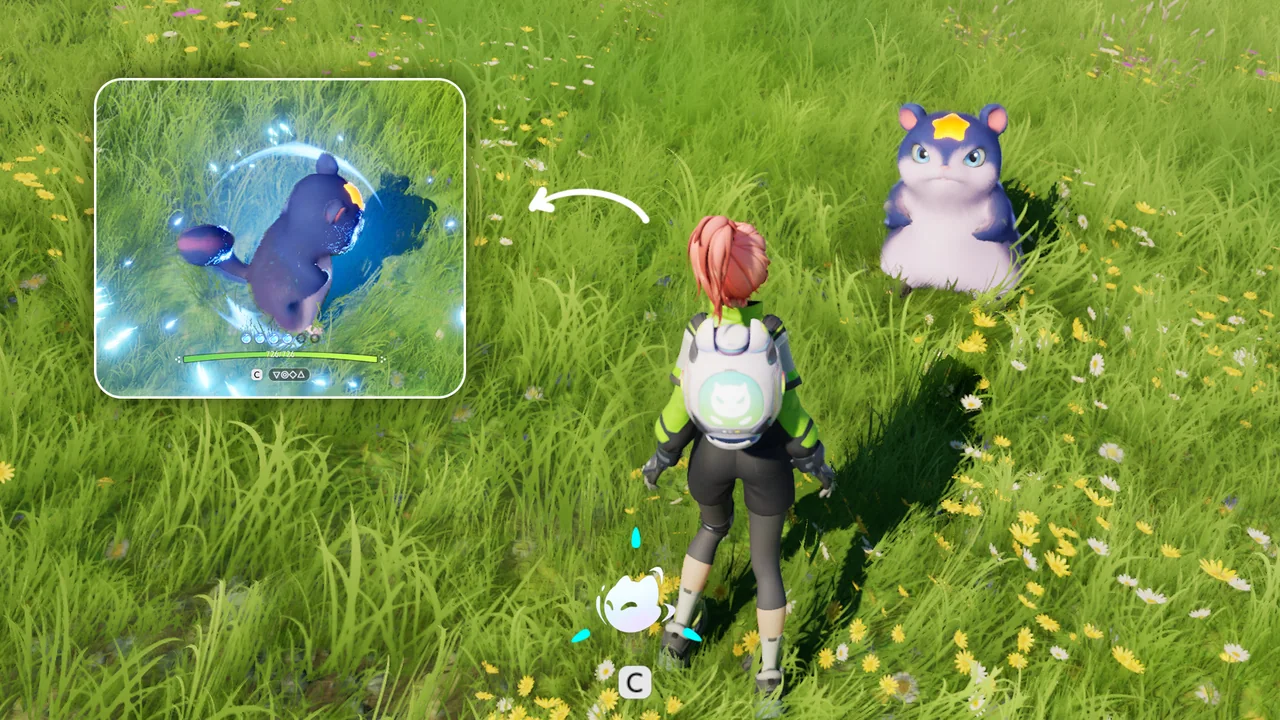 TwineCombat & Events · 1 stepPress #kHud/SwitchPet#z to enter Twine Mode with your Aniimo. Press #kHud/SwitchPet#z again to untwine. In Twine Mode, your character takes the form of an Aniimo and can move and use skills as that Aniimo.
 TwineCombat & Events · 1 stepPress #kHud/SwitchPet#z to enter Twine Mode with your Aniimo. Press #kHud/SwitchPet#z again to untwine. In Twine Mode, your character takes the form of an Aniimo and can move and use skills as that Aniimo.
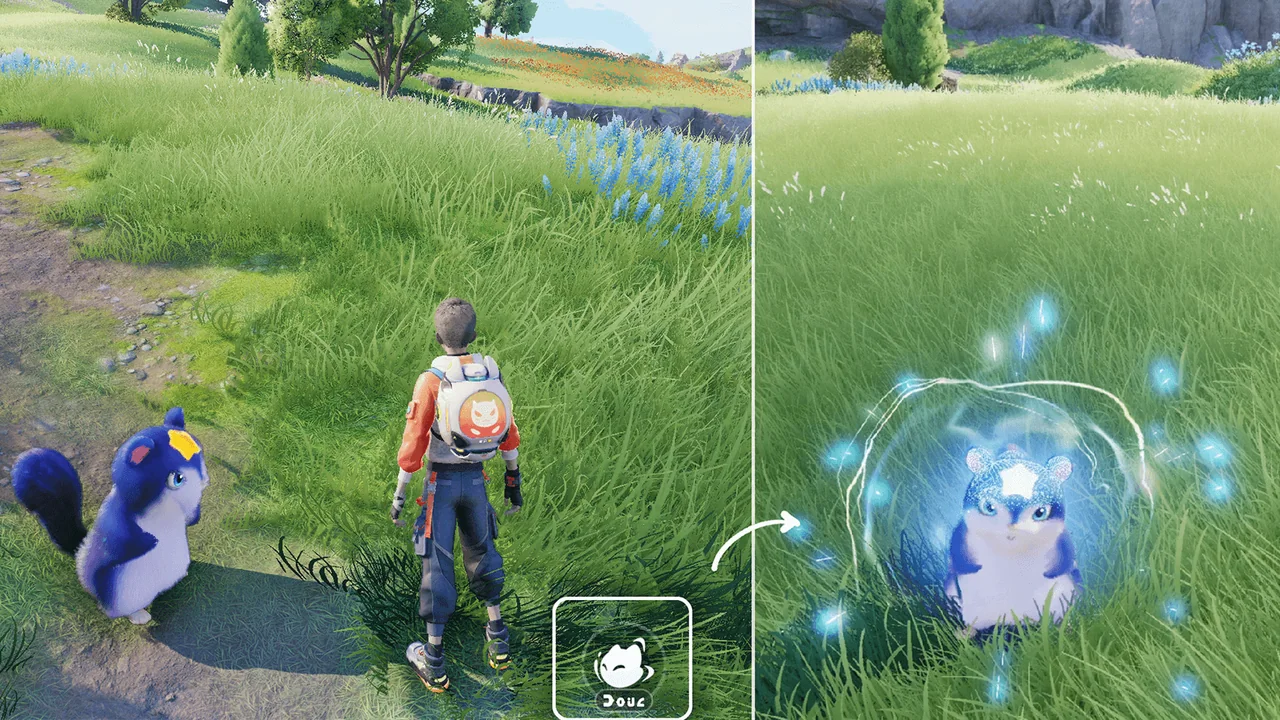 TwineCombat & Events · 1 stepPress the Twine button to enter Twine Mode with your Aniimo. Press the Twine button again to untwine. In Twine Mode, your character takes the form of an Aniimo and can move and use skills as that Aniimo.
 Aim SkillCombat & Events · 1 stepFor aiming skills, press and hold the corresponding skill button to enter Aim mode. While aiming, you can adjust your target by moving the camera. Release the skill button to fire the skill in your chosen direction.Lock-on ModeCombat & Events · 1 stepThere are two lock-on modes:
Manual lock-on: When you are not in lock-on status, press #kCatch/Focus#z to lock onto the current target and enter lock-on status.
Auto lock-on: When you are not in lock-on status, hitting a target will automatically lock onto it and activate lock-on status.
You can change lock-on mode at any time in Settings.Lock-on ModeCombat & Events · 1 stepThere are two lock-on modes:
Manual lock-on: When you are not in lock-on status, press Lock On to lock onto the current target and enter lock-on status.
Auto lock-on: When you are not in lock-on status, hitting a target will automatically lock onto it and activate lock-on status.
You can change lock-on mode at any time in Settings.
Aim SkillCombat & Events · 1 stepFor aiming skills, press and hold the corresponding skill button to enter Aim mode. While aiming, you can adjust your target by moving the camera. Release the skill button to fire the skill in your chosen direction.Lock-on ModeCombat & Events · 1 stepThere are two lock-on modes:
Manual lock-on: When you are not in lock-on status, press #kCatch/Focus#z to lock onto the current target and enter lock-on status.
Auto lock-on: When you are not in lock-on status, hitting a target will automatically lock onto it and activate lock-on status.
You can change lock-on mode at any time in Settings.Lock-on ModeCombat & Events · 1 stepThere are two lock-on modes:
Manual lock-on: When you are not in lock-on status, press Lock On to lock onto the current target and enter lock-on status.
Auto lock-on: When you are not in lock-on status, hitting a target will automatically lock onto it and activate lock-on status.
You can change lock-on mode at any time in Settings. CountersCombat & Events · 1 stepAniimo and their skills have elemental differences that create counters. Use them wisely to deal more damage.
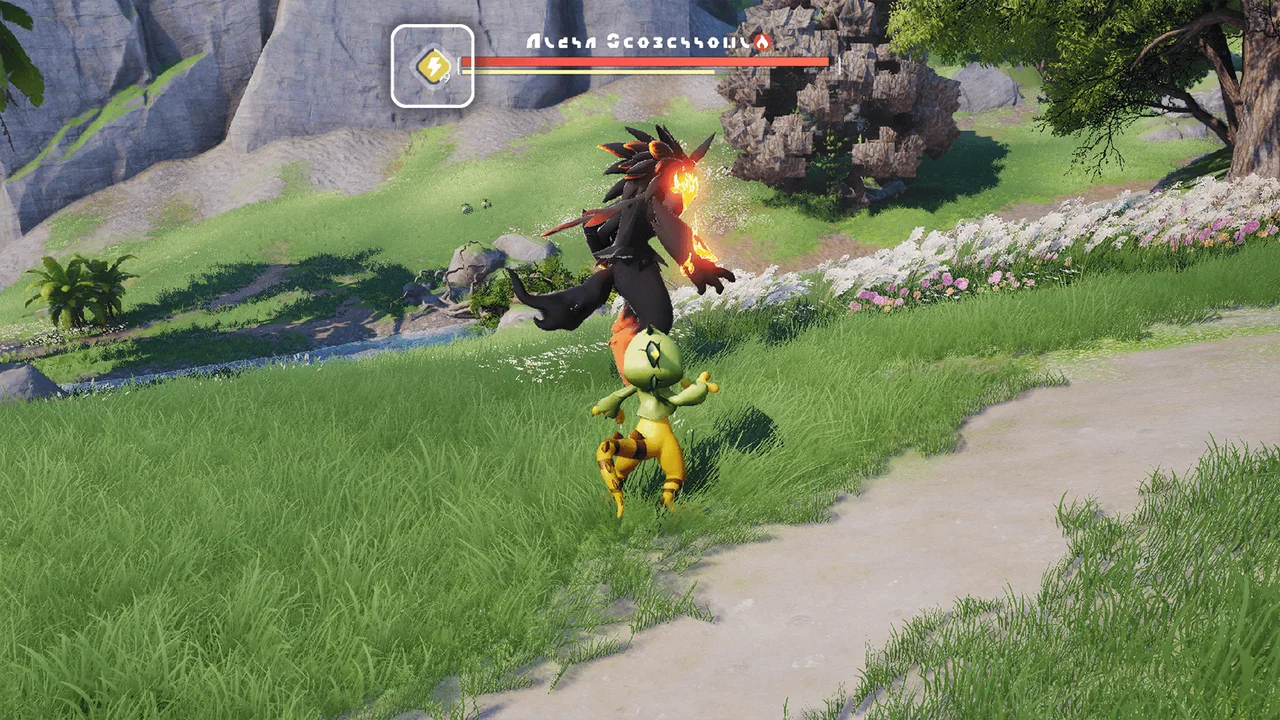 Elemental DebuffCombat & Events · 1 stepSome skills build the target’s elemental debuffs for their corresponding element. Elemental debuffs lower the matching elemental resistance and stack up to 20 times. Debuff buildup decreases over time, and the more debuff stacks there are, the faster the buildup drops. The world’s environment and weather can also build elemental debuffs.
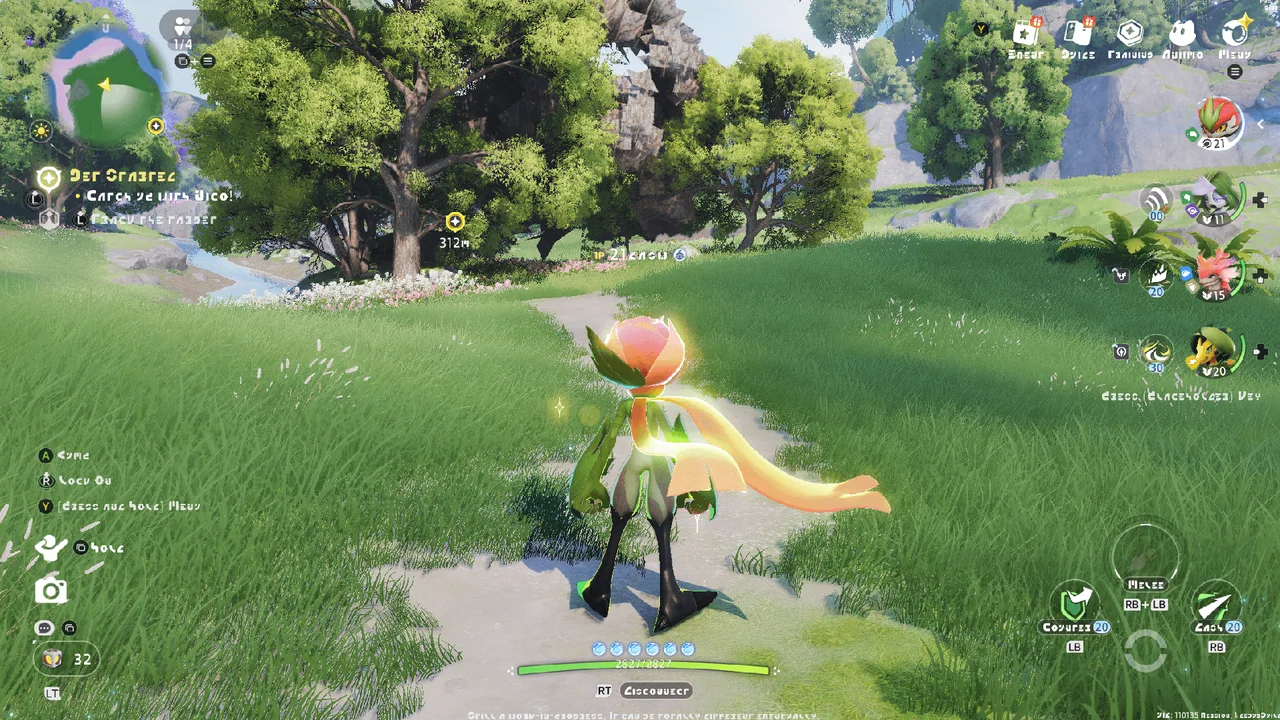 Solo Combat ModeCombat & Events · 1 stepIn Solo Combat Mode, you can freely switch between 4 Aniimo and use all of their skills. This mode is used for world exploration and solo gameplay.
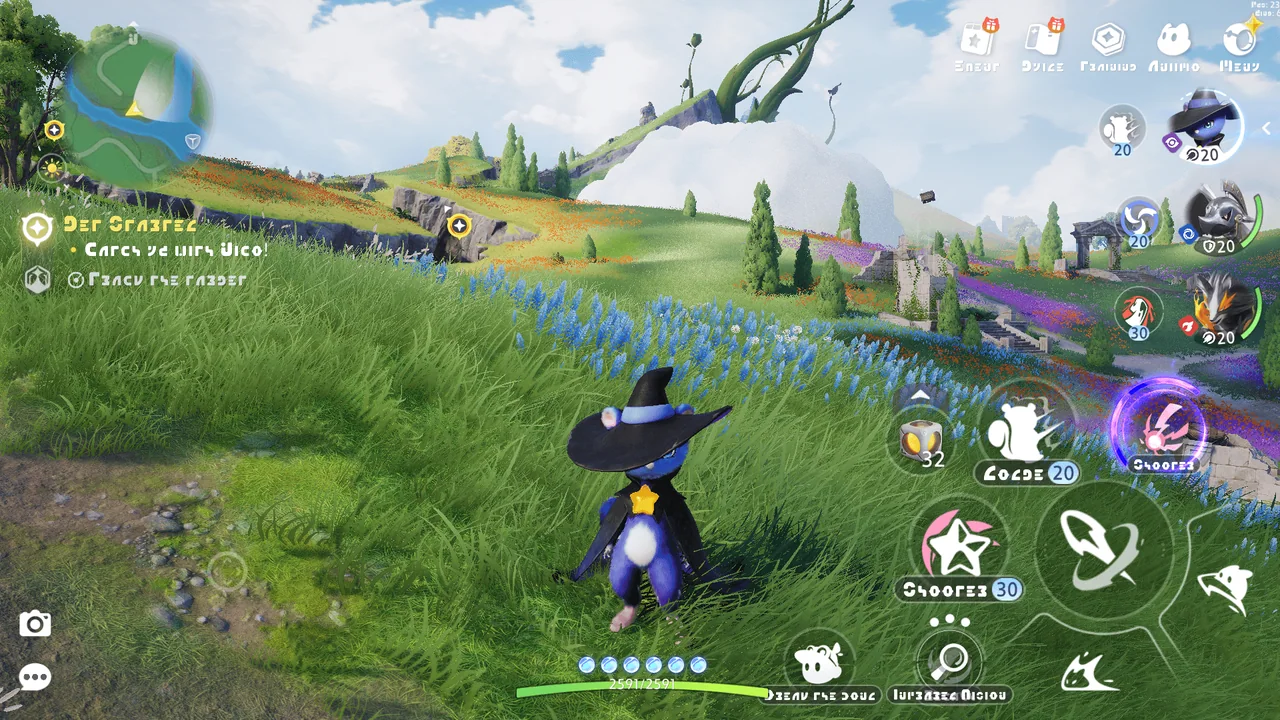 Solo Combat ModeCombat & Events · 1 stepIn Solo Combat Mode, you can freely switch between 4 Aniimo and use all of their skills. This mode is used for world exploration and solo gameplay.
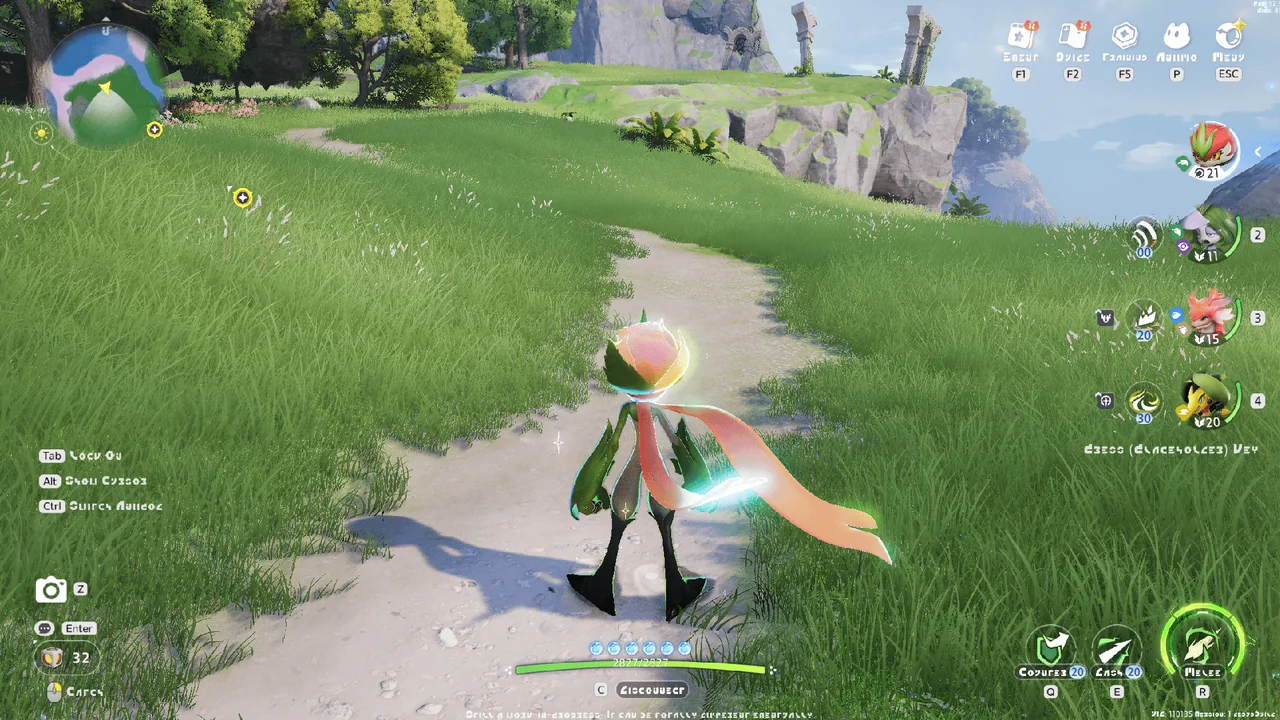 Solo Combat ModeCombat & Events · 1 stepIn Solo Combat Mode, you can freely switch between 4 Aniimo and use all of their skills. This mode is used for world exploration and solo gameplay.
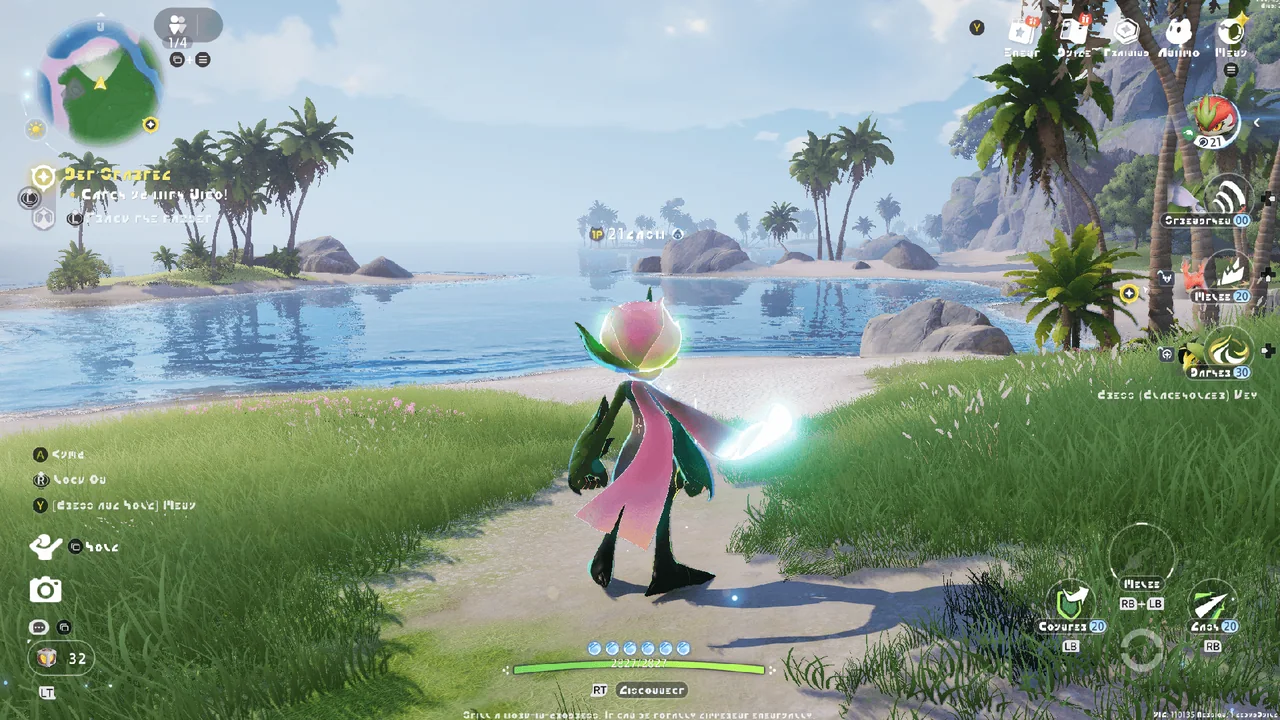 Team Combat ModeCombat & Events · 1 stepIn Team Combat Mode, only the first Aniimo in your party acts as the main active Aniimo. The other three can only support briefly by using core skills, after which you will automatically switch back to the main active Aniimo. This mode is used for team gameplay, such as Holo-Battle Interlink and Operation: Egg Heist.
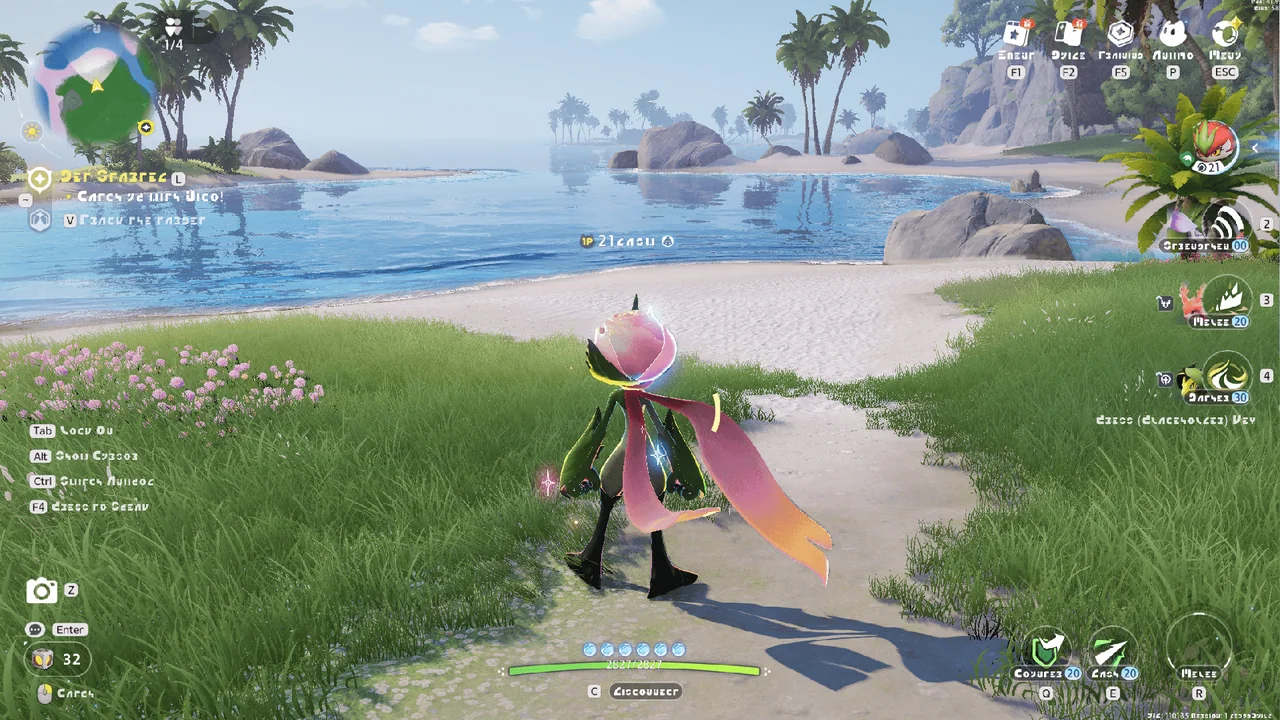 Team Combat ModeCombat & Events · 1 stepIn Team Combat Mode, only the first Aniimo in your party acts as the main active Aniimo. The other three can only support briefly by using core skills, after which you will automatically switch back to the main active Aniimo. This mode is used for team gameplay, such as Holo-Battle Interlink and Operation: Egg Heist.
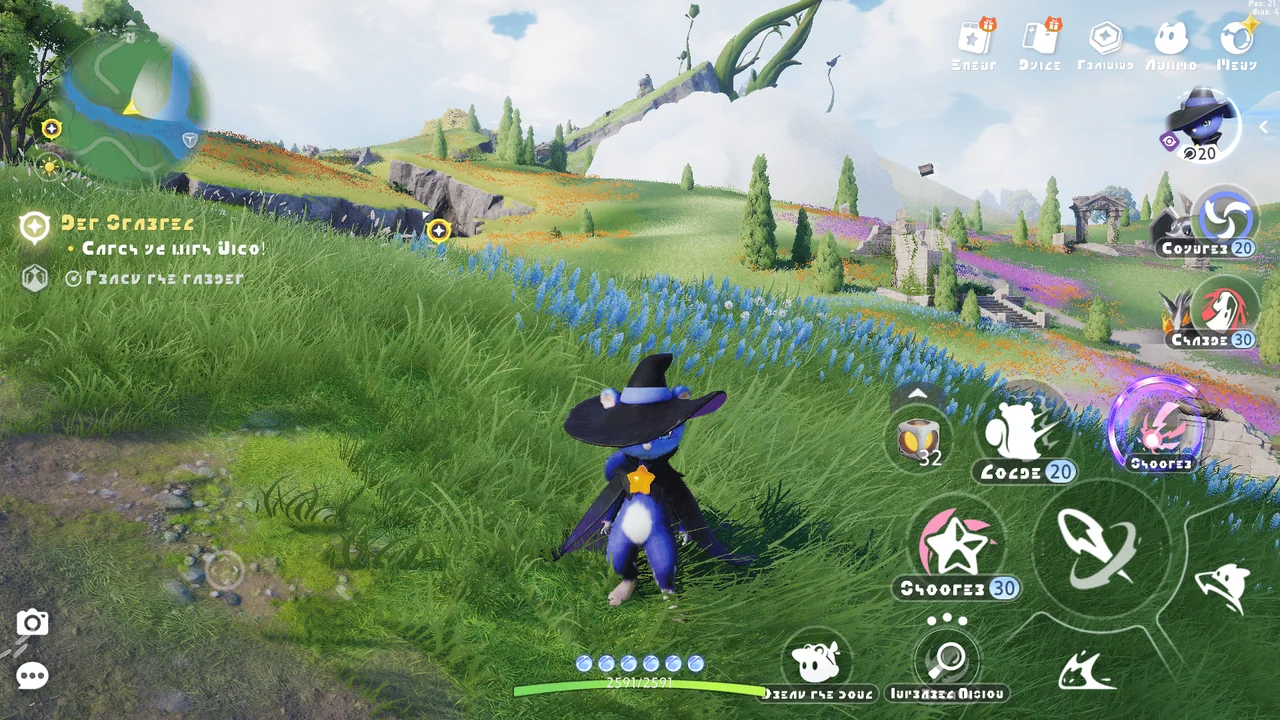 Team Combat ModeCombat & Events · 1 stepIn Team Combat Mode, only the first Aniimo in your party acts as the main active Aniimo. The other three can only support briefly by using core skills, after which you will automatically switch back to the main active Aniimo. This mode is used for team gameplay, such as Holo-Battle Interlink and Operation: Egg Heist.
 Aniimo RoleCombat & Events · 5 stepsAniimo have five roles, each with its own strengths:
DPS: Focuses on dealing heavy HP damage. They work best when switched in while the target is in BREAK.
Aniimo RoleCombat & Events · 5 stepsAniimo have five roles, each with its own strengths:
DPS: Focuses on dealing heavy HP damage. They work best when switched in while the target is in BREAK. Alpha TubsterCombat & Events · 1 stepWhen Alpha Tubster summons its Storm Shield, deal enough damage to break it and force the Alpha into the Weakened state.
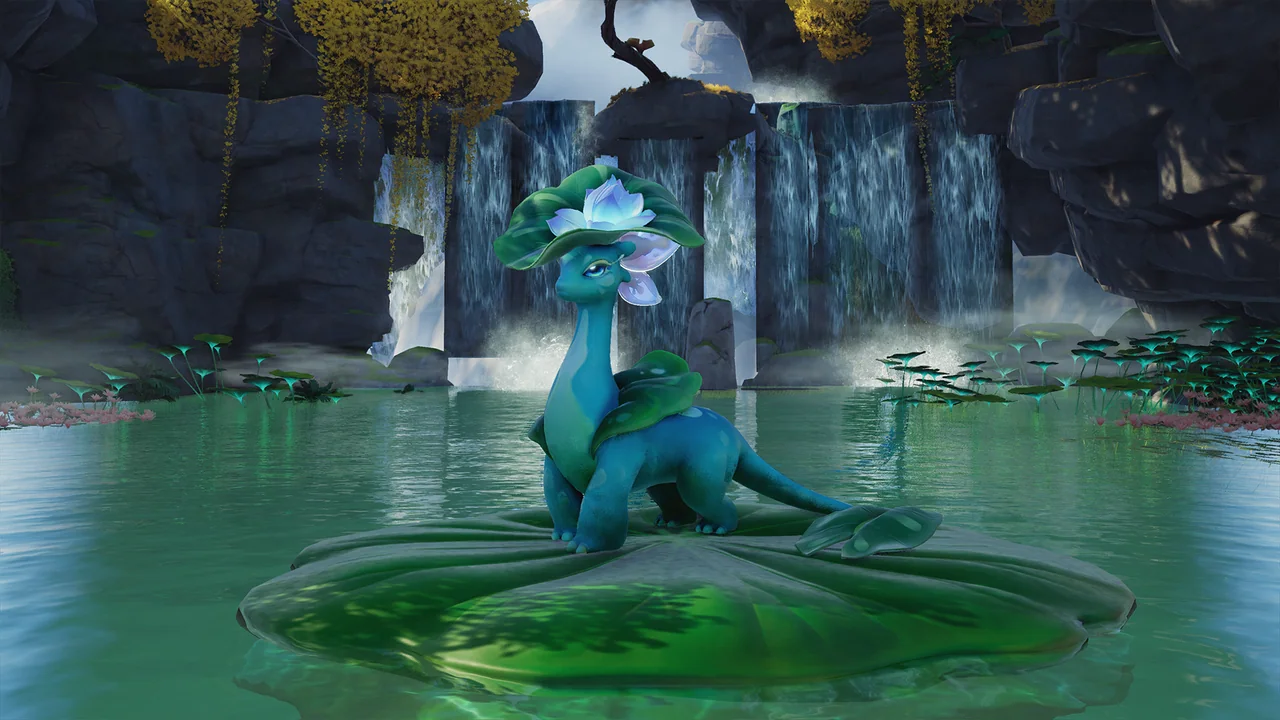 Alpha LeafyCombat & Events · 1 stepEvery so often, the Alpha Leafy will destroy the lotus leaves on the water’s surface. Releasing Ice element skills can create ice blocks to serve as footholds, giving you more space to move.
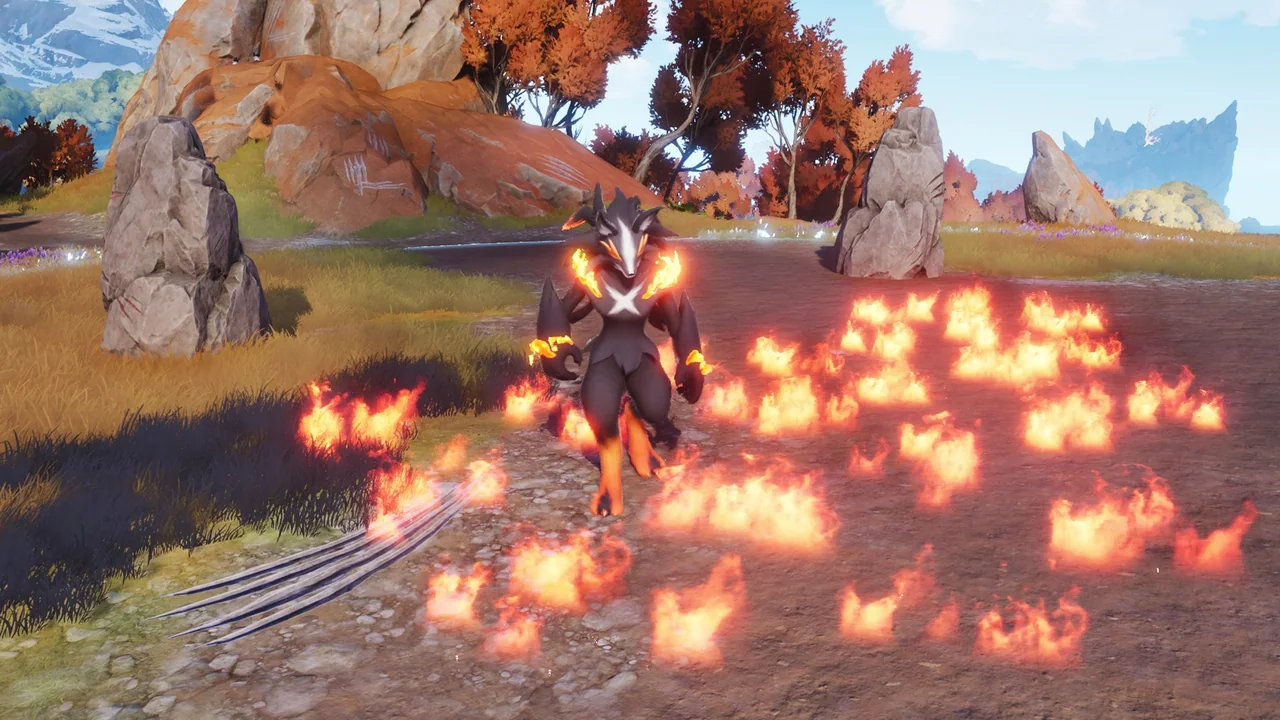 Alpha ScorchhowlCombat & Events · 1 stepThe Alpha Scorchhowl leaves continuously burning flames in the areas it has attacked, and passing through them invites Fire Debuff.
Using Water element skills can quickly put out the fire.
Alpha ScorchhowlCombat & Events · 1 stepThe Alpha Scorchhowl leaves continuously burning flames in the areas it has attacked, and passing through them invites Fire Debuff.
Using Water element skills can quickly put out the fire.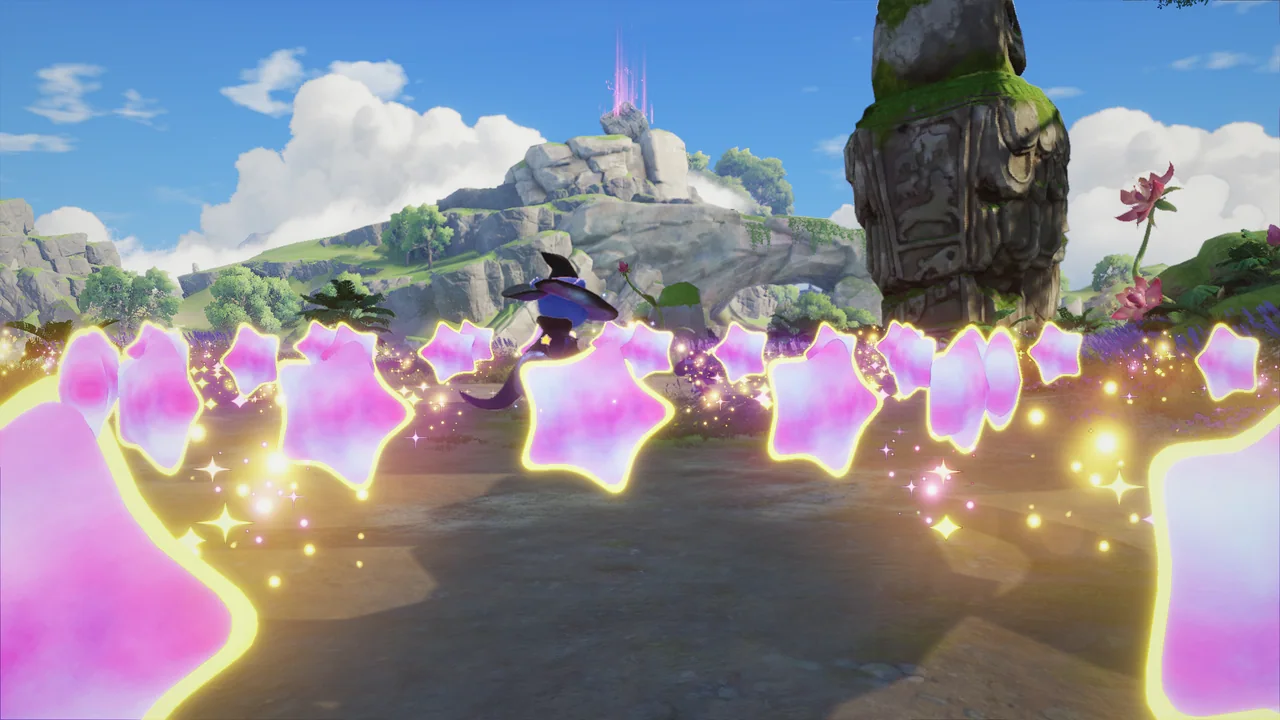 Alpha StellarysCombat & Events · 1 stepDuring combat, the Alpha will unleash various Energy Waves. Aniimo with special movement abilities such as Tunnel or Fly can handle and dodge them more easily.
 Alpha GeoclawCombat & Events · 1 stepDuring battle, the Alpha will unleash an Ice Prison to restrict the Pathfinder’s movement. Use Fire skills to destroy it quickly. When the Alpha uses Tunnel, ranged attacks cannot hit, but Pound skills can force it out.
 Alpha IgnitisCombat & Events · 1 stepAlpha Ignitis can enter Blade state, greatly increasing its ATK.
Watch its attack timing carefully. Strike when it leaves an opening to make it enter BREAK faster.
Alpha IgnitisCombat & Events · 1 stepAlpha Ignitis can enter Blade state, greatly increasing its ATK.
Watch its attack timing carefully. Strike when it leaves an opening to make it enter BREAK faster. Alpha BlazenCombat & Events · 1 stepThe Blazen Alpha enters Overcharged, frequently dashing toward its target at high speed. Place obstacles in its path for some unexpected results.
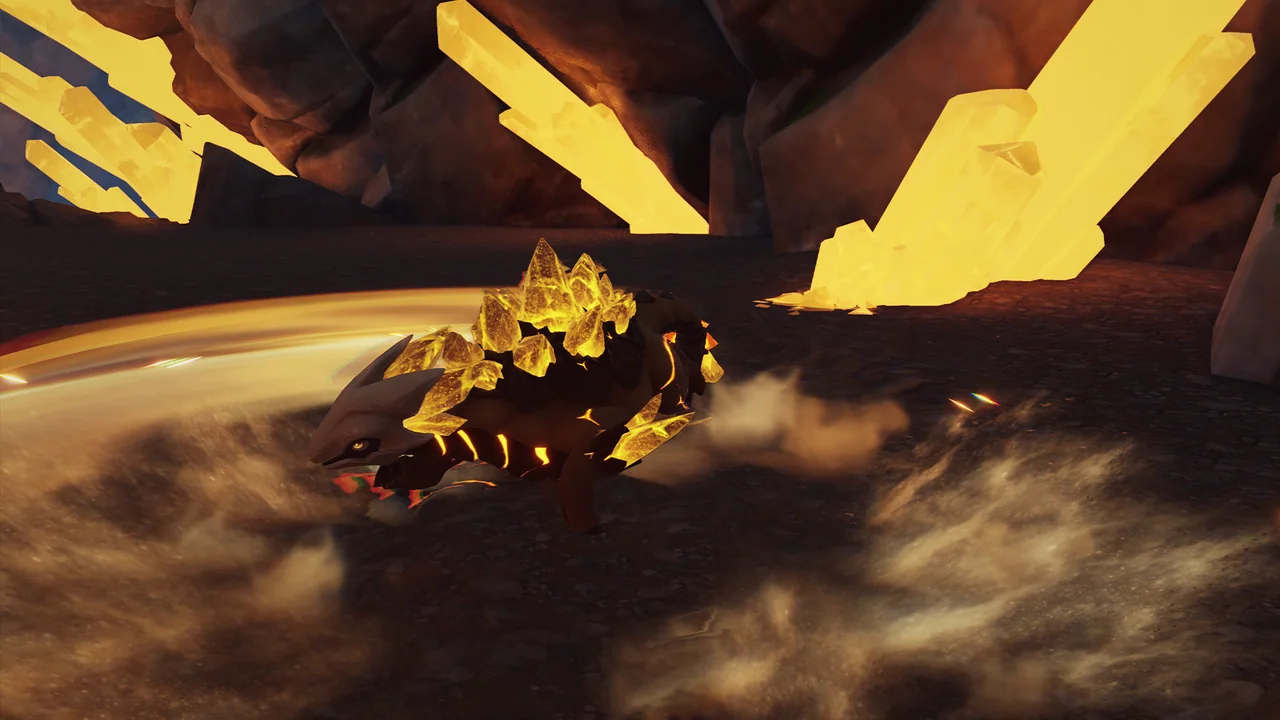 Alpha MinespineCombat & Events · 1 stepAfter the Minespine Alpha swings its tail hammer and slams the ground, it unleashes a Seismic Wave. Staying on higher ground lets you avoid this damage. Bringing an Aniimo that can alter terrain makes it easier to handle.
 Alpha IrisalCombat & Events · 1 stepWhen the Alpha Irisal is in danger, it will summon Iris to restore its HP.
 Alpha TurboCombat & Events · 2 stepsWhen Alpha Turbo takes flight, try luring it to charge through nearby Nimbi so they get stuck to it.
 Alpha LuminelleCombat & Events · 2 stepsThe Alpha Luminelle will build up its own charge. After several charge-ups, it becomes Fully Charged. When the Alpha is forced into the Break State, its charge buildup can be cleared.
 Omega SherroCombat & Events · 1 stepDuring battle, Sherro will periodically gather Water to form a giant sword and unleash a wide-range water wave attack. Be sure to dodge it. Having an Aniimo with Element Resistance take Sherro’s damage is also effective.
 Omega TuckinCombat & Events · 2 stepsDuring battle, Tuckin will create a Giant Vine Hammer to attack the Pathfinder. Strike at the right moment to break the hammer and force Tuckin into the Break State. Fire skills are more effective.
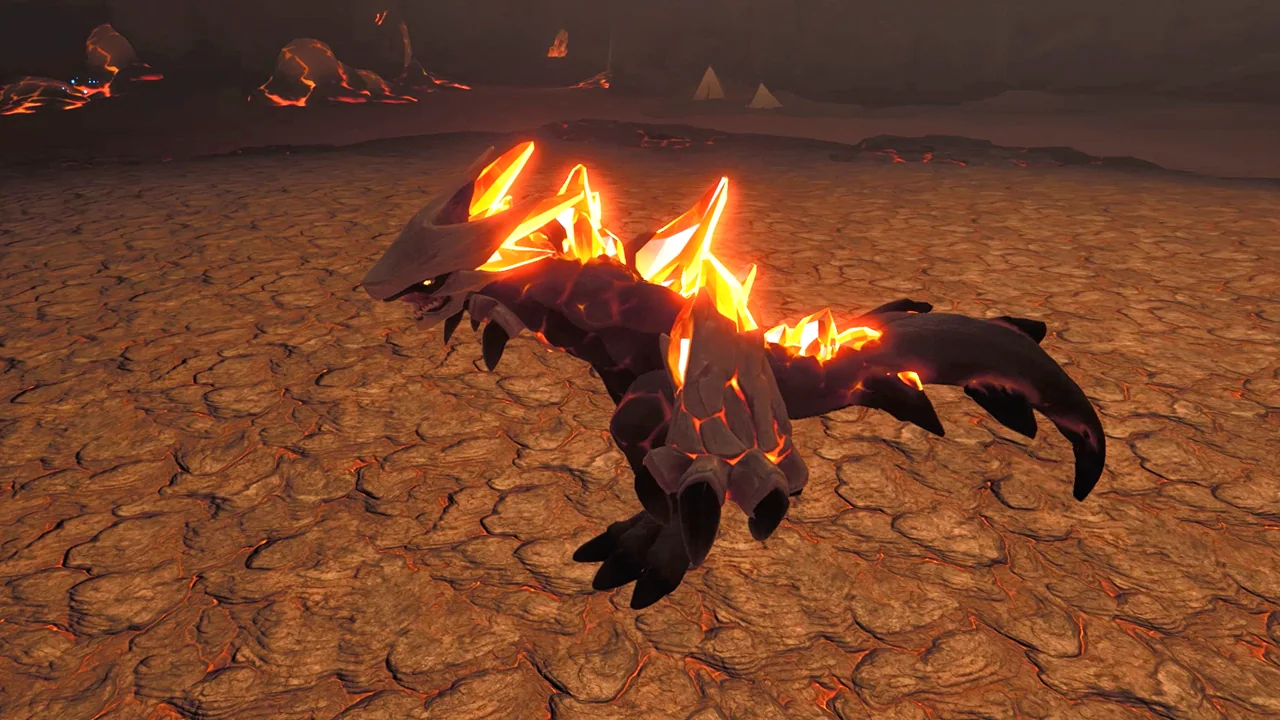 Alpha MagmarexCombat & Events · 1 stepAlpha Magmarex will build up heat. At enough stacks of heat, it enters Overheated state. Triggering BREAK can remove its Overheated state.
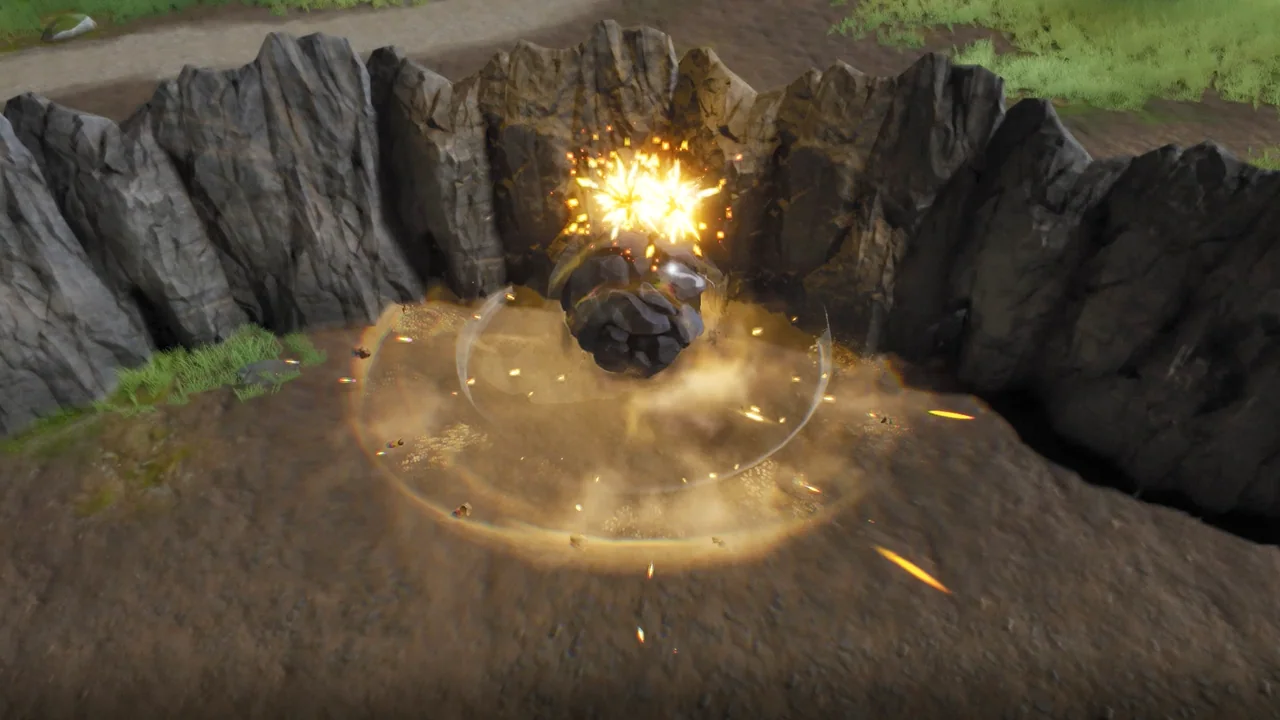 Alpha BouldusCombat & Events · 1 stepDuring battle, Bouldus creates rock walls to trap Pathfinders, then rolls around inside them. The walls deal heavy damage to whoever touches them, so stay clear.
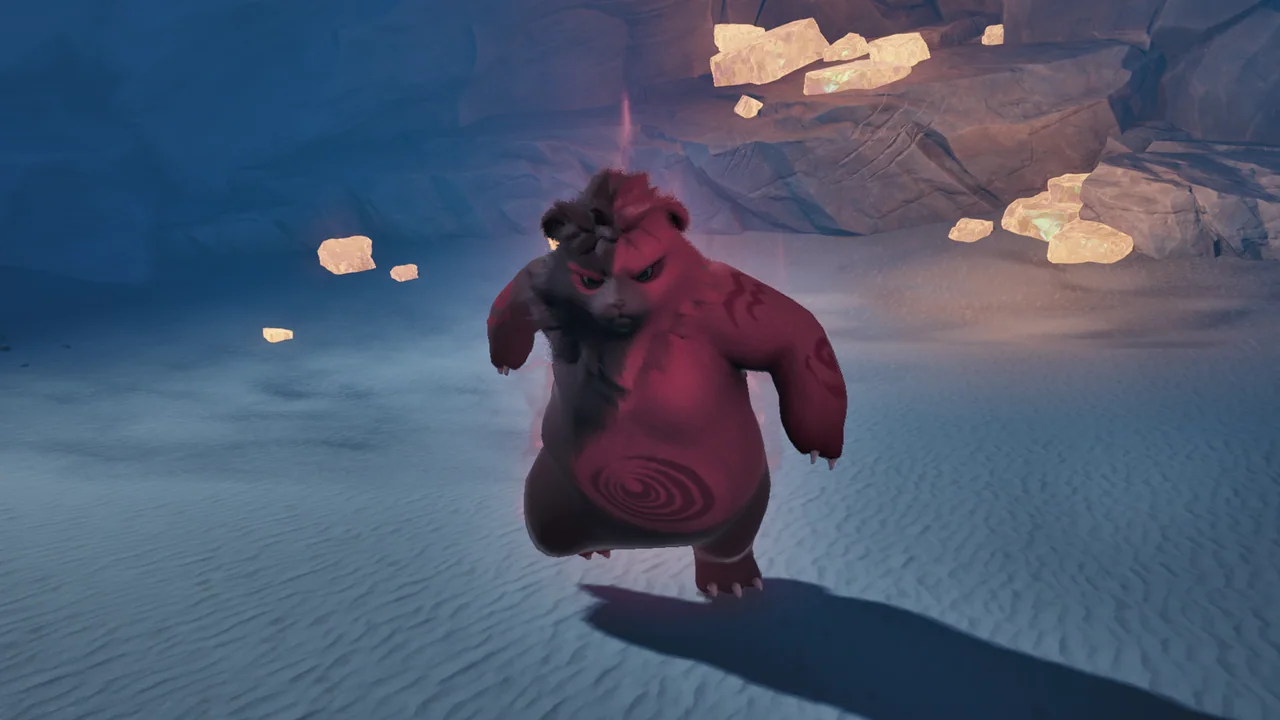 Alpha GrizboCombat & Events · 1 stepEach time Grizbo misses an attack, it gains 1 stack of Rage. Above 5 stacks, it becomes Enraged for 20s, greatly increasing its damage and attack frequency.
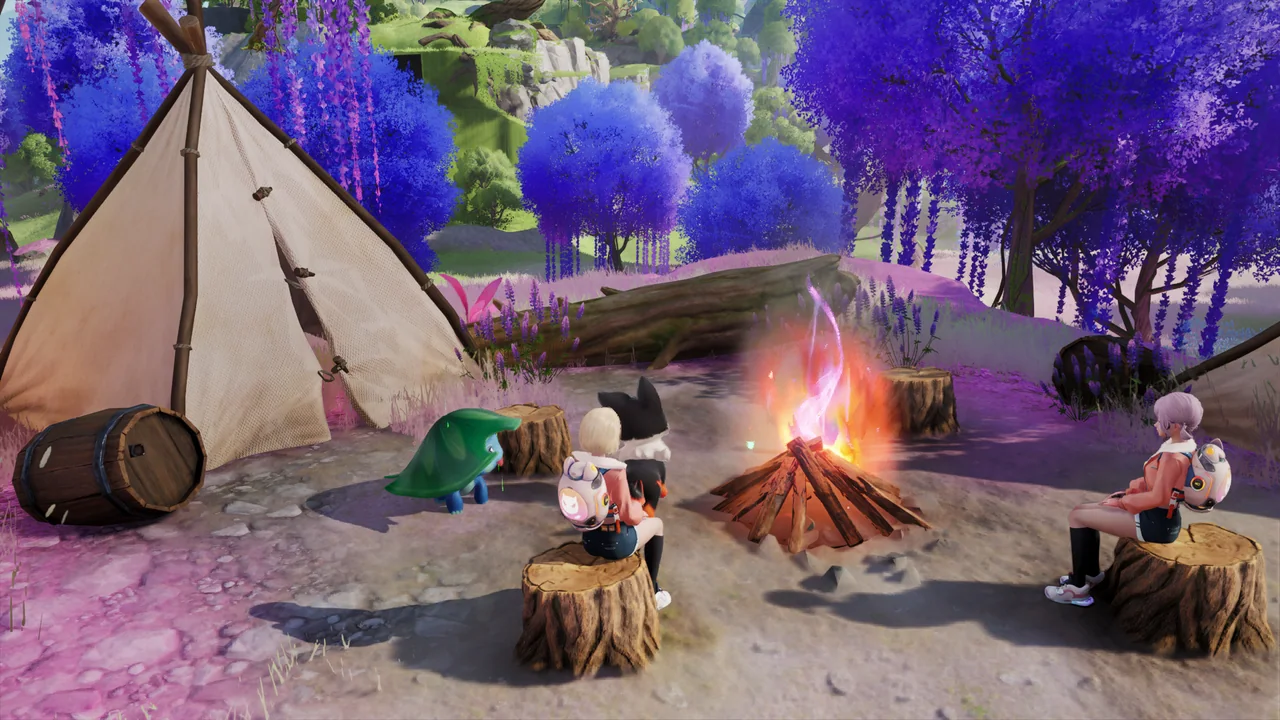 BonfireCombat & Events · 1 stepBonfires scattered across the Idyll continent burn with Vein energy—approach one to steadily restore your Aniimo’s HP, or perhaps meet fellow Pathfinders for a rest and to share natural resources!
 Egg Heist PreparationCombat & Events · 4 stepsBefore exploring, equip a backpack. A good backpack lets you bring back more ancient relics!
 Operation: Egg Heist Team ModeCombat & Events · 3 stepsOperation: Egg Heist Team Mode is a PvE mode. After your team lands on the lost island, collect supplies and find the entrance to the Lost Sanctum as quickly as possible!
 Operation: Egg HeistCombat & Events · 3 stepsOperation: Egg Heist is a PvP mode with up to six parties!
In PvP, participating Pathfinders’ Aniimo attributes are balanced. Attribute bonuses from equipped Held Items and their Runes do not take effect—only Held Item effects apply. (Item quality is ignored, and effects default to Legendary quality.)
Operation: Egg HeistCombat & Events · 3 stepsOperation: Egg Heist is a PvP mode with up to six parties!
In PvP, participating Pathfinders’ Aniimo attributes are balanced. Attribute bonuses from equipped Held Items and their Runes do not take effect—only Held Item effects apply. (Item quality is ignored, and effects default to Legendary quality.) Pathfinder ChallengeCombat & Events · 2 stepsSome Pathfinders from the institute can be found across Idyll. Challenge them to Twine Mode battles and defeat them to earn great rewards.
 Sea of Flowers AssessmentCombat & Events · 1 stepDuring battle, Irisal quickly builds Dance Power by attacking Pathfinders while on Turf. When Dance Power reaches its limit, Irisal enters the Dance Power Unleashed state. In this state, it can cast any non-Ultimate skill at no cost, then exits Dance Power Unleashed.
 Beast Fang Ridge AssessmentCombat & Events · 1 stepDuring battle, Magmarex continually applies a Fire Debuff to nearby Pathfinders and stuns distant ones. When it inflicts Break on a Pathfinder, it switches to Scorchhowl and uses Burn Breaker.
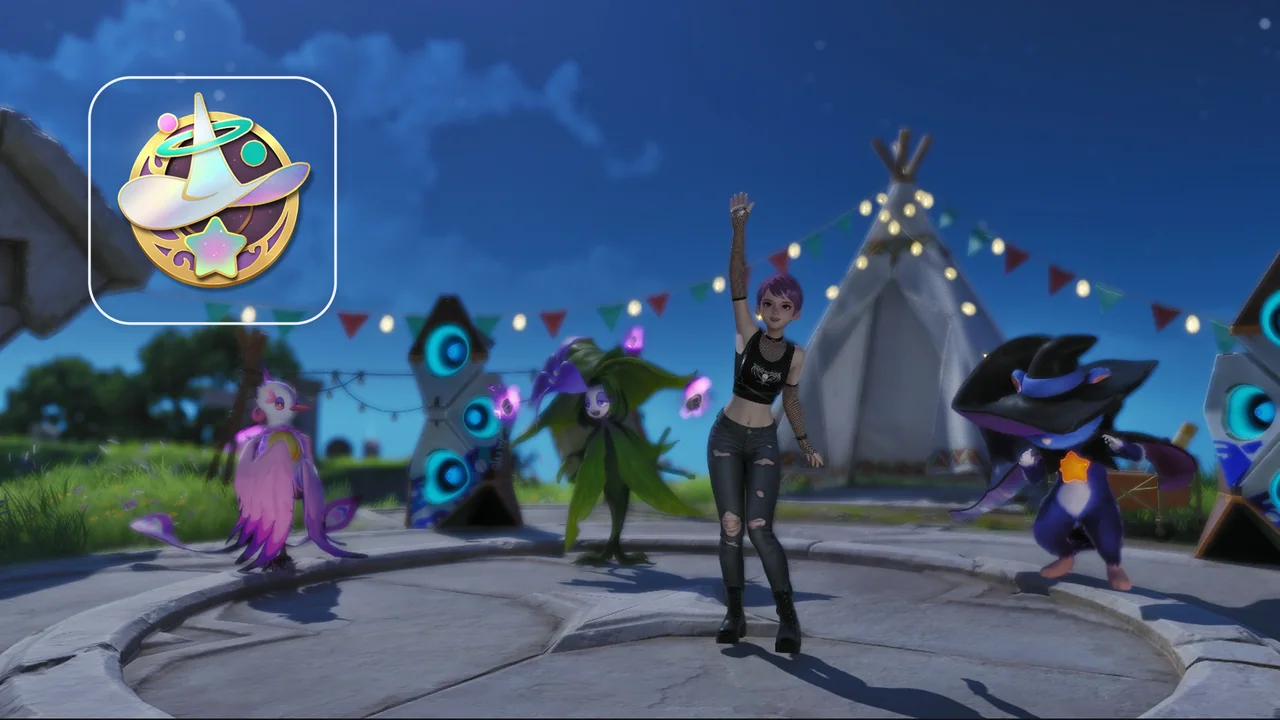 Berylline Vale AssessmentCombat & Events · 1 stepFragrancier’s [Secret Fragrance] mark increases Dark basic attack damage and can deal even more damage when paired with Stellarys’s trait. Hexxin’s skill applies [Curse]—basic attacks that hit targets with [Curse] restore more EP.
 Rosetower Woods AssessmentCombat & Events · 1 stepThornblade’s skills increase its own basic attack damage and build Melloblum’s [Rose Mark], reducing Melloblum’s skill cost. Watch out for Thornblade’s counter when casting skills.
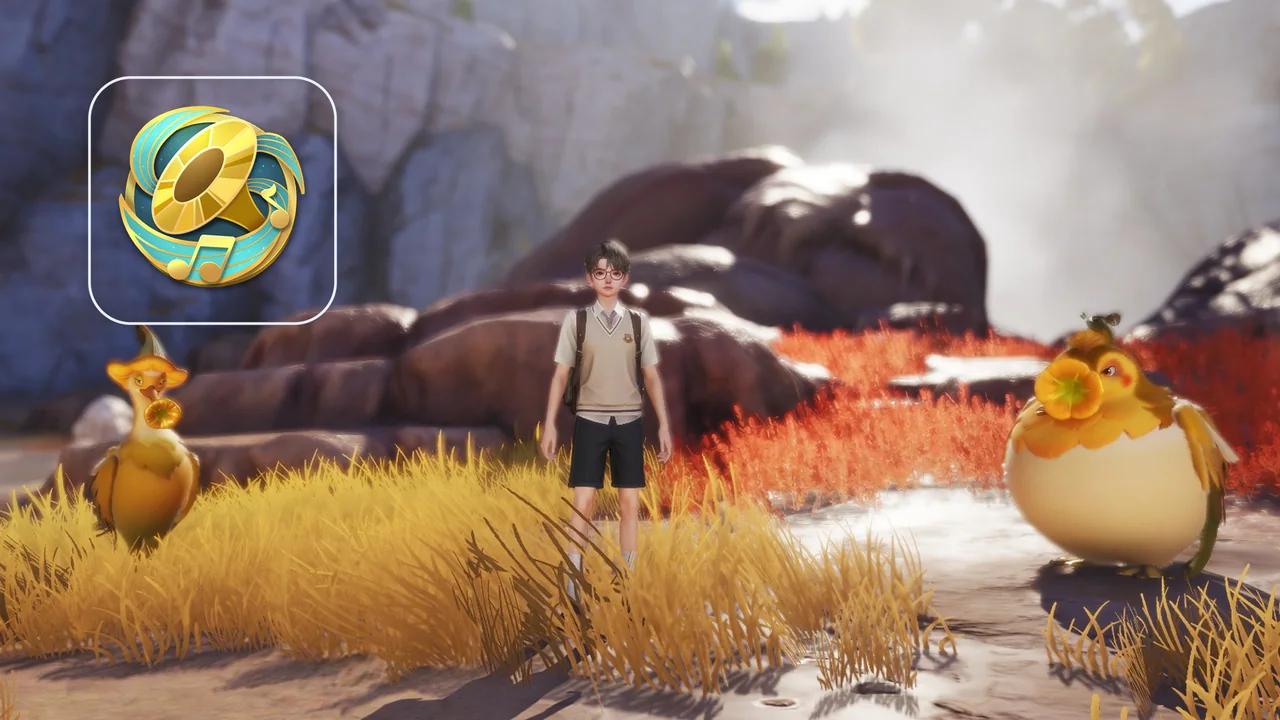 Zephyrus Landbridge AssessmentCombat & Events · 1 stepChirpi plays [Waltz], Tromber plays [March], and Tubster plays [Concerto] when triggering BREAK. Collect all three Movements to greatly enhance Cornet’s skill!
 Tideblossom Coast AssessmentCombat & Events · 1 stepErlath’s bubble domain and the puddles created by Piopiota let Sherro’s enhanced skills deal higher damage.
 Lita’s AssessmentCombat & Events · 1 stepLita will send out Aniimo of various elements in battle, so making good use of elemental counters is the key to victory.
Exploration 46
 Climb/Swim/FlyExploration · 4 stepsClimbing, swimming, and flying are three common Pathfinding abilities. They can be used in the following ways:
Pathfinders can swim while in a non-twined state.
Some Aniimo can use climbing, swimming, or flying abilities while deployed and twined or when equipped for Pathfinding.Climb/Swim/FlyExploration · 4 stepsClimbing, swimming, and flying are three common Pathfinding abilities. They can be used in the following ways:
Pathfinders can swim while in a non-twined state.
Some Aniimo can use climbing, swimming, or flying abilities while deployed and twined or when equipped for Pathfinding.Climb/Swim/FlyExploration · 4 stepsClimbing, swimming, and flying are three common Pathfinding abilities. They can be used in the following ways:
Pathfinders can swim while in a non-twined state.
Some Aniimo can use climbing, swimming, or flying abilities while deployed and twined or when equipped for Pathfinding.
Climb/Swim/FlyExploration · 4 stepsClimbing, swimming, and flying are three common Pathfinding abilities. They can be used in the following ways:
Pathfinders can swim while in a non-twined state.
Some Aniimo can use climbing, swimming, or flying abilities while deployed and twined or when equipped for Pathfinding.Climb/Swim/FlyExploration · 4 stepsClimbing, swimming, and flying are three common Pathfinding abilities. They can be used in the following ways:
Pathfinders can swim while in a non-twined state.
Some Aniimo can use climbing, swimming, or flying abilities while deployed and twined or when equipped for Pathfinding.Climb/Swim/FlyExploration · 4 stepsClimbing, swimming, and flying are three common Pathfinding abilities. They can be used in the following ways:
Pathfinders can swim while in a non-twined state.
Some Aniimo can use climbing, swimming, or flying abilities while deployed and twined or when equipped for Pathfinding.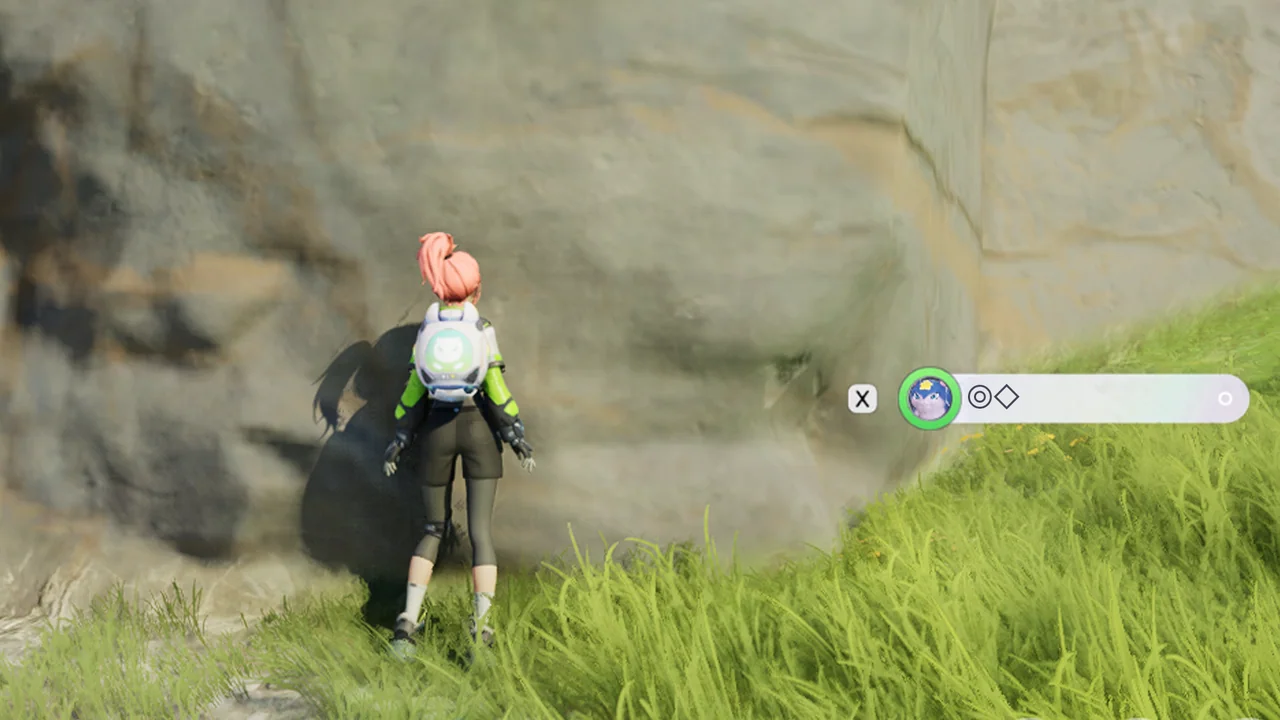 ClimbExploration · 1 stepAfter obtaining Celestis, you gain enhanced climbing ability. Approach a wall, then press #kPlayer/ClimbJump#z to start climbing. Press #kPlayer/ClimbJump#z again to stop. Climbing costs Stamina.
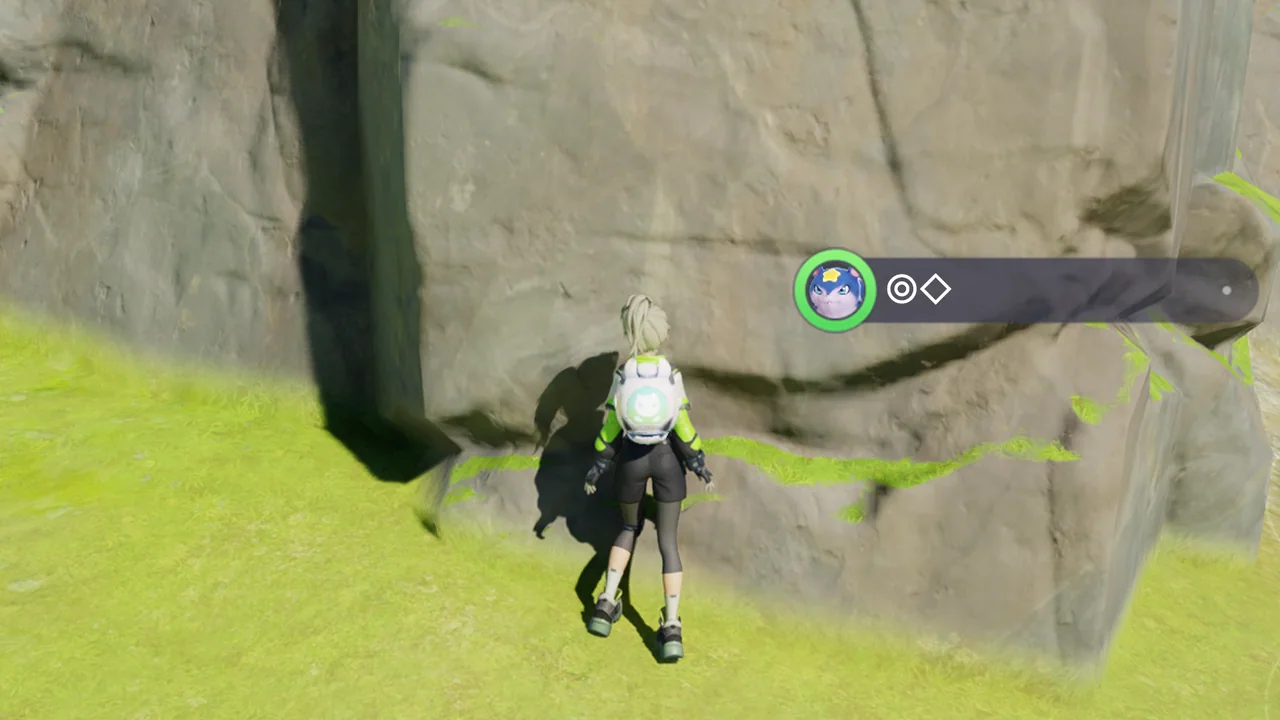 ClimbExploration · 1 stepAfter obtaining Celestis, you gain enhanced climbing ability. Approach a wall and press the button shown in the prompt to start climbing. Press it again to stop climbing.
Climbing costs Stamina.
ClimbExploration · 1 stepAfter obtaining Celestis, you gain enhanced climbing ability. Approach a wall and press the button shown in the prompt to start climbing. Press it again to stop climbing.
Climbing costs Stamina. SwimExploration · 1 stepAfter obtaining Susuta or Skippy, you gain stronger swimming ability. You’ll start swimming automatically near deep water and stop automatically after leaving it.
Press #kPlayer/StartSprint#z to swim faster. This costs Stamina.SwimExploration · 1 stepAfter obtaining Susuta or Skippy, you gain enhanced swimming ability. Swimming starts automatically when you enter deep water and stops automatically when you leave it.
Swimming costs Stamina.
SwimExploration · 1 stepAfter obtaining Susuta or Skippy, you gain stronger swimming ability. You’ll start swimming automatically near deep water and stop automatically after leaving it.
Press #kPlayer/StartSprint#z to swim faster. This costs Stamina.SwimExploration · 1 stepAfter obtaining Susuta or Skippy, you gain enhanced swimming ability. Swimming starts automatically when you enter deep water and stops automatically when you leave it.
Swimming costs Stamina. FlyExploration · 3 stepsAfter obtaining a Celestis, you gain Level 1 Flying Ability. Press #kPlayer/Jump#z while airborne to start flying. Press #kFly/StopFly#z to stop flying.
Press #kFly/GlideRise#z to use "Rise," quickly rising upward at a high Stamina cost.FlyExploration · 3 stepsAfter obtaining a Celestis, you gain the ability to fly. Follow the button prompt that appears while airborne to start flying, then press it again to stop.
Press Jump to use "Rise," quickly rising upward at a high Stamina cost.
FlyExploration · 3 stepsAfter obtaining a Celestis, you gain Level 1 Flying Ability. Press #kPlayer/Jump#z while airborne to start flying. Press #kFly/StopFly#z to stop flying.
Press #kFly/GlideRise#z to use "Rise," quickly rising upward at a high Stamina cost.FlyExploration · 3 stepsAfter obtaining a Celestis, you gain the ability to fly. Follow the button prompt that appears while airborne to start flying, then press it again to stop.
Press Jump to use "Rise," quickly rising upward at a high Stamina cost. ElemancyExploration · 2 stepsAniimo have all kinds of elemental abilities. Emberpup can breathe fire, while Skippy can spray water and release chilling air.
 MechanismsExploration · 3 steps[Bouncy Pad]: A plant that grows near water. When its leaves are affected by water skills or water in the environment, it will absorb water and grow. Once grown, the plant becomes springy and can bounce Pathfinders and Aniimo upward.
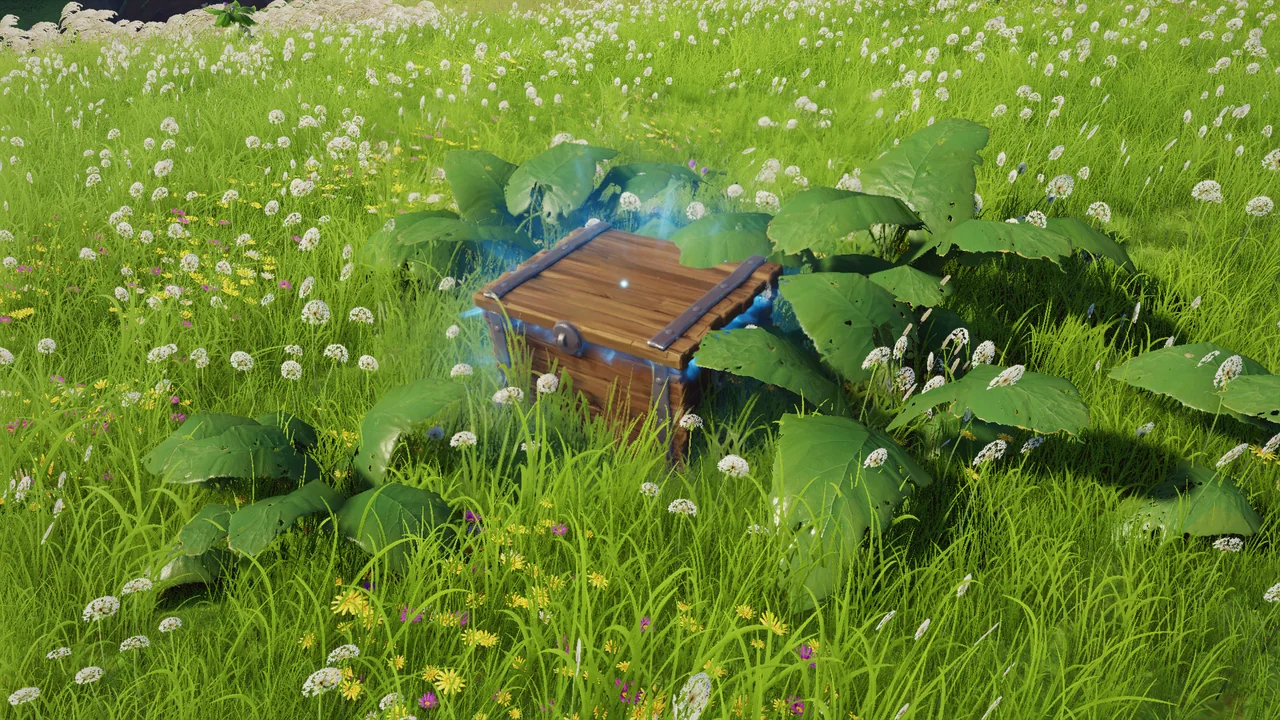 CollectiblesExploration · 2 steps[Chest]: Chests can be found throughout the world. Open them to receive various rewards.
 SanctumExploration · 5 stepsSanctums were built by the Ancient Idyllians to repair the transmission of Vein energy. Scattered throughout Idyll’s Vein layers, these Ancient Idyll Civilization structures are powered by Mechina mechanisms.
 Glimmer TreeExploration · 2 stepsGlimmer Trees are special plants found in Mistwoods. Press the prompted button to activate one, then use it to light up the darkness.
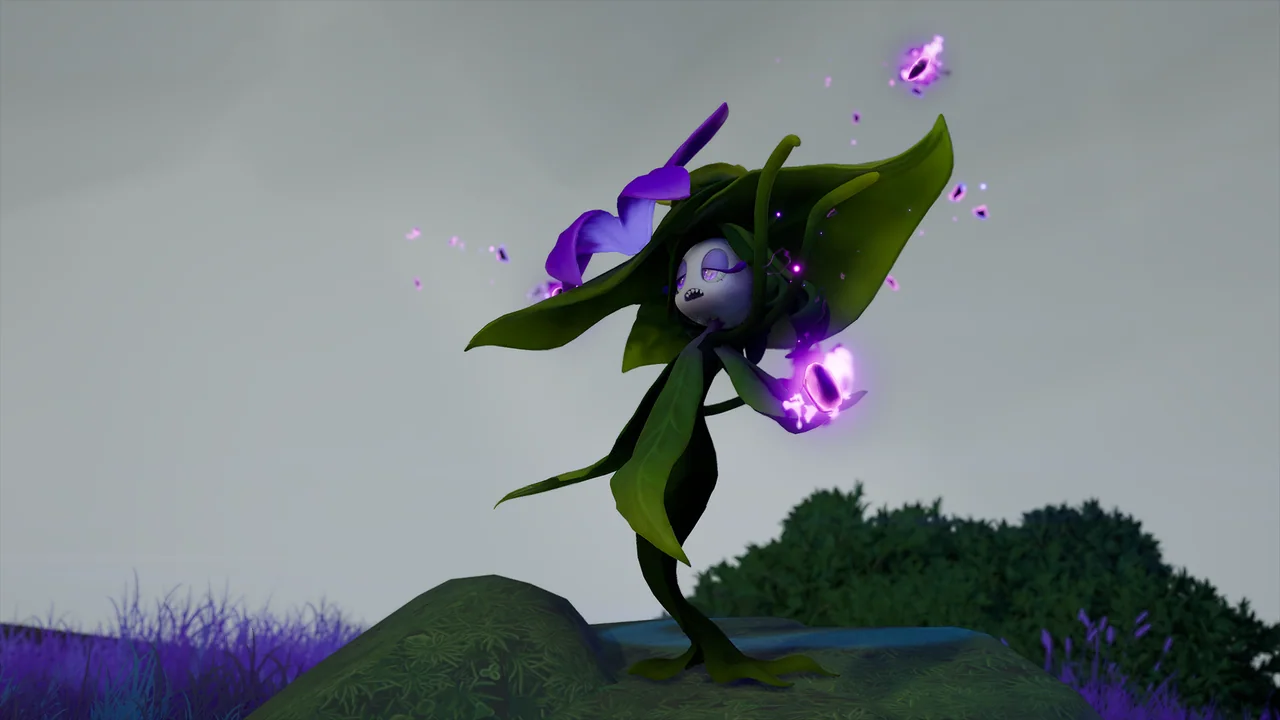 HexxinExploration · 1 stepHexxin has a powerful ability that can cause hallucinations and knock out targets, but its field of vision is limited. Avoiding the area it illuminates in front of it will keep you undetected.
 DazeshroomExploration · 2 stepsDazeshrooms grow in Mistwoods. Their vivid colors stand out sharply against the surroundings.
 SwampExploration · 2 stepsThis polluted pool slows creatures that touch the swamp, making them move sluggishly.
 Lily PadExploration · 1 stepFloaty Pads floating on the water will be pressed underwater when the load on them is too heavy.
 Lumin AmberExploration · 1 stepThis amber is formed from dispersed Vein energy and imbued with Lumin Power. The Branch can absorb the energy within it and grow. The name Lumin comes from the brilliant light this energy emits.
 Lumin Amber: Runaway AmberExploration · 2 stepsA Lumin Amber that flies away when touched?
 Lumin Amber ProtectorExploration · 1 stepThe Lumin Amber attracts nearby Aniimo to guard it. Defeat the guarding Aniimo to break the seal and claim the amber.
 Lumin Amber: Lumin CollectionExploration · 2 stepsSome amber looks just like ordinary amber, but is actually very unstable...
 Integrate into Aniimo EcosystemExploration · 2 stepsA group of Aniimo has gathered together. Are they up to something? Twine with the same kind of Aniimo to understand what they’re saying.
 Peculiar CloudsExploration · 1 stepThe clouds over Nimbus Fields linger for a long time, and being among them gives you a sense of reduced gravity.
 Dandelion TreeExploration · 2 stepsA dandelion tree growing in the Nimbus Fields.
 Shielded ChestExploration · 1 stepThe ancient ruins’ energy protects a precious treasure. The Energy Pillars hint at the number and direction of the switches. Find and activate all the switches to claim the treasure!
 FanExploration · 1 stepAn ancient fan. Supply it with electric energy to activate it and generate powerful wind fields.
 Power NodeExploration · 2 steps[Conductive Base]: A base that can conduct electricity. Trace outward from the base to find nearby batteries, then figure out how to place them on it.
 Elemental SwitchExploration · 1 stepAttacks or conduction matching the Element Attribute can activate the corresponding elemental switch.
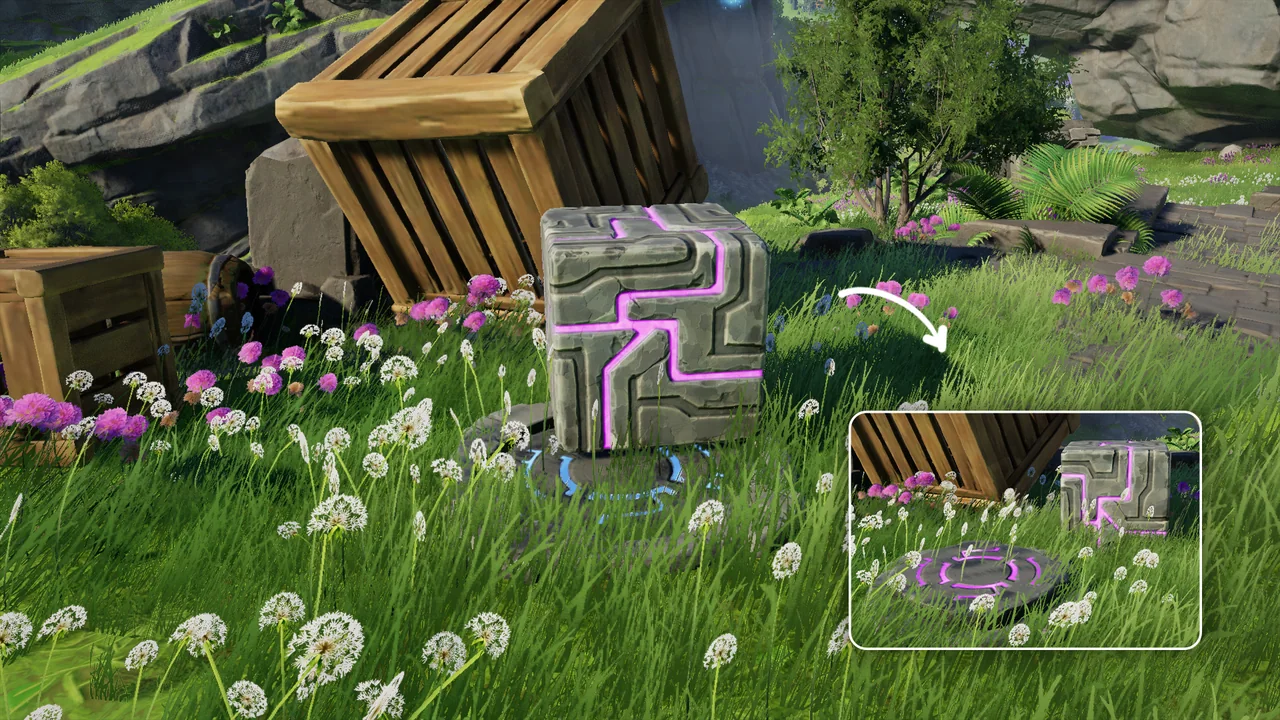 Pressure SwitchExploration · 1 stepA pressure-activated switch. Placing an Aniimo or object on top of it activates the switch. The mechanism automatically shuts off when the Aniimo or object is removed.
 Lumin Amber: Blessed AniimoExploration · 1 stepAniimo blessed by Vein energy. During the catching process, the Lumin Power attached to them can be activated, condensing into Lumin Amber and dropping. Some Aniimo might also have accidentally swallowed or be carrying Lumin Amber.
 Bilateral TotemsExploration · 3 stepsSome Totems scattered across the world cannot be lined up with the naked eye. Twine with a Jawling family Aniimo and activate Bilateral to align Totems and trigger their effect.
 BilateralExploration · 2 stepsThe Jawling family has a unique way of seeing the world. Press the Mobility skill button to have your Aniimo use it.
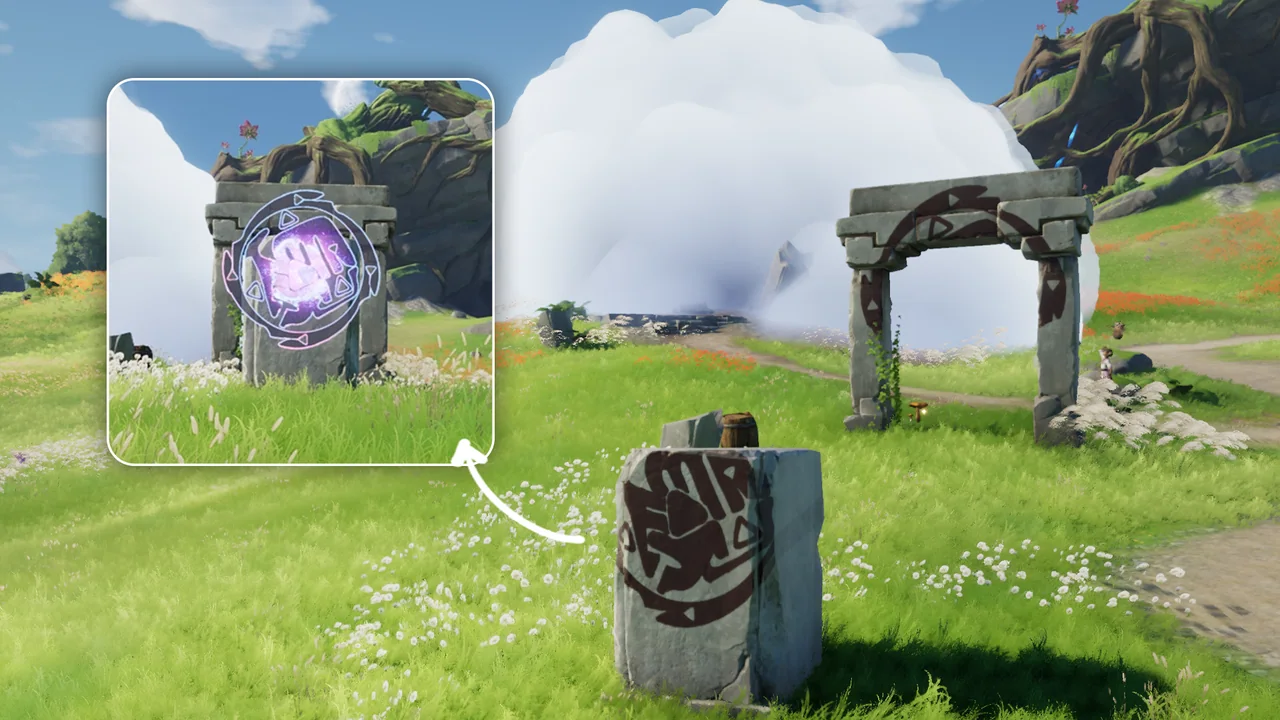 Lumin Amber: Lumin MarkingExploration · 1 stepLumin Markings imbued with Lumina Energy have been etched into every corner of the world. Try to find them, then piece them together from the correct position and perspective.
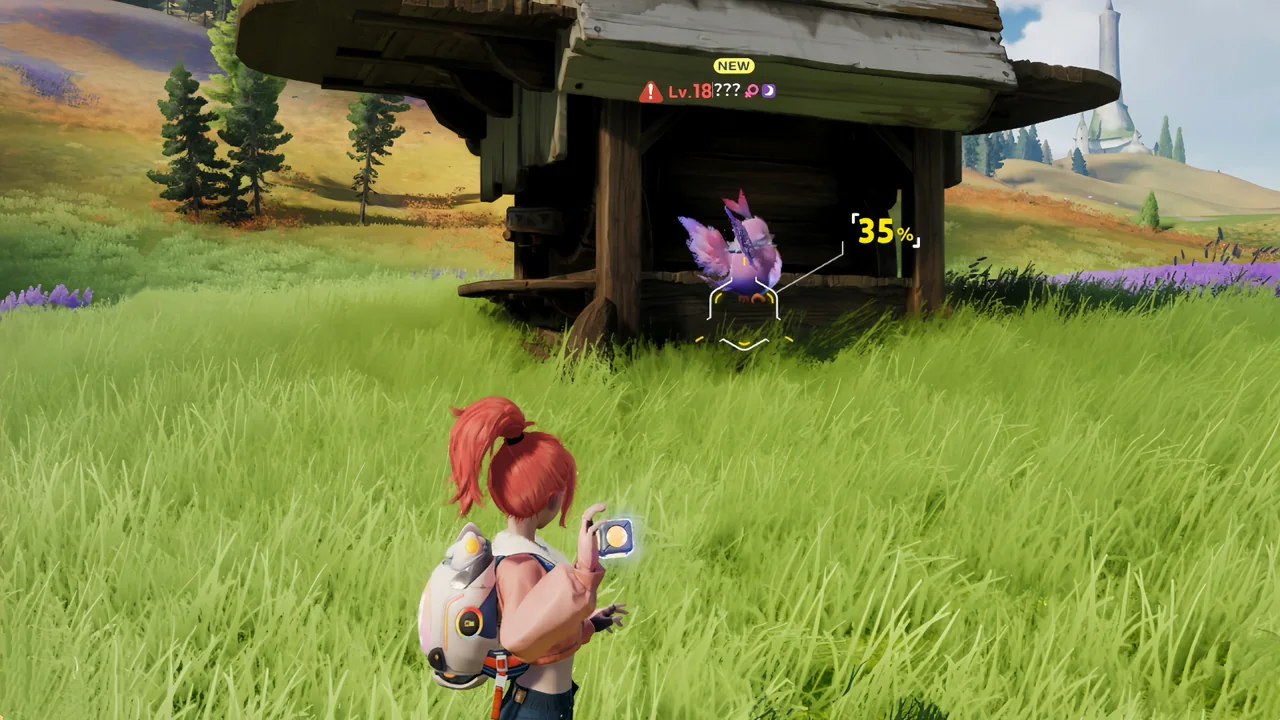 Gather AromathystExploration · 3 stepsCatch and Twine with Dewy.
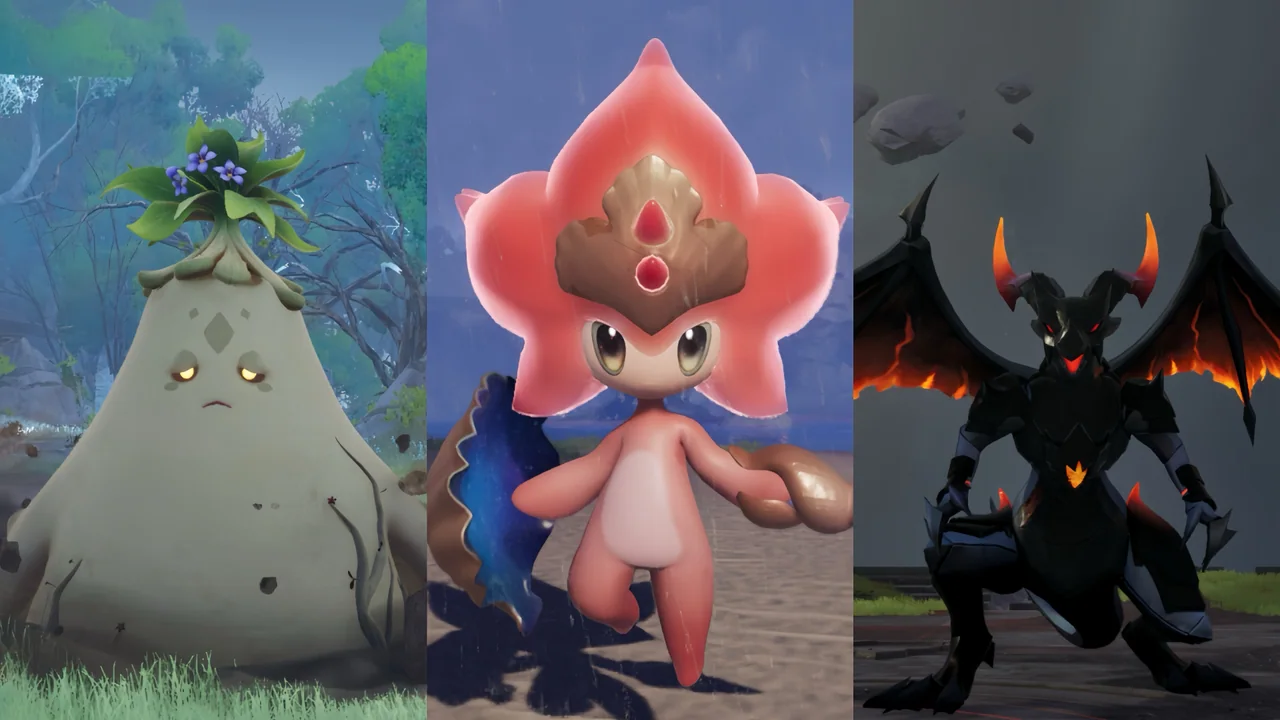 Legendary Ancient SpiceExploration · 1 stepAn ancient spice said to honor the Aeons, made from precious ingredients nurtured by the Veins of Breezy Plains:
Go to Mistwoods, defeat Tucking, and obtain Super Truffle.
Go to Echoback Landing, defeat the Omega Sherro, and obtain Echoback Salt.
Go to Russet Highlands, complete the Journey quest: Warrior, and obtain Flameheart Stone.
Legendary Ancient SpiceExploration · 1 stepAn ancient spice said to honor the Aeons, made from precious ingredients nurtured by the Veins of Breezy Plains:
Go to Mistwoods, defeat Tucking, and obtain Super Truffle.
Go to Echoback Landing, defeat the Omega Sherro, and obtain Echoback Salt.
Go to Russet Highlands, complete the Journey quest: Warrior, and obtain Flameheart Stone. Companion ModeExploration · 4 stepsAfter forming a party, use your Student ID to activate Companion Mode. In this mode, guides can gift caught Aniimo to fellow Companion team members—connect with your teammates and explore the world together!
 Morphling - Find the Mask FragmentExploration · 2 stepsThe fake Aniimo transformed from the mask fragment looks perfect, but its behavior will seem strange or even wrong. Watch closely and find the imposter!Lava CrystalExploration · 1 stepLava Crystals are extremely tough. Twine with Magmarex and use Fast and Furious to break them. The energy released from shattered crystals can also restore Magmarex’s Stamina.Springy TuftballExploration · 1 stepThe Springy Tuftball, formed from Fentuft fur, activates Puff Up after absorbing electric energy. Once springy, it launches any Pathfinder or Aniimo that touches it into the air.Melancholic MistExploration · 1 stepWhen a Plateau Form Nimbi is feeling down, it generates Melancholic Mist. Pathfinders or Aniimo who come into contact with the mist are affected by Sorrow.
If trapped within it for too long, they become overwhelmed by sorrow and become Withdrawn, making it difficult to move.
Morphling - Find the Mask FragmentExploration · 2 stepsThe fake Aniimo transformed from the mask fragment looks perfect, but its behavior will seem strange or even wrong. Watch closely and find the imposter!Lava CrystalExploration · 1 stepLava Crystals are extremely tough. Twine with Magmarex and use Fast and Furious to break them. The energy released from shattered crystals can also restore Magmarex’s Stamina.Springy TuftballExploration · 1 stepThe Springy Tuftball, formed from Fentuft fur, activates Puff Up after absorbing electric energy. Once springy, it launches any Pathfinder or Aniimo that touches it into the air.Melancholic MistExploration · 1 stepWhen a Plateau Form Nimbi is feeling down, it generates Melancholic Mist. Pathfinders or Aniimo who come into contact with the mist are affected by Sorrow.
If trapped within it for too long, they become overwhelmed by sorrow and become Withdrawn, making it difficult to move. HustleExploration · 1 stepDuring Hustle, an Aniimo moves much faster, making it easier to clear terrain it normally couldn’t cross.
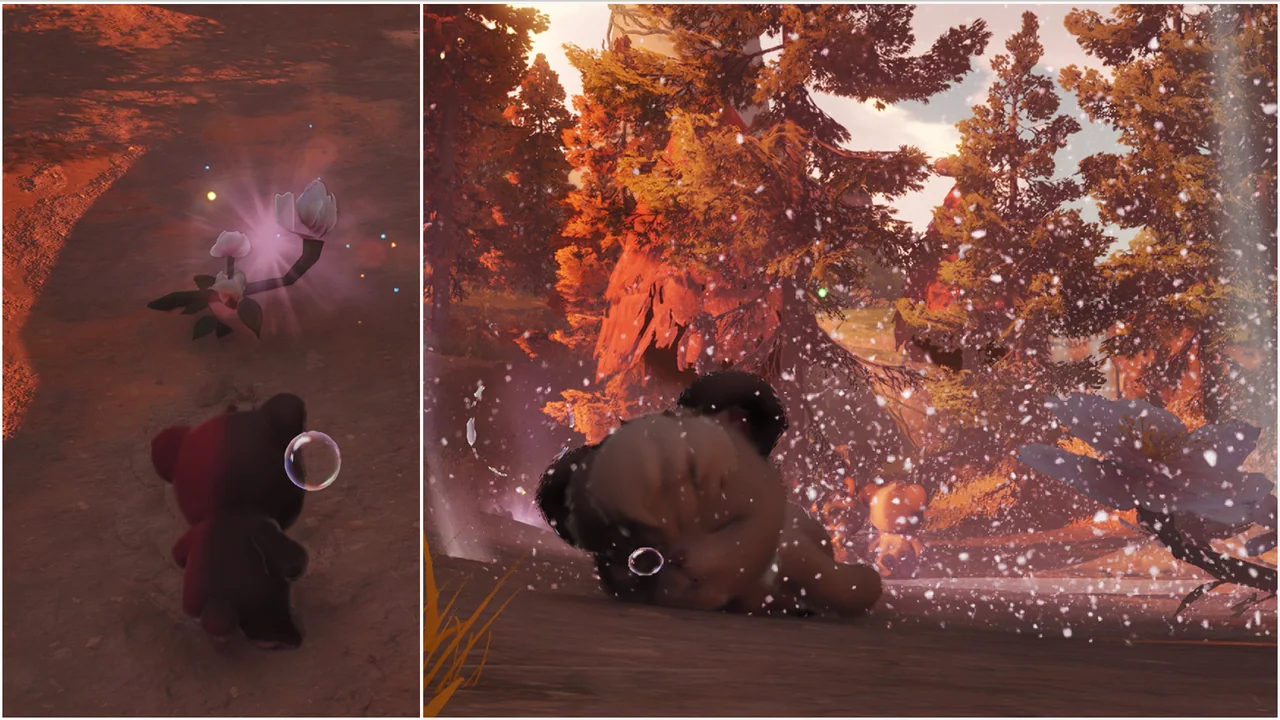 Cubbo’s RoseExploration · 1 stepWhen struck by a shock wave, it blooms from a bud into a flower and releases pollen that puts both humans and Aniimo into a deep sleep.Parasol PineExploration · 1 stepWhen struck by a shock wave, this pine tree opens up like an umbrella and may shake loose fruit, Aniimo, or even chests hidden inside.Ancient Lithorail, Ancient Iron CrateExploration · 1 stepThis worn iron box fits onto rails. Push it onto a track, and it will slide quickly along the rails.
 Irisalis Petal: GatheringExploration · 2 stepsTop left: Irisalis Petal · Part I "Lumenfly Valley"
Bottom left: Irisalis Petal · Part II "Lumenfly Valley"
Top right: Irisalis Petal · Part III "Tideblossom Coast"
Bottom right: Irisalis Petal · Part IV "Tideblossom Coast"
Irisalis Petal: GatheringExploration · 2 stepsTop left: Irisalis Petal · Part I "Lumenfly Valley"
Bottom left: Irisalis Petal · Part II "Lumenfly Valley"
Top right: Irisalis Petal · Part III "Tideblossom Coast"
Bottom right: Irisalis Petal · Part IV "Tideblossom Coast"Sanctums 65
Gameplay Guide: CelestisSanctums · 1 stepCelestis can climb specially patterned bricks. When falling from a height, it can fly forward, and wind affects it while flying.Gameplay Guide: BoltySanctums · 1 stepBolty can use Lightning-type skills to power up batteries, charge moving platforms, and—by interacting with environmental objects—complete the entire circuit and electrify the Sanctum. Forge ahead!Gameplay Guide: BoltySanctums · 1 stepBolty can use Lightning-type skills to charge batteries, power moving platforms, and more—and can also climb specially textured bricks. Combine Bolty’s abilities with environmental objects to complete the entire circuit and electrify the Sanctum. Forge ahead!Gameplay Guide: WisptisSanctums · 1 stepWisptis can fly; while flying, it is affected by wind.Gameplay Guide: TurboSanctums · 1 stepTurbo can fly through the clouds; while in flight mode, Turbo can attach itself to a Mechina Battery upon proximity.Gameplay Guide: FlameruffSanctums · 1 stepFlameruff can aim by holding the skill button, then launch a fireball toward the target direction. The fireball ignites flammable objects like wooden crates and vines, and can also activate fire-type obelisks. Blessed SanctumSanctums · 1 stepA blessed rewarding Sanctum—congratulations on your discovery! Dare to claim its treasures!Blessed SanctumSanctums · 1 stepA blessed rewarding Sanctum—congratulations on your discovery! Dare to claim its treasures!Blessed SanctumSanctums · 1 stepA blessed rewarding Sanctum—congratulations on your discovery! Dare to claim its treasures!Blessed SanctumSanctums · 1 stepA blessed rewarding Sanctum—congratulations on your discovery! Dare to claim its treasures!Gameplay Guide: FenrierSanctums · 1 stepFenrier can use the Ice Creation skill on water surfaces to generate ice blocks—build a path across bodies of water!Gameplay Guide: PopotaSanctums · 1 stepIn water, Popotas can Jump over obstacles. While dashing, Popotas Hastes through the water—and jump even farther! Watch your stamina, and race to the finish as quickly as possible!Gameplay Guide: SparkiSanctums · 1 stepSparki can aim by holding the skill button, then launch a fireball toward the target direction. The fireball ignites vines and can also activate fire-type obelisks.Gameplay Guide: GracewingSanctums · 1 stepGracewing can fly; while flying, it is affected by wind.Gameplay Guide: HelmutSanctums · 1 stepHelmut can use Detection to spot special objects—use this ability in tandem with environmental mechanisms to control the distant ram and guide the ball into the mechanism slot.Gameplay Guide: HelgonSanctums · 1 stepHelgon can fly by holding the Jump button. In this state, it can fly over water. Activate its Mobility ability to use Bilateral. It can also use skills to destroy cracked stone walls.Gameplay Guide: MagmarexSanctums · 1 stepMagmarex can use Fast and Furious to smash Lava Crystals and Lava Spheres, restoring some Stamina. Hitting Explosive Barrels or Explosive Balls causes an explosion that knocks you back. Watch your Stamina and try to reach the finish as quickly as possible!
 Brick with Special PatternsSanctums · 1 stepSanctum bricks with unique patterns — Aniimo possessing climbing ability can scale them.FanSanctums · 1 stepCreates a wind field. Aniimo flying in the field will be lifted continuously.Wet Wooden ChestSanctums · 1 stepA Wet Wooden Chest can conduct electricity, unlike a standard wooden crate. Be sure to submerge it in water for a moment to achieve the damp state.
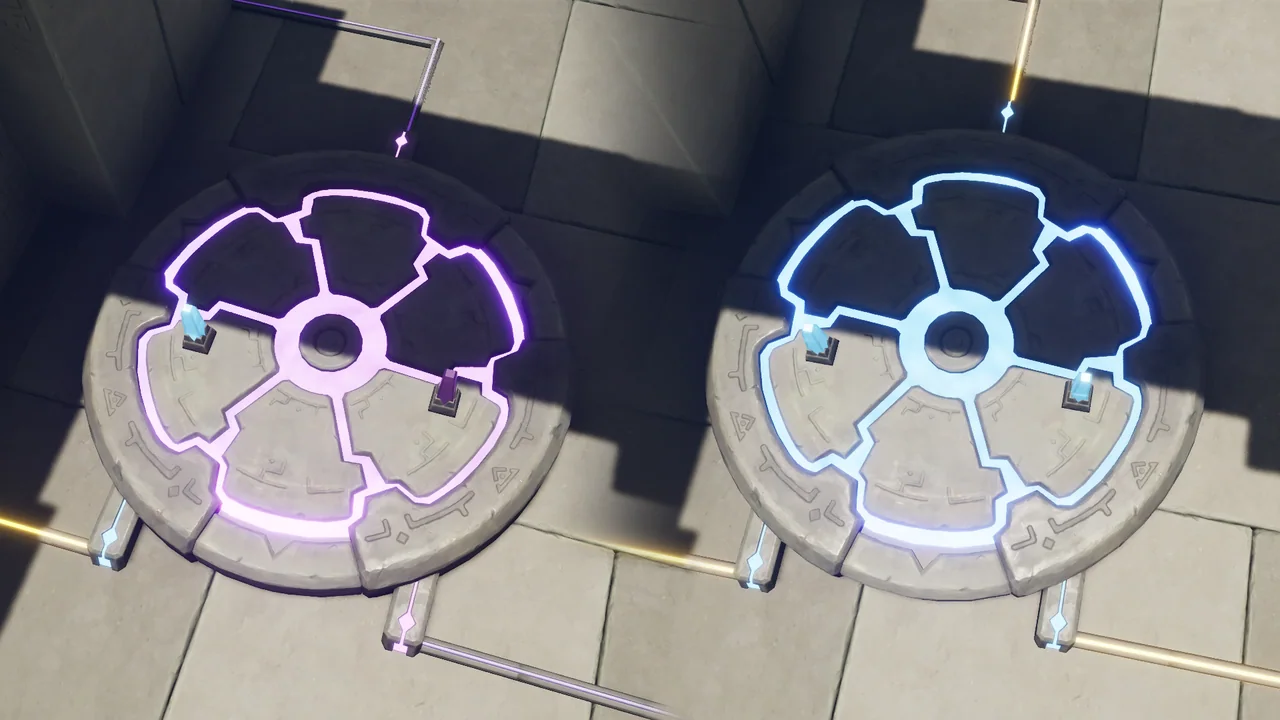 Circuit: "∑"Sanctums · 1 stepA single merging circuit only powers up when both branching circuits are powered; the indicator light on a circuit illuminates when that circuit is active.Light BulbSanctums · 1 stepStays lit while continuously powered, and dims when power is cut.Wet Wooden ChestSanctums · 1 stepA Wet Wooden Chest can conduct electricity, unlike a standard wooden crate. Be sure to submerge it in water for a moment to achieve the damp state.Circuit: "∑"Sanctums · 1 stepA single merging circuit only powers up when both branching circuits are powered; the indicator light on a circuit illuminates when that circuit is active.Light BulbSanctums · 1 stepStays lit while continuously powered, and dims when power is cut.Electric FanSanctums · 1 stepActivating it generates a wind field; Aniimos flying within the field will be lifted continuously.CloudSanctums · 1 stepUpon entering, gravity lessens—Turbos can fly here. Though the area is shrouded in mist, be careful not to lose your way.Fire-type obelisksSanctums · 1 stepActivates when affected by Fire Elemancy—either via a Fire Elemancy attack or proximity to burning objects.Ice BlockSanctums · 1 stepIt gradually melts and shrinks over time, and exposure to fire accelerates the melting process.Rolling PillarSanctums · 1 stepMove obstacles out of the way—when Popota bumps into them, stars will pop up! Keep an eye out for a quicker path nearby!
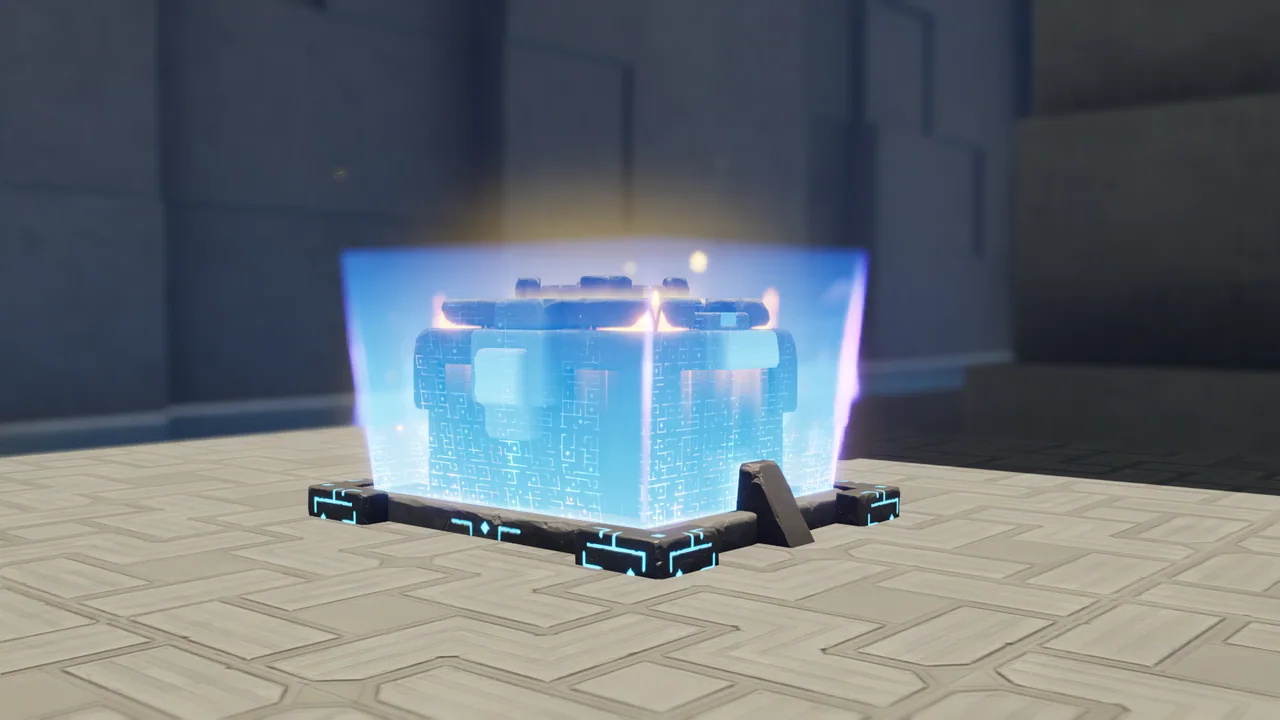 Chest BarrierSanctums · 1 stepIf time runs out, a barrier bearing the Sanctum’s unique patterns will seal the chest. How strange... Better hurry to the finish!Chest BarrierSanctums · 1 stepIf time runs out, a barrier bearing the Sanctum’s unique patterns will seal the chest. How strange... Better hurry to the finish!Flickering PlatformSanctums · 1 stepIt shifts to another location at regular intervals. The position of the non-physical platform is indicated by a ghostly silhouette—mind the rhythm!Trap BridgeSanctums · 1 stepStepping onto the trap bridge causes it to tremble—and after a brief moment, it collapses. Once fully collapsed, it pauses briefly before resetting to its original position.Fire-type obelisksSanctums · 1 stepActivates upon taking Fire damage, causing the corresponding fan to reorient.Moving HammerSanctums · 1 stepA building block controlled via the console that moves vertically up and down and can launch the ball.
 Mechanical Ball and SocketSanctums · 2 stepsWhen a Tumbler falls into its matching hole, it opens the corresponding mechanism door—keep an eye out for a light cone on the hole that matches the color of the Chest!
 Mechanical BallSanctums · 1 stepWhen the Gear Ball falls into the hole, it activates the fan that leads to the next room.
 Lava Crystal, Lava SphereSanctums · 1 stepCan be shattered by Magmarex; shattering restores Stamina to the dragon.
 Explosive Barrels & Explosive BallsSanctums · 1 stepMagmarex’s impact causes it to explode, dealing a moderate shock wave.Gameplay Guide: EmberpupSanctums · 1 stepWith Emberpup, you can hold the skill to aim and launch a fireball in the target direction. Fireballs can ignite vines, unlit bonfires, and other flammable wooden objects. They can also melt ice and detonate Explosive Barrels.
 VineSanctums · 1 stepVines can be ignited by fire and will be destroyed after a short time.
 BonfireSanctums · 1 stepUnlit bonfires can be lit by fire and will keep burning.
 Ice BlockSanctums · 1 stepIce blocks will gradually melt and shrink when affected by fire. Once they shrink enough, they will be destroyed.
 Explosive BarrelsSanctums · 1 stepExplosive Barrels can be detonated by fire, releasing a shock wave.Gameplay Guide: ChirpiSanctums · 1 stepWith Chirpi, you can hold the skill button to aim and fire a Wind Bomb toward the target. When the Wind Bomb hits something or travels a certain distance, it creates a tornado. The tornado can lift lighter objects and let flying Aniimo fly inside it.
 Puzzle Ball SocketSanctums · 1 stepRoll the wooden ball into the hole to open the matching mechanism door.
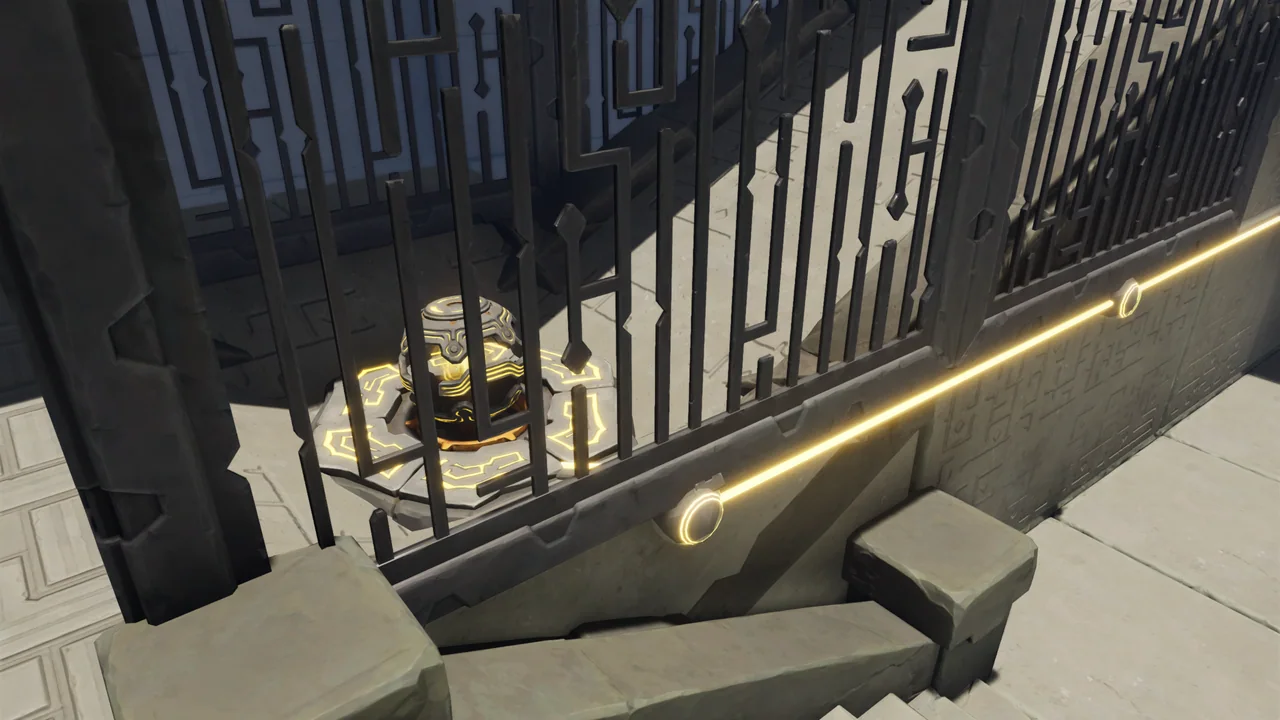 Battery, Electric FanSanctums · 2 stepsBatteries continuously make nearby objects conduct electricity.Gameplay Guide: EmberpupSanctums · 1 stepWith Emberpup, you can hold the skill to aim and launch a fireball in the target direction. Fireballs can ignite wooden crates, vines, and other flammable wooden objects.
 Wooden FlammablesSanctums · 2 stepsFire can ignite wooden objects such as crates and vines, and they will be destroyed after a short time. Wooden balls, bonfires, and similar objects can keep burning once lit.
 Puzzle Ball SocketSanctums · 1 stepRoll the wooden ball into the hole to open the matching mechanism door.Hot FountainSanctums · 1 stepApproaching or triggering a Hot Fountain will launch nearby targets upward with a powerful water jet, causing a brief dash. Once landed, they can resume action immediately.Floating PlankSanctums · 1 stepUse [Control] to [Grab] it, then place it on the water where it gives you a clear view.Gameplay Guide: CoziteSanctums · 1 stepCozite can fly. You can also hold the skill button to aim and throw mud balls along a parabolic arc. Mud balls can activate Rotating Pillars and Targeting Slabs.Gameplay Guide: PawneySanctums · 1 stepPawney can hold the skill button to aim. When its Grappling Hookshot hits a hookable object, it can quickly Pull itself to the aimed landing point.Rotating PillarSanctums · 1 stepWhen the Rotating Pillar on the gear is hit by a mud ball, it rotates the object linked to the gear once. When the Rotating Pillar is hit again, it will reverse and reset.Targeting SlabSanctums · 1 stepHit the Targeting Slab with a mud ball to open the small door below.
 Grappling Hookshot PointSanctums · 1 stepHave Pawney aim at the Grappling Hookshot Point and use Grappling Hookshot. Reaching the targeted landing spot will trigger Pawney’s vault.Switch and Flame TrapSanctums · 1 stepInteract with the switch once to disable the flame trap.SpikesSanctums · 1 stepStep on the pressure plate to toggle the spikes in and out.ControlSanctums · 1 stepIn the Sanctum, activate the Control Skill, then move the reticle to aim at interactive objects. Objects that can be grabbed will be highlighted. You can adjust the forward and backward distance, set objects down, or throw them.ControlSanctums · 1 stepIn the Sanctum, activate the Control Skill, then move the reticle to aim at interactive objects. Objects that can be grabbed will be highlighted. You can adjust the forward and backward distance, set objects down, or throw them.ControlSanctums · 1 stepIn the Sanctum, activate the Control Skill, then move the reticle to aim at interactive objects. Objects that can be grabbed will be highlighted. You can adjust the forward and backward distance, set objects down, or throw them.ControlSanctums · 1 stepIn the Sanctum, activate the Control Skill, then move the reticle to aim at interactive objects. Objects that can be grabbed will be highlighted. You can adjust the forward and backward distance, set objects down, or throw them.ControlSanctums · 1 stepIn the Sanctum, activate the Control Skill, then move the reticle to aim at interactive objects. Objects that can be grabbed will be highlighted. You can adjust the forward and backward distance, set objects down, or throw them.
Blessed SanctumSanctums · 1 stepA blessed rewarding Sanctum—congratulations on your discovery! Dare to claim its treasures!Blessed SanctumSanctums · 1 stepA blessed rewarding Sanctum—congratulations on your discovery! Dare to claim its treasures!Blessed SanctumSanctums · 1 stepA blessed rewarding Sanctum—congratulations on your discovery! Dare to claim its treasures!Blessed SanctumSanctums · 1 stepA blessed rewarding Sanctum—congratulations on your discovery! Dare to claim its treasures!Gameplay Guide: FenrierSanctums · 1 stepFenrier can use the Ice Creation skill on water surfaces to generate ice blocks—build a path across bodies of water!Gameplay Guide: PopotaSanctums · 1 stepIn water, Popotas can Jump over obstacles. While dashing, Popotas Hastes through the water—and jump even farther! Watch your stamina, and race to the finish as quickly as possible!Gameplay Guide: SparkiSanctums · 1 stepSparki can aim by holding the skill button, then launch a fireball toward the target direction. The fireball ignites vines and can also activate fire-type obelisks.Gameplay Guide: GracewingSanctums · 1 stepGracewing can fly; while flying, it is affected by wind.Gameplay Guide: HelmutSanctums · 1 stepHelmut can use Detection to spot special objects—use this ability in tandem with environmental mechanisms to control the distant ram and guide the ball into the mechanism slot.Gameplay Guide: HelgonSanctums · 1 stepHelgon can fly by holding the Jump button. In this state, it can fly over water. Activate its Mobility ability to use Bilateral. It can also use skills to destroy cracked stone walls.Gameplay Guide: MagmarexSanctums · 1 stepMagmarex can use Fast and Furious to smash Lava Crystals and Lava Spheres, restoring some Stamina. Hitting Explosive Barrels or Explosive Balls causes an explosion that knocks you back. Watch your Stamina and try to reach the finish as quickly as possible!Brick with Special PatternsSanctums · 1 stepSanctum bricks with unique patterns — Aniimo possessing climbing ability can scale them.FanSanctums · 1 stepCreates a wind field. Aniimo flying in the field will be lifted continuously.Wet Wooden ChestSanctums · 1 stepA Wet Wooden Chest can conduct electricity, unlike a standard wooden crate. Be sure to submerge it in water for a moment to achieve the damp state.Circuit: "∑"Sanctums · 1 stepA single merging circuit only powers up when both branching circuits are powered; the indicator light on a circuit illuminates when that circuit is active.Light BulbSanctums · 1 stepStays lit while continuously powered, and dims when power is cut.Wet Wooden ChestSanctums · 1 stepA Wet Wooden Chest can conduct electricity, unlike a standard wooden crate. Be sure to submerge it in water for a moment to achieve the damp state.Circuit: "∑"Sanctums · 1 stepA single merging circuit only powers up when both branching circuits are powered; the indicator light on a circuit illuminates when that circuit is active.Light BulbSanctums · 1 stepStays lit while continuously powered, and dims when power is cut.Electric FanSanctums · 1 stepActivating it generates a wind field; Aniimos flying within the field will be lifted continuously.CloudSanctums · 1 stepUpon entering, gravity lessens—Turbos can fly here. Though the area is shrouded in mist, be careful not to lose your way.Fire-type obelisksSanctums · 1 stepActivates when affected by Fire Elemancy—either via a Fire Elemancy attack or proximity to burning objects.Ice BlockSanctums · 1 stepIt gradually melts and shrinks over time, and exposure to fire accelerates the melting process.Rolling PillarSanctums · 1 stepMove obstacles out of the way—when Popota bumps into them, stars will pop up! Keep an eye out for a quicker path nearby!Chest BarrierSanctums · 1 stepIf time runs out, a barrier bearing the Sanctum’s unique patterns will seal the chest. How strange... Better hurry to the finish!Chest BarrierSanctums · 1 stepIf time runs out, a barrier bearing the Sanctum’s unique patterns will seal the chest. How strange... Better hurry to the finish!Flickering PlatformSanctums · 1 stepIt shifts to another location at regular intervals. The position of the non-physical platform is indicated by a ghostly silhouette—mind the rhythm!Trap BridgeSanctums · 1 stepStepping onto the trap bridge causes it to tremble—and after a brief moment, it collapses. Once fully collapsed, it pauses briefly before resetting to its original position.Fire-type obelisksSanctums · 1 stepActivates upon taking Fire damage, causing the corresponding fan to reorient.Moving HammerSanctums · 1 stepA building block controlled via the console that moves vertically up and down and can launch the ball.Mechanical Ball and SocketSanctums · 2 stepsWhen a Tumbler falls into its matching hole, it opens the corresponding mechanism door—keep an eye out for a light cone on the hole that matches the color of the Chest!Mechanical BallSanctums · 1 stepWhen the Gear Ball falls into the hole, it activates the fan that leads to the next room.Lava Crystal, Lava SphereSanctums · 1 stepCan be shattered by Magmarex; shattering restores Stamina to the dragon.Explosive Barrels & Explosive BallsSanctums · 1 stepMagmarex’s impact causes it to explode, dealing a moderate shock wave.Gameplay Guide: EmberpupSanctums · 1 stepWith Emberpup, you can hold the skill to aim and launch a fireball in the target direction. Fireballs can ignite vines, unlit bonfires, and other flammable wooden objects. They can also melt ice and detonate Explosive Barrels.VineSanctums · 1 stepVines can be ignited by fire and will be destroyed after a short time.BonfireSanctums · 1 stepUnlit bonfires can be lit by fire and will keep burning.Ice BlockSanctums · 1 stepIce blocks will gradually melt and shrink when affected by fire. Once they shrink enough, they will be destroyed.Explosive BarrelsSanctums · 1 stepExplosive Barrels can be detonated by fire, releasing a shock wave.Gameplay Guide: ChirpiSanctums · 1 stepWith Chirpi, you can hold the skill button to aim and fire a Wind Bomb toward the target. When the Wind Bomb hits something or travels a certain distance, it creates a tornado. The tornado can lift lighter objects and let flying Aniimo fly inside it.Puzzle Ball SocketSanctums · 1 stepRoll the wooden ball into the hole to open the matching mechanism door.Battery, Electric FanSanctums · 2 stepsBatteries continuously make nearby objects conduct electricity.Gameplay Guide: EmberpupSanctums · 1 stepWith Emberpup, you can hold the skill to aim and launch a fireball in the target direction. Fireballs can ignite wooden crates, vines, and other flammable wooden objects.Wooden FlammablesSanctums · 2 stepsFire can ignite wooden objects such as crates and vines, and they will be destroyed after a short time. Wooden balls, bonfires, and similar objects can keep burning once lit.Puzzle Ball SocketSanctums · 1 stepRoll the wooden ball into the hole to open the matching mechanism door.Hot FountainSanctums · 1 stepApproaching or triggering a Hot Fountain will launch nearby targets upward with a powerful water jet, causing a brief dash. Once landed, they can resume action immediately.Floating PlankSanctums · 1 stepUse [Control] to [Grab] it, then place it on the water where it gives you a clear view.Gameplay Guide: CoziteSanctums · 1 stepCozite can fly. You can also hold the skill button to aim and throw mud balls along a parabolic arc. Mud balls can activate Rotating Pillars and Targeting Slabs.Gameplay Guide: PawneySanctums · 1 stepPawney can hold the skill button to aim. When its Grappling Hookshot hits a hookable object, it can quickly Pull itself to the aimed landing point.Rotating PillarSanctums · 1 stepWhen the Rotating Pillar on the gear is hit by a mud ball, it rotates the object linked to the gear once. When the Rotating Pillar is hit again, it will reverse and reset.Targeting SlabSanctums · 1 stepHit the Targeting Slab with a mud ball to open the small door below.Grappling Hookshot PointSanctums · 1 stepHave Pawney aim at the Grappling Hookshot Point and use Grappling Hookshot. Reaching the targeted landing spot will trigger Pawney’s vault.Switch and Flame TrapSanctums · 1 stepInteract with the switch once to disable the flame trap.SpikesSanctums · 1 stepStep on the pressure plate to toggle the spikes in and out.ControlSanctums · 1 stepIn the Sanctum, activate the Control Skill, then move the reticle to aim at interactive objects. Objects that can be grabbed will be highlighted. You can adjust the forward and backward distance, set objects down, or throw them.ControlSanctums · 1 stepIn the Sanctum, activate the Control Skill, then move the reticle to aim at interactive objects. Objects that can be grabbed will be highlighted. You can adjust the forward and backward distance, set objects down, or throw them.ControlSanctums · 1 stepIn the Sanctum, activate the Control Skill, then move the reticle to aim at interactive objects. Objects that can be grabbed will be highlighted. You can adjust the forward and backward distance, set objects down, or throw them.ControlSanctums · 1 stepIn the Sanctum, activate the Control Skill, then move the reticle to aim at interactive objects. Objects that can be grabbed will be highlighted. You can adjust the forward and backward distance, set objects down, or throw them.ControlSanctums · 1 stepIn the Sanctum, activate the Control Skill, then move the reticle to aim at interactive objects. Objects that can be grabbed will be highlighted. You can adjust the forward and backward distance, set objects down, or throw them.